|
**Please note that due to the 2020 COVID Pandemic there were limitations** Intro: For this final project we were tasked with using the previsualized motion capture takes from within Motionbuilder, or another source such as Mixamo. After finding previsualized takes, stitch at least 4 different clips together to create a final piece. These clips together should at least attempt to accomplish one of the following:
My proposal: My project was intended to be an individual performing a series of actions that led to the characters untimely "end":
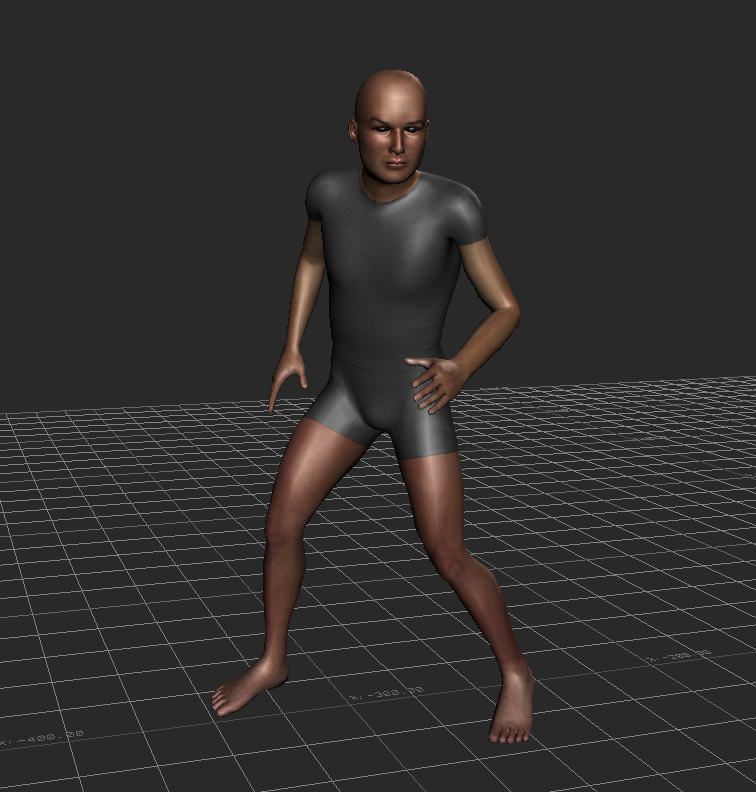
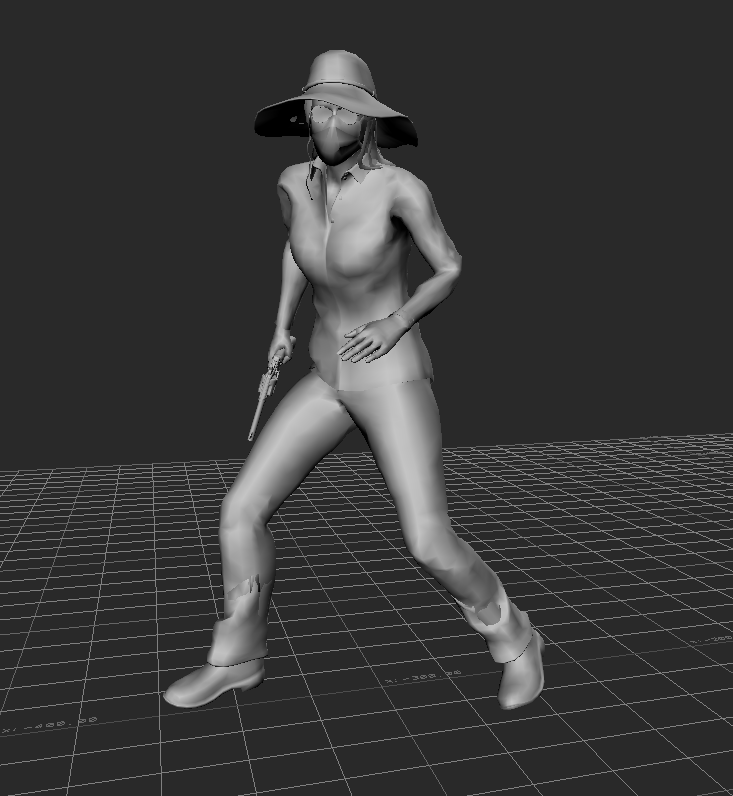
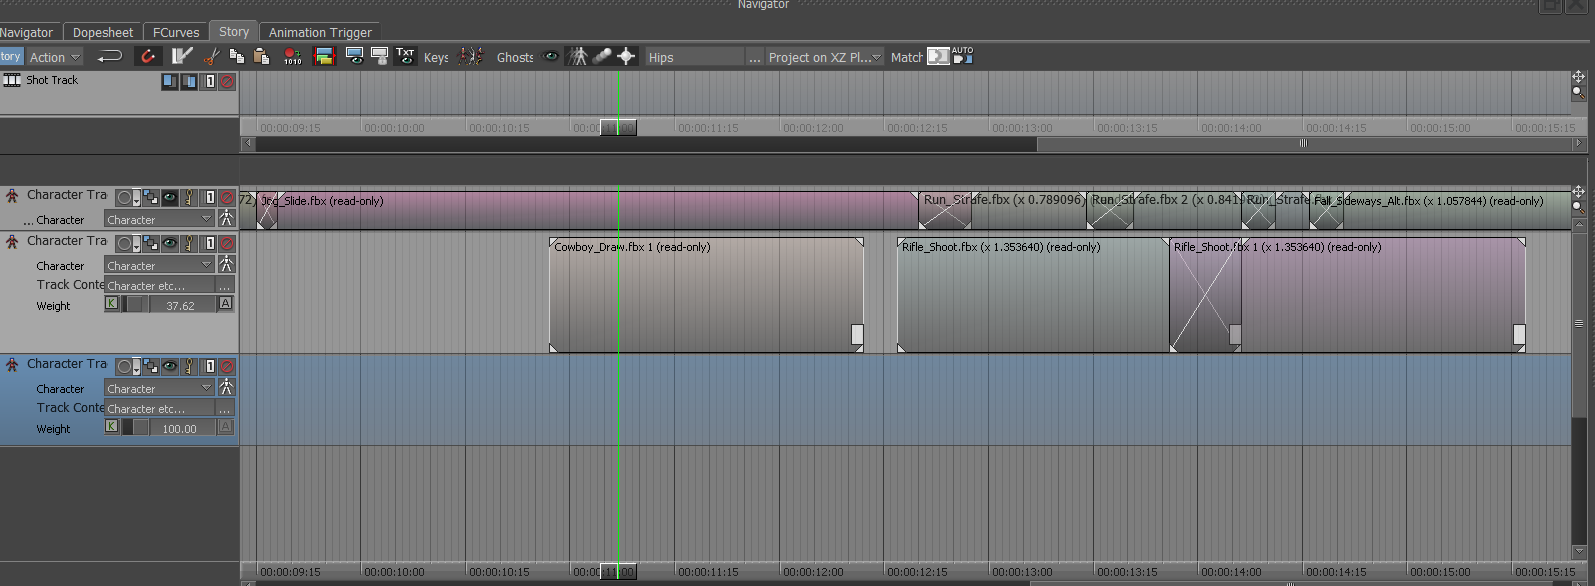 MotionBuilder Story Example Working in MotionBuilder: To begin, I started to stitch together different scenes. I placed the default male character (from MotioBuilder) within the scene. Afterwords, I created a custom character using Fuse, this software allows you to adjust small details such as clothing, hair, body/facial features, and textures. I ended up only using the geometry for this assignment as I'm aware of how to render, but this is focused more on the motion of the scene and the previsualization of the content. Bringing this new character into MotionBuilder, I retargeted the skeleton from the old character onto the new one. I also found a revolver model online and attached this to the skeleton. There were a few tweaks here and there to get it to align correctly--one thing I did differently was to scale my character down to about the same height as the default, making the reach/stretch settings much more manageable.
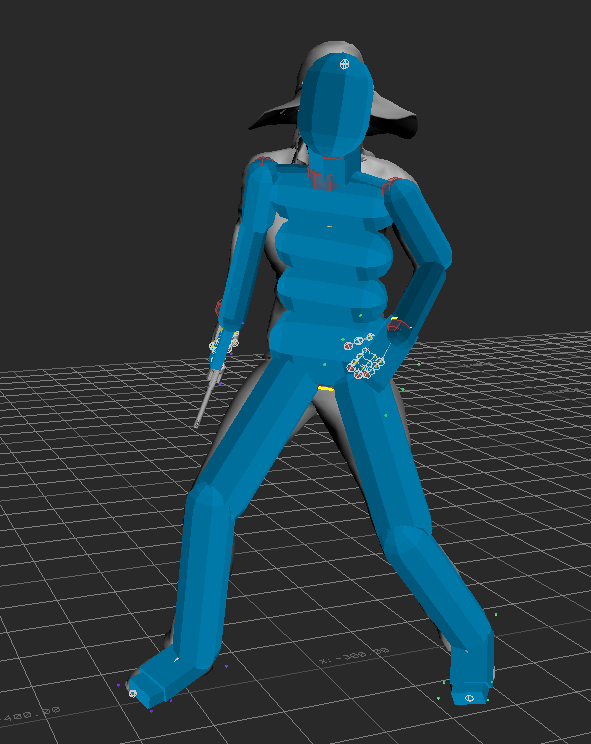
Within MotionBuilder, there is a tab called "Story". Within story, you are able to take these pre-animated sequences and stitch them together. This is done by placing each scene back to back, and readjusting the initial position of the character's actions. You can also trim and edit the scenes as needed. On top of this, you can tell a specific scene to only interact with certain body parts. For example, I have my character walking forward. Let's say at a certain point I want my character to wave--bring in the pre-animated "wave" and place it into the story. After this, tell the rig to only be affected by that single arm, rather than the whole body. You can then take the "wave" motion and overlap it with the previous walk motion. This can also be faded into one another--rather than have your character 'jerk' to it's next position there is the ability to overlap actions (much like a cross-dissolve with video, or cross-fade with audio). 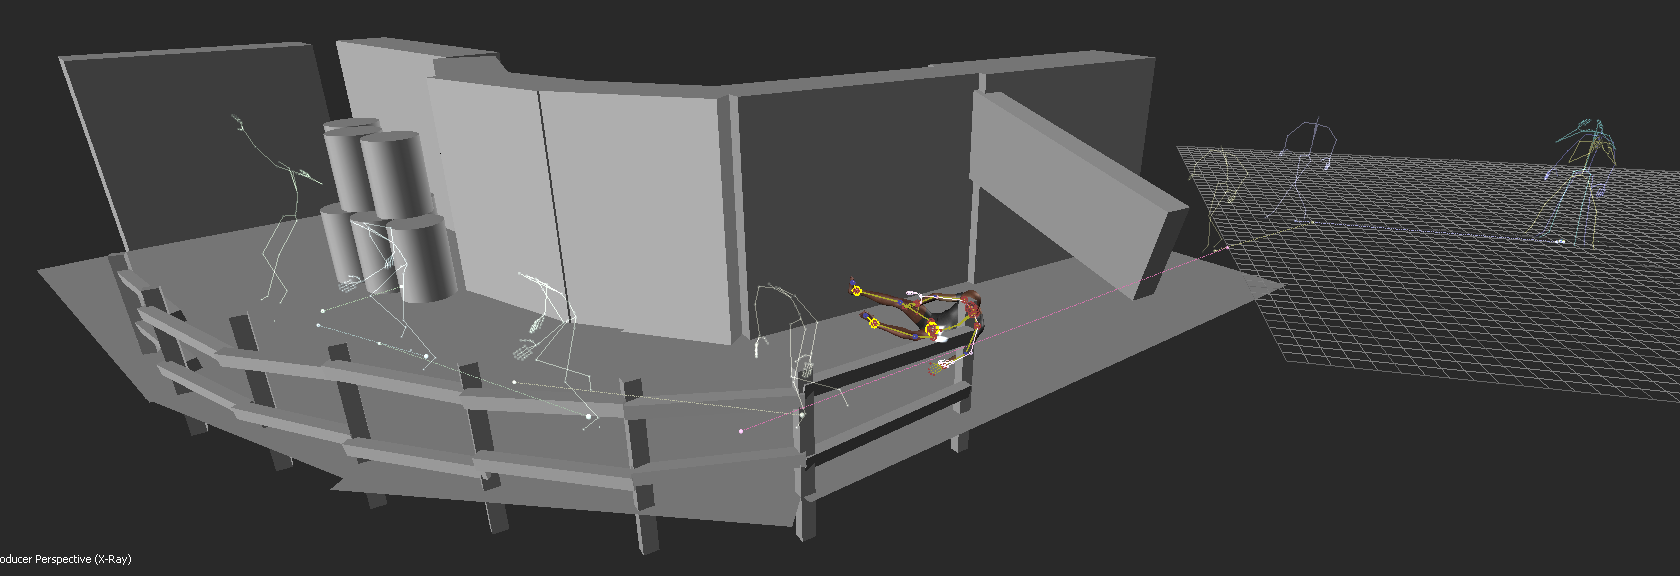 Example of previz environment and different animated sequences stitched together. After all of the minute adjustments to the character motion, there was the task of using physics solvers to create an interactive environment with the character. This process included using ragdoll physics to make the character's body fall and retain physical attributes when striking different objects within the scene. In the figure above, you might notice some barrel-like objects--these were the objects I wanted the ragdoll to interact with. In MotionBuilder, you have the ability to attribute and adjust the ragdoll placed onto the body--below you can find an example of how sinple geometry is used to simulate and reproduce realistic interactions.
Outcomes: I would definitely go back if I had the opportunity to add more to the environment and render out the sequence, but this loses sight of the initial project to begin with. I will say there is a moment where the character stands up after the sliding motion that was never fully fixed--I attempted many different times to make it appear natural, but it is minor enough that it doesn't break the flow of the scene. This project was about the motion of the character and learning the technicalities that came with creating such a scene. Out of all of the software out there for creating previsualized scenes, I can confidently say MotionBuilder is your most important asset in preparing content. Some of the nuanced movement I added to the character (using a control rig and baking the animation back onto the original skeleton) while in motion included:
**Please note that due to the 2020 COVID Pandemic these were pre-captured mocap files.** Intro: The goal for this project/exercise is to pick at least 3 takes from previously recorded motion capture data, find a model/skeleton to work with retargeting problems and add expressiveness if appropriate. With these takes, it was also necessary to utilize character settings and a control-rig to plot and remap data onto a virtual character of our choosing. Because of the nature of the project, I used a simple "woman athlete" rig for the sake of understanding the technicalities of plotting, retargeting, and implementing more expressive motion. There's the additional task of fixing faulty data if needed. 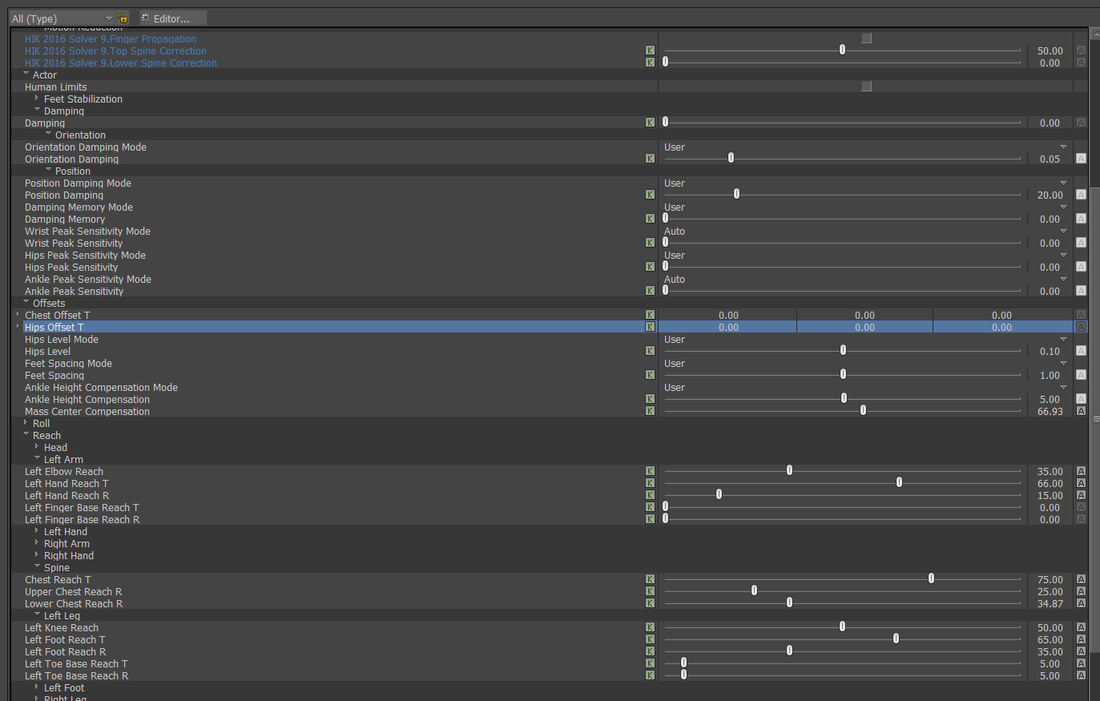 Character retargeting example Editing within MotionBuilder: When initially bringing in a new take of animation, and a separate character model/skeleton, it is important to attempt to "zero" out the initial T-pose of the character in order to properly retarget your desired skeleton/model. It should be noted that you want to do this for BOTH the character model and the motion-capture skeleton, as forgoing one will ultimately leave undesired issues with retargeting in the long run. After retargeting, there becomes an artistic task of fidgeting with numbers that correspond to how the imported skeleton will stretch/reach to the animated one. There's the ability to adjust a myriad of settings--I like to recall the children's limerick, "head, shoulders, knees, and toes". Though in this case there is a proper order to making these work. I suggest beginning internally (stomach area) and move towards outer extremities (hands and feet). One should begin with adjusting the hips and attempting to solve match the root joint of the entire skeletal structure. The spine is the next task to take care of, as there is often over/under-extension making your character look like they're bent/slouching. I often found moving onto the shoulders helps with any of the issues with the arms and makes retargeting a breeze once you've found a realistic shoulder look. After this, move onto the knees and the position of the feet--you'll often find that your imported model will have spacing issues with their ankles, and this can easily be fixed. The intensity of the "reach" is from a 0-100 scale: 0 being the base configuration, 100 being a complete "stick" to the motion capture take. Be advised that using 100 will more than often result in "jumping" issues with the joints; as the skeleton can/not reach, it will appear to "click" into place many times. A safe bet is often to just go with 50, and move periodically up/down the scale for finer adjustments. Also, remember that if your character is very dynamic over a long period of time, you can "key" these values periodically depending on the motion. Outcomes:
Above you can find a video example of before and after the edited sequences. This exercise taught me how to work with control rigs, too, as this can provide extra animation layers that allow for nuanced movement. These layers can be stacked one on top of the other, and allow the animator to switch between them if there's a need. For example, if one wanted to edit only the wrist movement like a waving hand, and then edit the elbow animation, these can be separate layers. After making the changes, the animator is able to add even more motion without affecting the initial elbow/wrist movement. I found most of the time that I would first edit the motion with a smooth/butterworth filter to remove any unnecessary slips/glitches in the motion, then create a control rig with animation layers, and re-bake the animation back to the skeleton as needed.
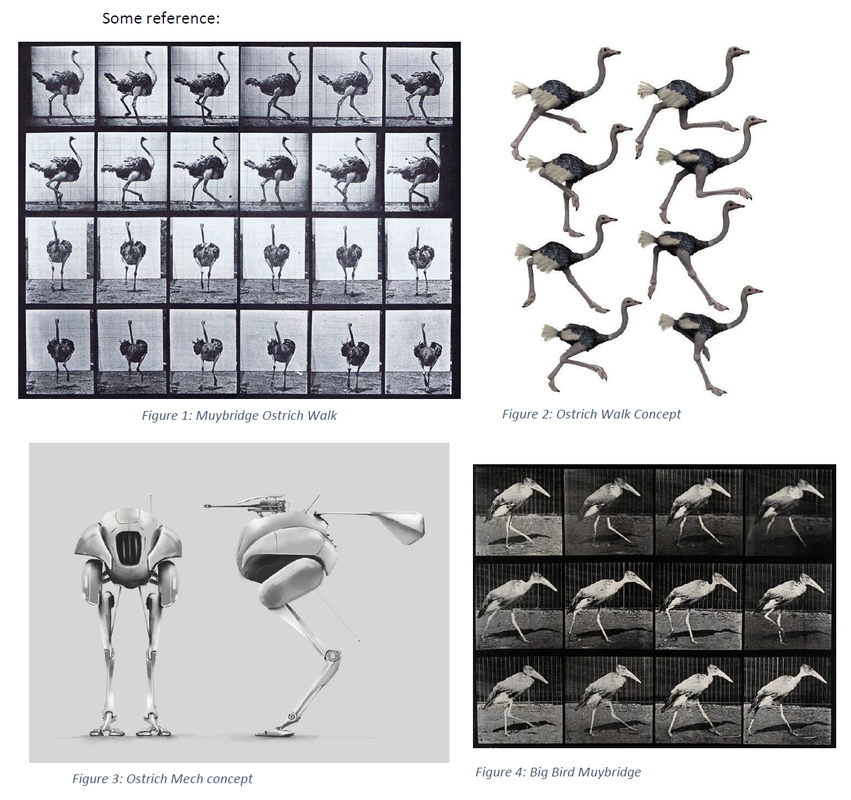 Ornithological reference of Ostrich/Bird Movement (some images grabbed from Google) Intro: For this project, we needed to explore and capture a "complex prop"; in addition to this, we were also required to explore relation-constraints within MotionBuilder. This meant having the translation data of one of the props influence something else within the scene. The props themselves needed to have some sort of hinge, or motion, that could be captured and rigged within MotionBuilder. Our group decided to use an Ostrich leg as our influenced movement. The pieces were combined together via cardboard, tape, and some simple tied knots. The rig itself was held up by a "T"-handle in the middle, and the feet were strapped into the bottom. 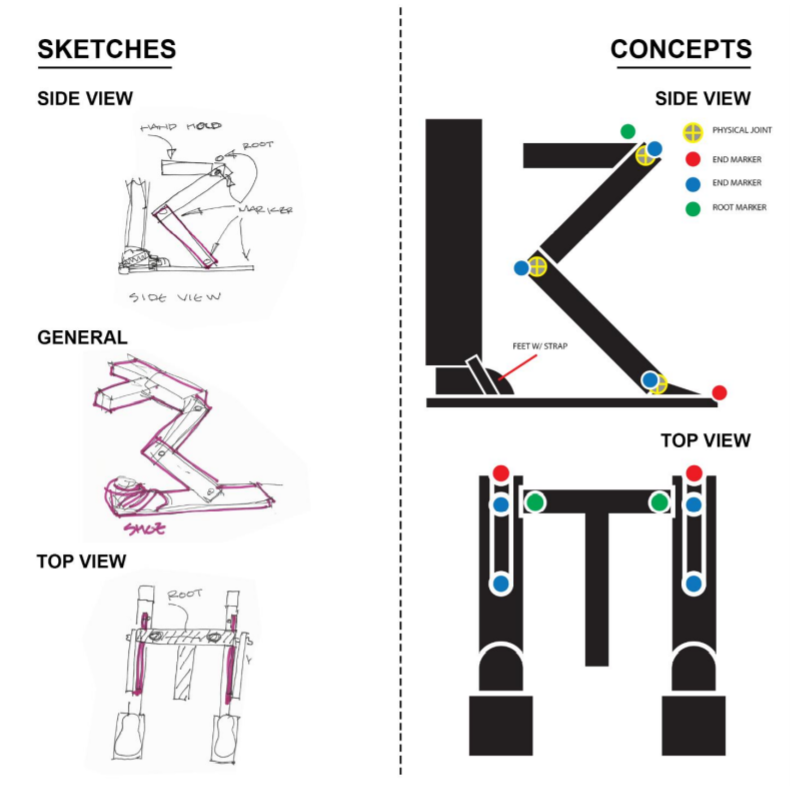 Example of complex-prop design inspired by ornithological anatomy. Capturing, Rigging, and Constraints: The figure above is the general layout we proposed for the creation of the prop. As for the markers and the placement of each object, The feet and the "hips" were two separate objects. We had considered placing a marker on the "knee" joint between the hips and the feet, but we found this provided unnecessary information--there ended up only being a need for the feet/hips, as there was the ability to create a IK/FK joint-chain by hand within MotionBuilder. We also had the addition of an umbrella to simulate some sort of head movement from the walking motion. The handle and the umbrella portion were each separate objects, both could be used for further exploration of constraints if desired. After bringing in the data, it was cleaned and I began to attach some geometry to simulate an abstracted bird-like form. I attempted to use brightly colored geometry to signify the bones/joints of the rig. The video is documentation of the capture: Outcomes: I decided to work with an example that didn't require too much editing in terms of fixing the data. This was the simple walk. I translated the original position of the head to be more above the hips, rather than far out in front. The geometry I attached informed how the rest of the rig could be created. I added in a knee joint between the hips and the feet, allowing for a realistic chain-IK to be used. This chain-IK also had a pole vector, allowing the knee to be consistently pointed towards the back. After getting the legs to function correctly, I decided to experiment with an antenna. This antenna used relation constraints that were influenced by the vertical translation of both left/right feet. As one or the other moved upwards, this constraint was mapped towards the scale of the cube closest to the head of the creature. As the cube scaled, due to the feet, the rest of the cubes also did the same--but, the other cubes were only influenced by the first cube. This also used a "3D Damping" relation, allowing a flow of information to be delayed from cube to cube. It sways and shrinks with cartoon-like exaggeration. Moving on from experimenting with the antenna, I added a dynamic neck chain. This was created using joints, nulls, and spheres, to simulate a swinging neck as the creature moved across the screen. The beginning joint was attached to the head of the creature, while the end was attached to the hips. The final experiment was to create a dumbbell-like bowl geometry, and place it inside of the torus object. This model was then suspended between the torus with a rigid body attribute; then I placed dynamic cubes inside to simulate objects moving within the structure. If I had more time, I would go back and add more cubes to the mix, almost like the creature was unintentionally leaving a trail of cubes behind it as it traverses across the screen. Below you can find a video of the examples described:
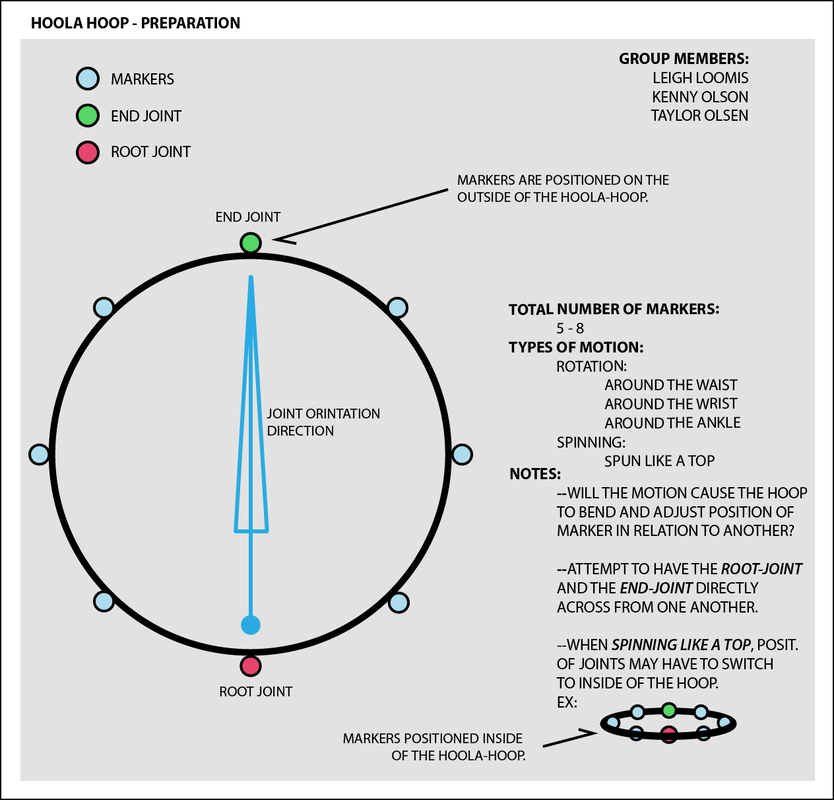 Our group's proposal. Quickly designed by myself using Adobe Illustrator. Intro: For this project, we were introduced to using Shogun and MotionBuilder. The main goals for this round of captures was to familiarize ourselves with the software and be able to capture a "simple prop". This prop was to not having any complex joint structure--meaning nothing that would bend or act like an arm or leg. It was about how the object was influenced and could be visualized to something else. Some others in the class use cubes, sport balls, swords, etc. Our group went with a hoola hoop. Working/animating with MotionBuilder: As seen with the figure above we were to place markers around the object itself for the data to be streamed correctly. We later learned that this was incorrect--as having markers placed evenly around the edges meant the system would lose track of where to place each point. We solved this by placing markers that weren't equidistant from one another on either side. This made defining a root/end joint easier to manage, and easier to capture. We ended up not using Shogun because of licensing issues on personal machines. Within ACCAD there is only a few machines that have the Shogun app installed; luckily we were more concerned with using MotionBuilders versatility. We needed about 2-5 motion sequence variations. Ours were as follows:
Outcomes: The pendulum motion became a tire swing--I was able to use nCloth to animate the rope between the two. As for the spinning, I decided to create a coin spinning on it's axis. Each sequence was sent into Maya for further previsualization. The geometry was attached to the root joint of each motion-take. Extraneous elements were added for the sake of visualization (Ex: ground plane, rope, bg, etc.) **Please note that these scenes are not "beauty" rendered. The point is for the motion and how this can be used in a previsualization.** Both can be seen in the example vids below:
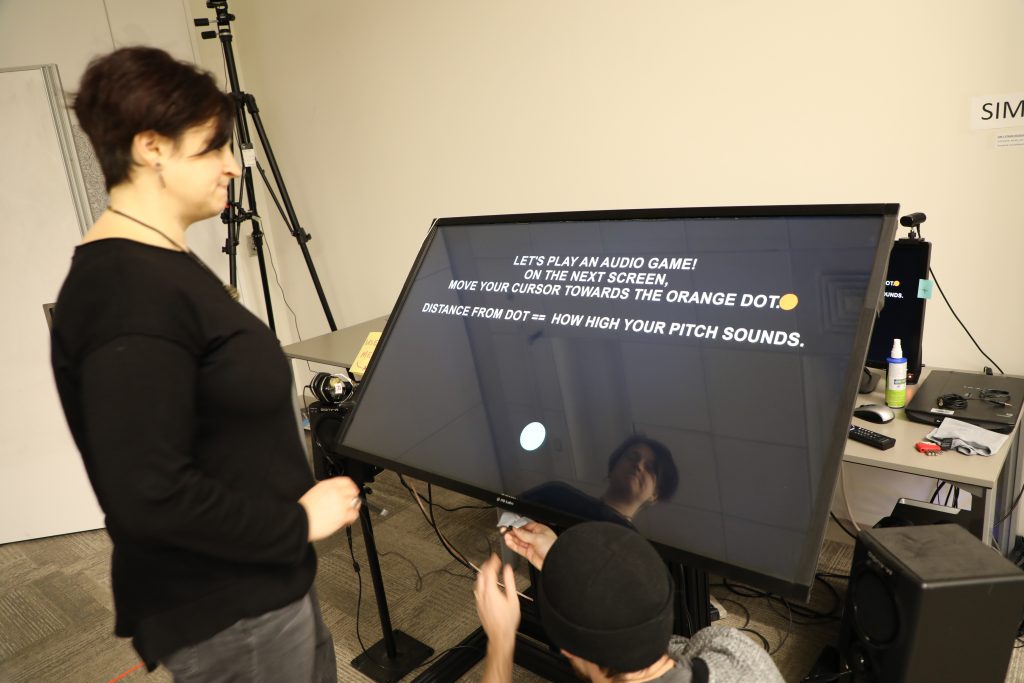
**link includes Isadora project files, Max/MSP files, images, sounds, etc.** Cycle 3: I decided to move forward with the Audio game as previously mentioned. Through the last few weeks, I had random participants test the game and let me know if any part had any particular confusion to it. Some of the comments that were mentioned included:
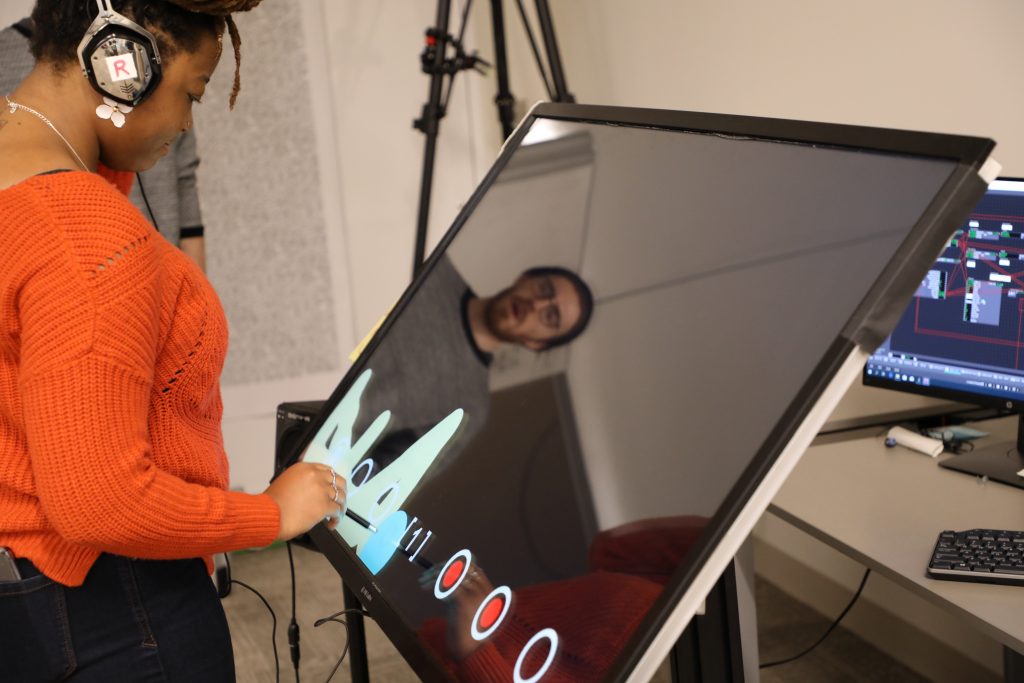
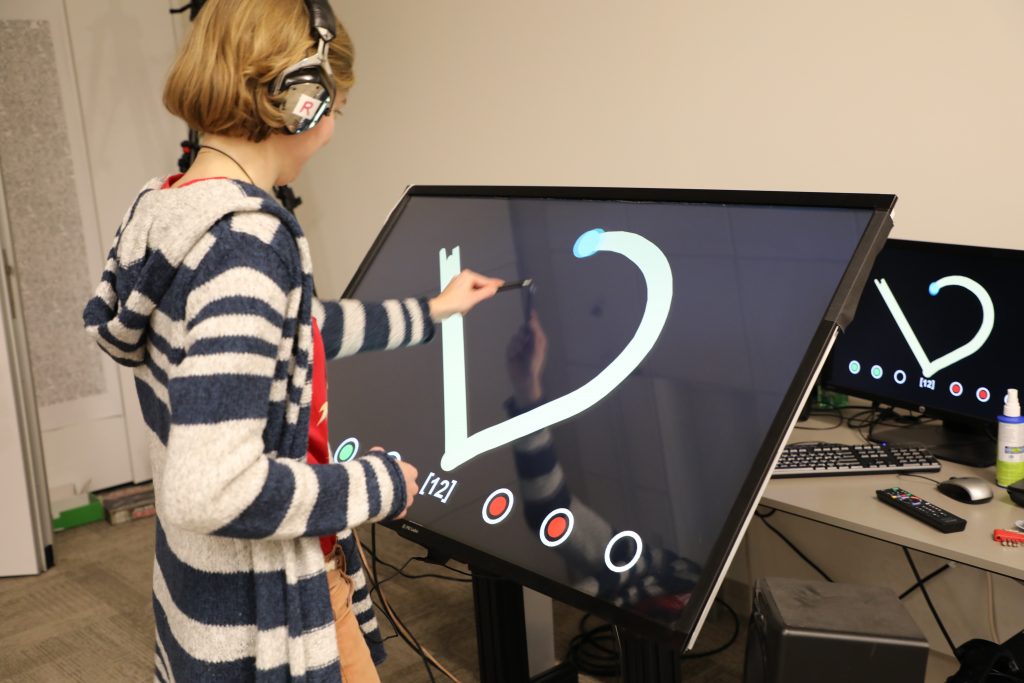
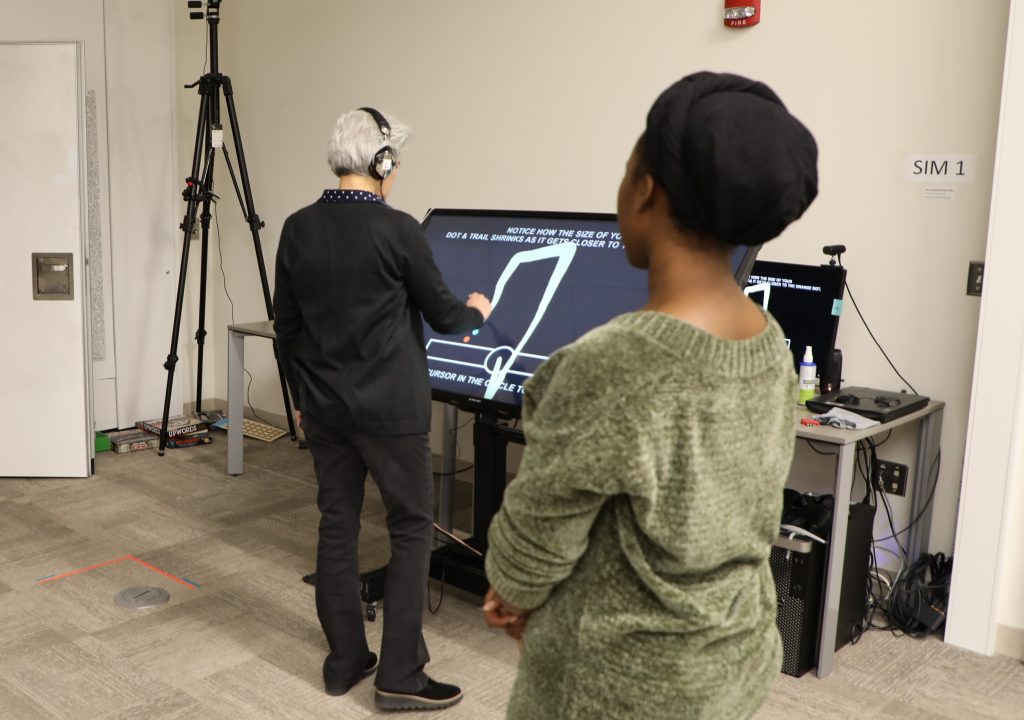
—I had considered using the Kinect as a means to play. That being said, I took the time to become part of the Beta testing group for Isadora. Using the Kinect data, it was difficult to calibrate all of the settings for every time the experience would be set up. It was also somewhat buggy, and didn’t necessarily follow the body as planned. —I hooked up the OpenNi and Skeleton decoder to get the x/y data from the hand of the user, but because of the lag or loss of input, it made the experience unpleasant. I also attempted to use the depth from the Orbecc sensor in the MoLab. This would use the top-down orientation of the depth to create a ‘blob’ to be tracked. Unfortunately, as well, the feedback was buggy and difficult to be managed. –I ended up going with the IR sensor touch screen placed on top of the monitor as the solution. This allowed a user to use either their hand, a touch-friendly pen, and headphones (simultaneously send to speakers as well) for the experience. —Below is a visual representation of the layout: 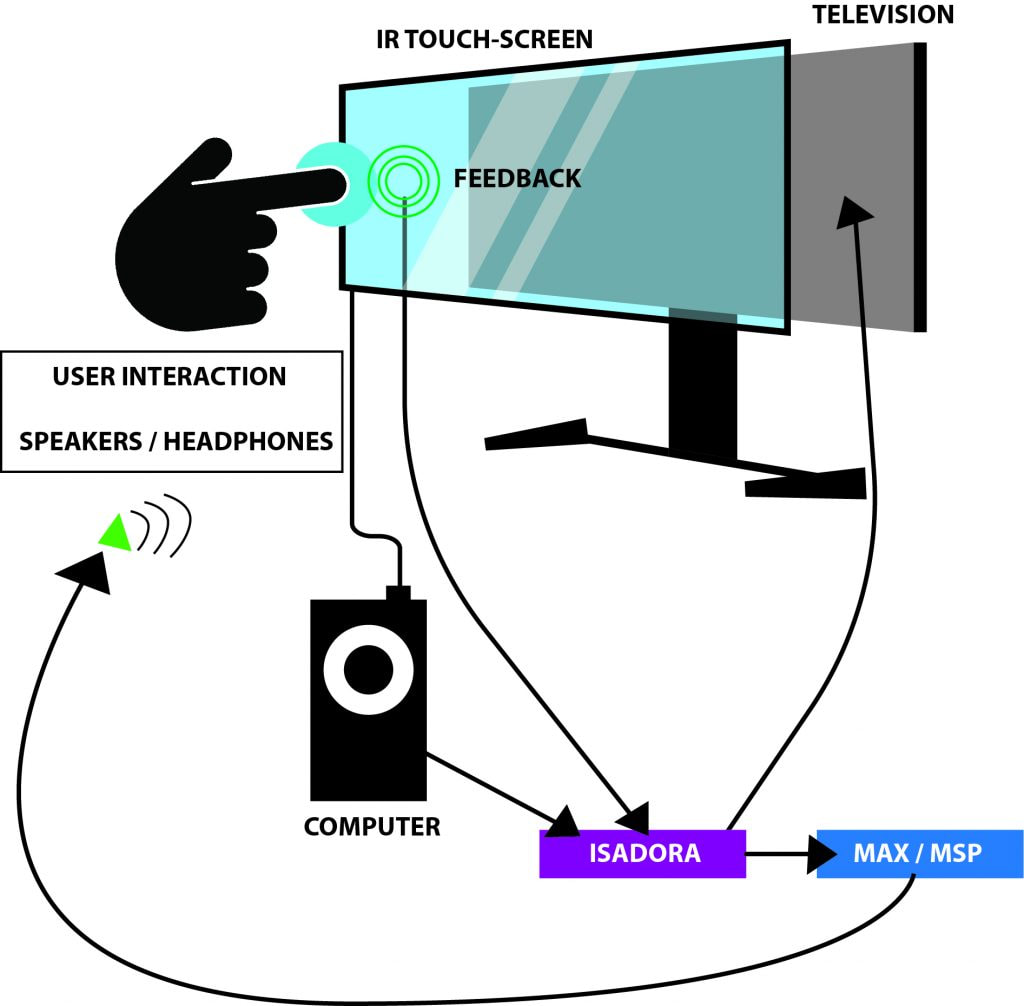 —Folks from a day of presenting the project. The interaction with the screen worked well! —Below is an example of the actual game being played. It goes through the Easy / Medium modes. If you happen to win the experience, you get a nice treat of music and visuals at the end! Note: the losing screen is not shown, though if you can imagine: No music, and no visuals. Just a plain, “You Lose!” screen with the same options as the ‘Win’ screen. Audio Game Examples —I decided to move forward with the project in a way that made it as easy for the user to get used to using a touch screen. This prevented the player from scribbling all over the screen with a mouse to try to find the dot, and added a level of difficulty that didn’t let the participant “cheat” to win.
I also ended up throwing in the different difficulties for the experience. >>Easy Mode<< —The user gets a visual trail to track where they’ve been; this includes shrinking the trail as the user gets closer to the target. The user’s cursor shrinks as it gets closer. The audio will also aid in their efforts. >>Medium Mode<< —The user’s cursor shrinks as it gets closer. The audio will also aid in their efforts. >>Hard Mode<< —Only the audio will aid in their efforts. (Using headphones is the best way for this experience) The actors used within the Isadora project include:
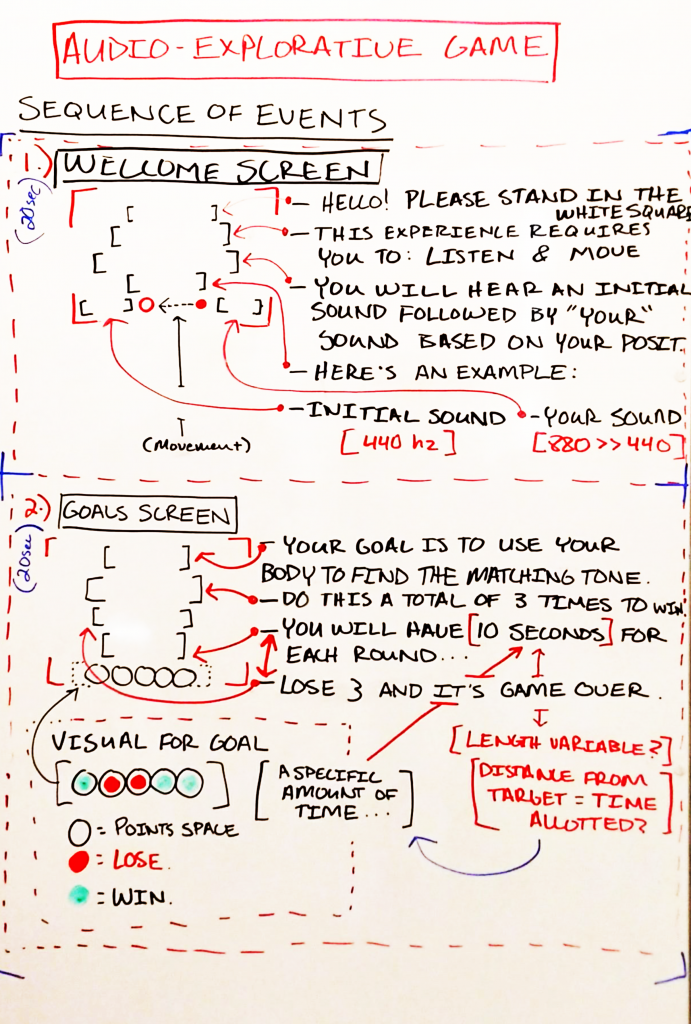
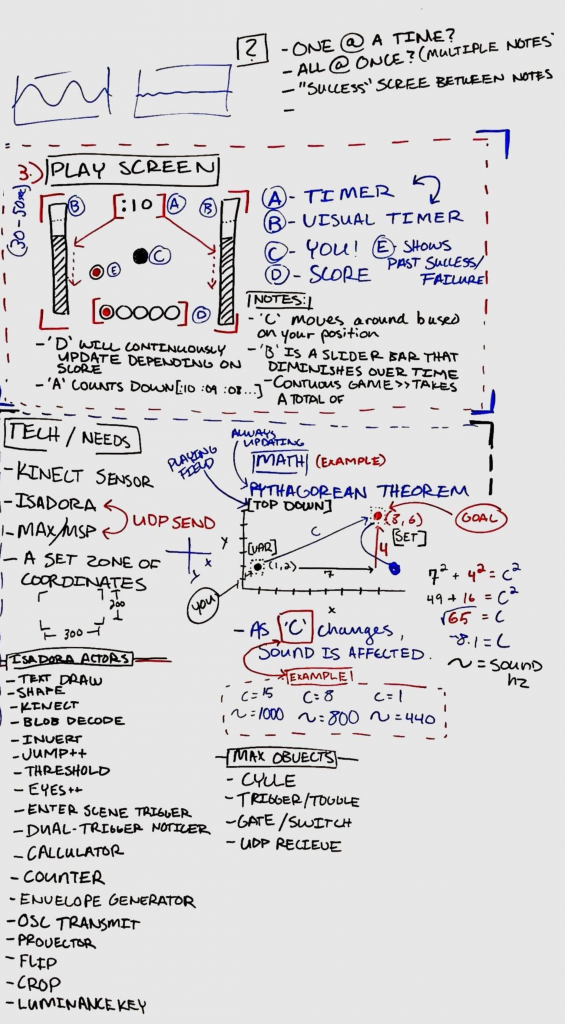
Outcome: —I think that my game was well received. Everything about the experience taught me more about working within the limitations of Isadora. I would go back and change a few things about the interaction — like some idle music during the sections where the user needs to read. Or, I might narrate those pages altogether to ‘make’ the user listen, rather than expect them to read the text to it’s full extent. I would also want to add some videos as the explanation screens; and having them ‘catch’ a few of the dots before moving forward seems like it would benefit the experience–rather than throwing them into the experience too quickly. All in all, I see myself using the program more in tandem with Max/MSP, and perhaps Touch Designer, for future projects that could be installations! -Taylor Olsen For Cycle 2: —I decided to completely abandon my idea of using this project as a means to push my thesis work forward, and decided to instead use this as a way to explore an audio-driven game. The game itself is an interactive piece that uses the body as a “human tuning-fork”. The programs that would be used are Isadora and Max/MSP. Isadora would send the messages via an OSC message to Max, and would therein transmit a sound based on those OSC messages. My intentions are to use the body tracking from a Kinect, or Orbbec, to tune a pitch to match another “fixed” pitch (this would also be sent to Max). To begin: —I drew out my initial idea on a whiteboard of how the experience would start. This included:
—For now there are 3 screens: Welcome, Goals, and Game-play. The welcome screen includes all of the introductory information for the game, including how the experience will play out and a small example. The goals screen shows what the player needs to do; it’s a 3-out-of-5 win/lose gambit. The game-play screen shows the timer, a visual representation of the countdown, and where the player has won/lost a round.
—To elaborate upon this, I proposed the idea to the group and had some feedback/questions in terms of game-play, visuals. The setup thankfully made sense to the group (and myself). The comments are as follows: >>Game-play:
>>Visuals:
—My next steps include (in order, hopefully):
–This week of Cycle 1 I progressed more towards using this time to develop my thesis work. I decided to show the class the progress of the work and an example of how the project is progressing towards a ‘finalized’ project. –My goal for this project is to be able to have the visuals projected towards the ground plane, and have the audio also reactive to the visuals being produced. Giving the viewer an audio-visual experience of animation beyond that of just watching it projected on a screen.
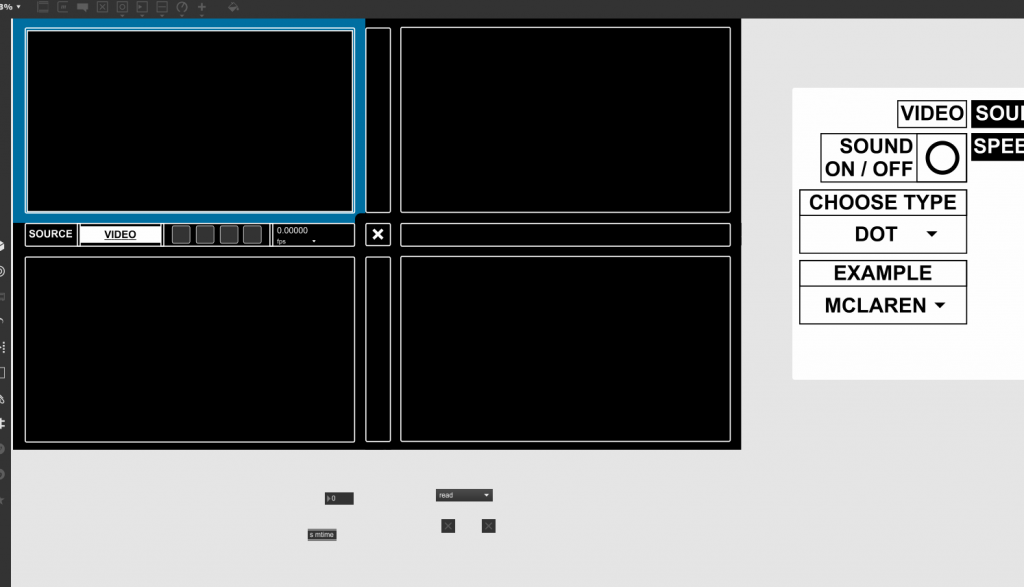
–For the moment, the patch works as an interface that 4 separate instances of utilizing visuals to drive audio. The proposed 4 separate sources are as follows: 1. Video 2. Image 3. Live 4. Multi-Touch –Currently the only piece that I have invested time into showcasing is the “video” source. For the sake of effort and how much time it takes to connect all of the separate pieces that entail the position based object orientation, the GUI setup, and the prototyping, I have decided to stick with the work of making the video portion the main focus. –Beyond this, I have been having considerations of changing the viewing experience from a viewing experience on a screen to a top-down projection onto the floor. I proposed a series of questions for the sake of generating a conversation around the piece as well:
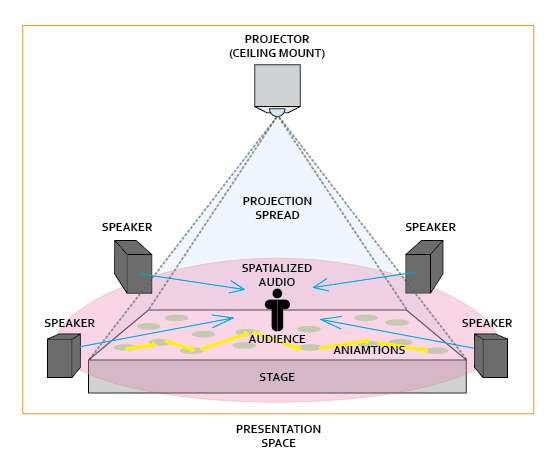 Proposed presentation space. 4-Channel spatialized audio that is driven by animation Feedback from the class (from what I could write down in time) entailed:
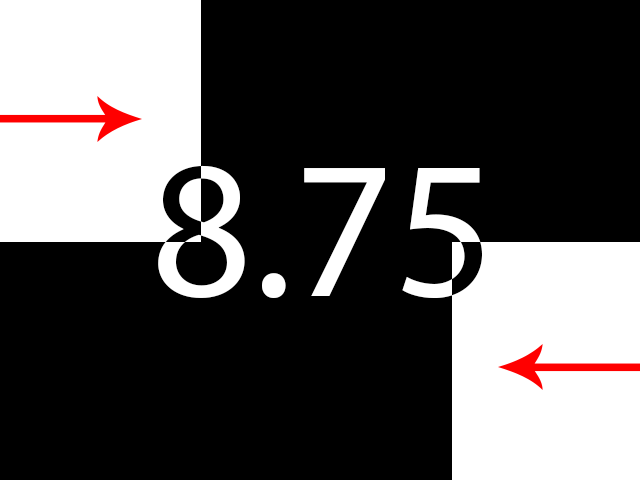
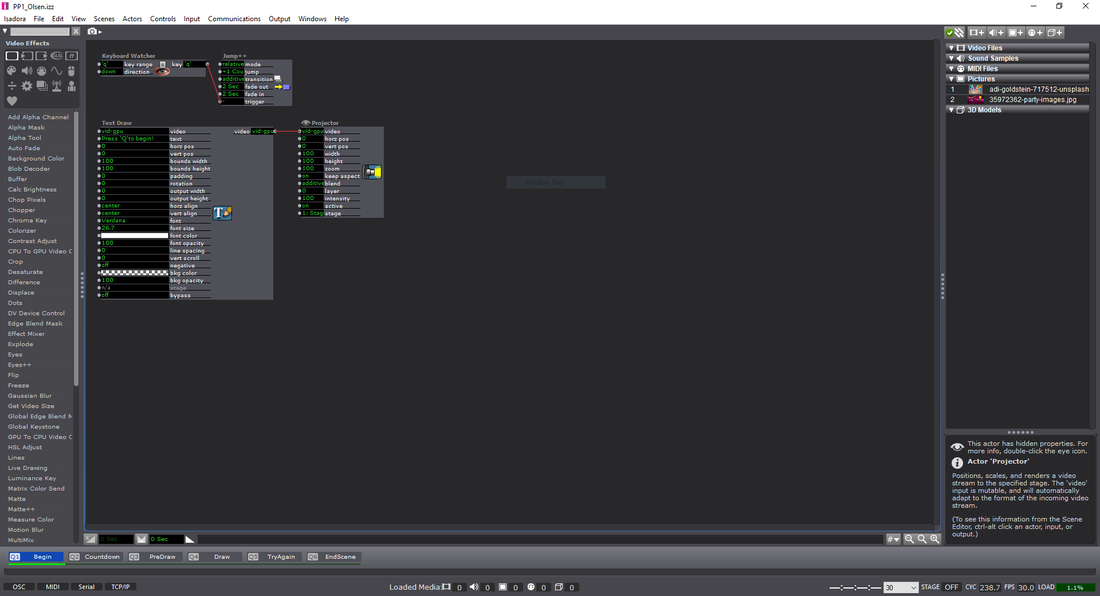
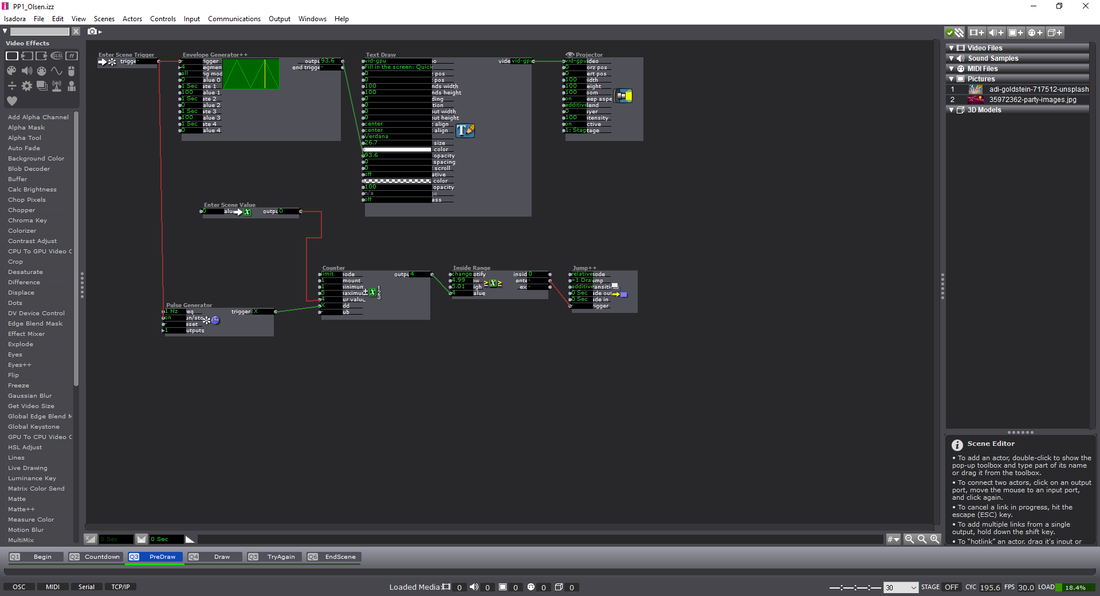
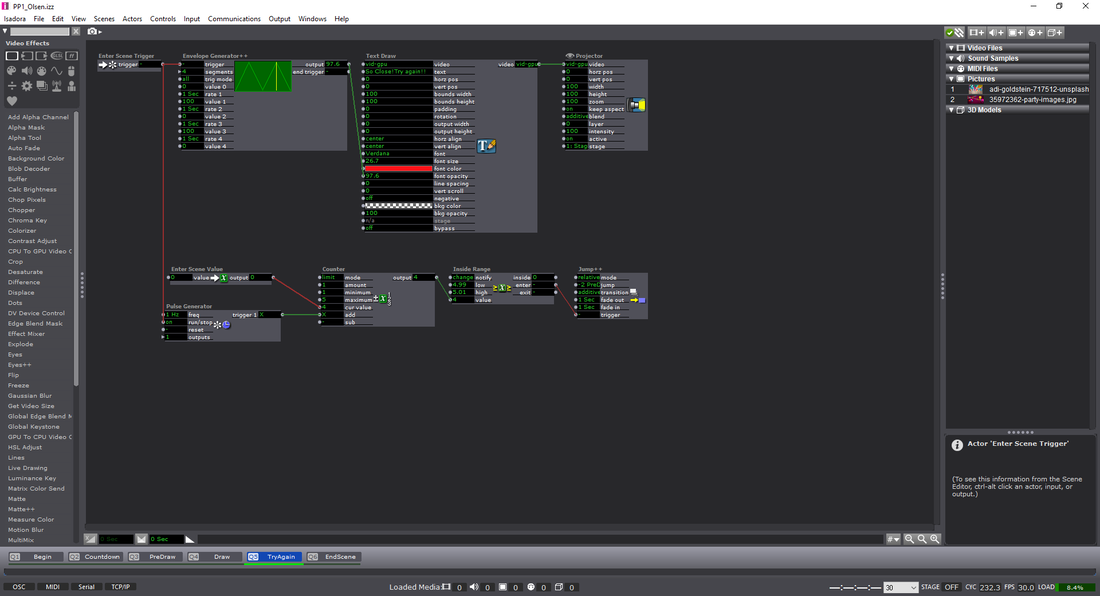
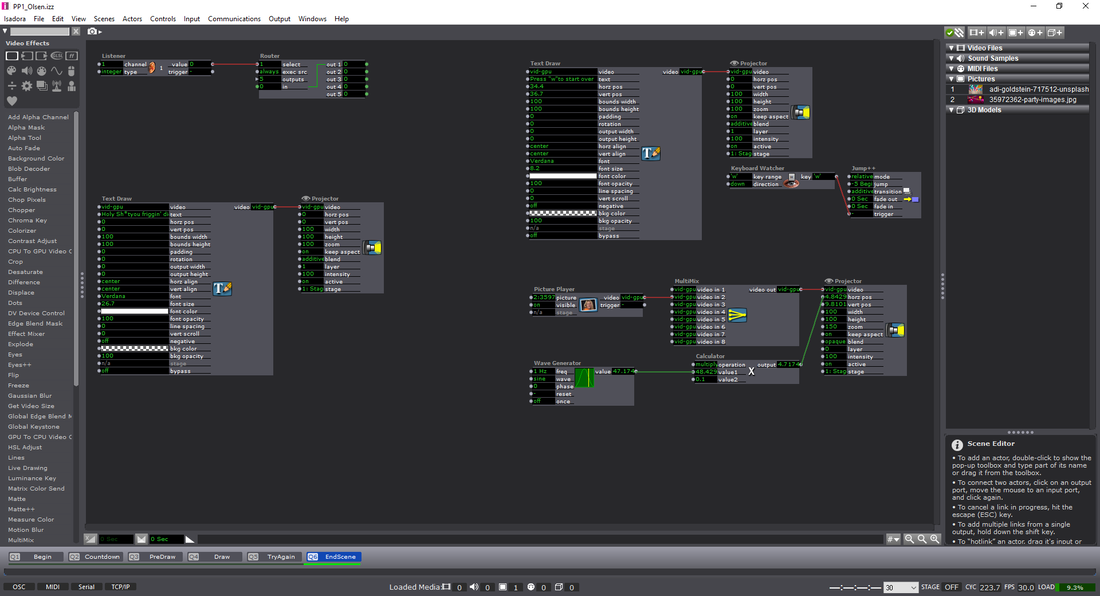
For this pressure project we had to reveal a mystery within 3 minutes with the following caveats: 1. Create an experience for one or more participants 2. In this experience a mystery is revealed 3. You must use Isadora for some aspect of this experience 4. Your human/computer interface may(must?) NOT include a mouse or keyboard. **Above is an attachment of my ideation** Ideation
--To do this, there needs to be a webcam hooked up to Isadora. After the interface is “live”, I used a Difference actor to notice these variations and output them to a virtual stage. On Virt Stage 1: we can see this effect being used. The grey area is the dynamically recorded imagery being noticed as separate pixels on from the webcam. On Virt Stage 2: we can see that I changed the visuals to a threshold–making them stand out as pure white. Through this pipeline, I then used a Calculate Brightness actor to notice the amount of white-pixels (created by movement) on the screen. This number could then be base-lined, and outputted to an Inside Range actor. --You might notice on Stage 1 (not virtual) that the grainy pieces along the edges of the imagery are less apparent–this is due to ‘grabbing’ the frame (Freeze actor), and regulating the change in imagery rather than having it be constantly examined. Putting this through an Effect Mixer actor, I was able to have a threshold of the original image and the live-frames being used. This provided a more smooth measurement of the difference in frames rather than a disruption from stray pixels. Putting this data through a Smoother actor also alleviated arbitrary numbers that would ‘jump’ and disrupt the data stream.
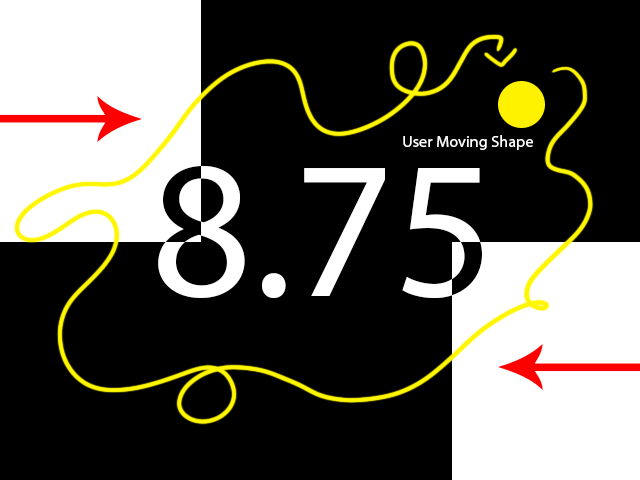
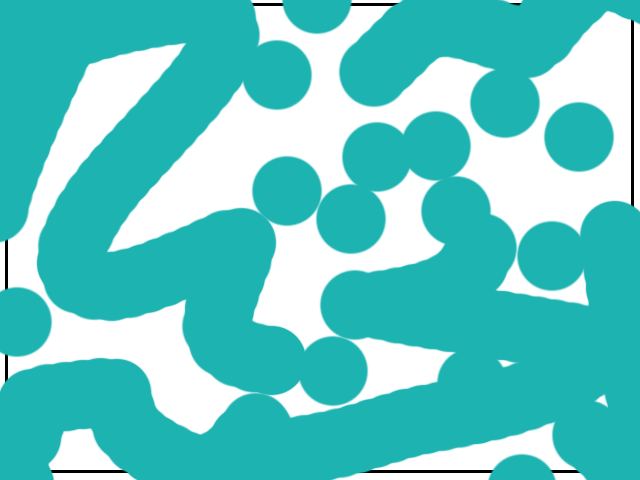
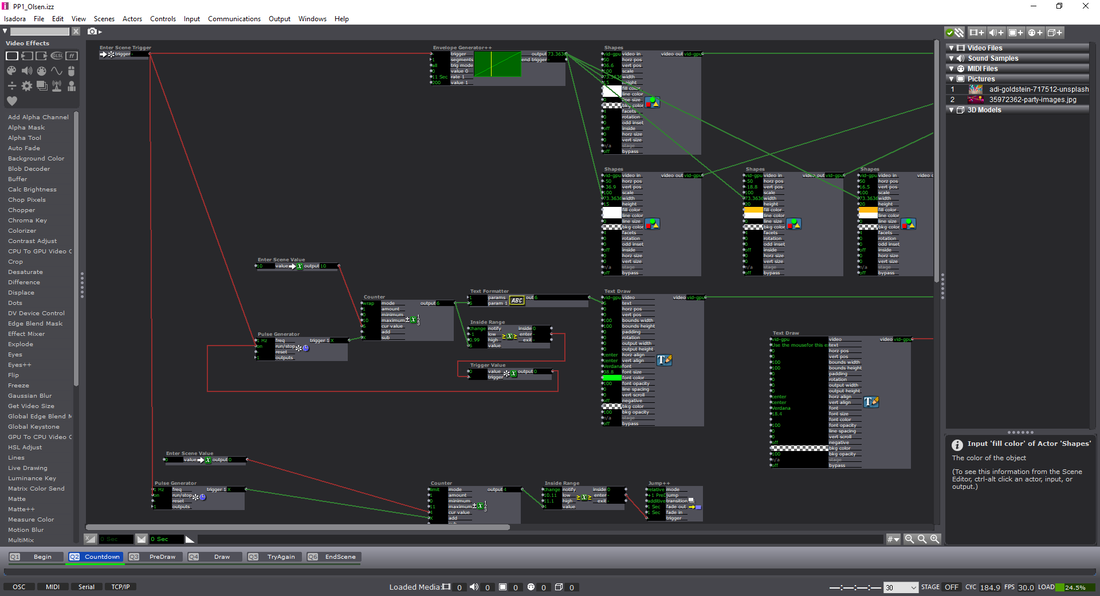
--After creating the webcam interactivity, I used the Inside Range actor as the basis of measuring how many times ‘movement’ was captured. This was done by having a trigger activate when the amount of white on the screen (from movement) was enough to trigger a reaction. I used this to ‘build’ tension as a meter filled up to reveal text underneath. The triggers were sent to a Counter actor, and then to a shape actor to continuously update the width of the shape. To make sure that the participants kept moving, the meter would go recede back to normal through a Pulse Generator actor. This pulse was subtracting the numbers, rather than counting. On top of this, there was a beeping sound that increased in amplitude and the speed at which it was played if it was continuously triggered. This extra bit of feedback made the audience more aware that what they were doing was having an effect.
For the Audio version, I used the microphone of the webcam and the same ‘building’ shape technique as the movement scene. For the dual combination, I upped the amount of times the Pulse Generator triggered the subtraction from the counter, but made sure that both the sound and movement was being accounted for. This made the experience more difficult to achieve if someone was solely moving, or making noise. Having both required a deeper level of interactivity beyond the standard of just one of them working to complete the task. For those who are interested (and for my own reference) here’s the list of actors that I used within the patch:
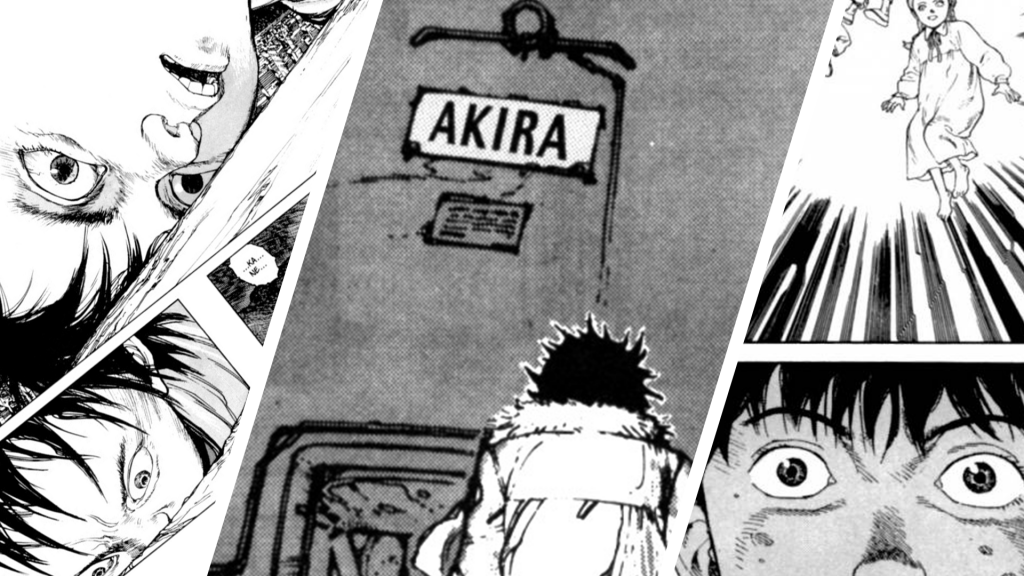
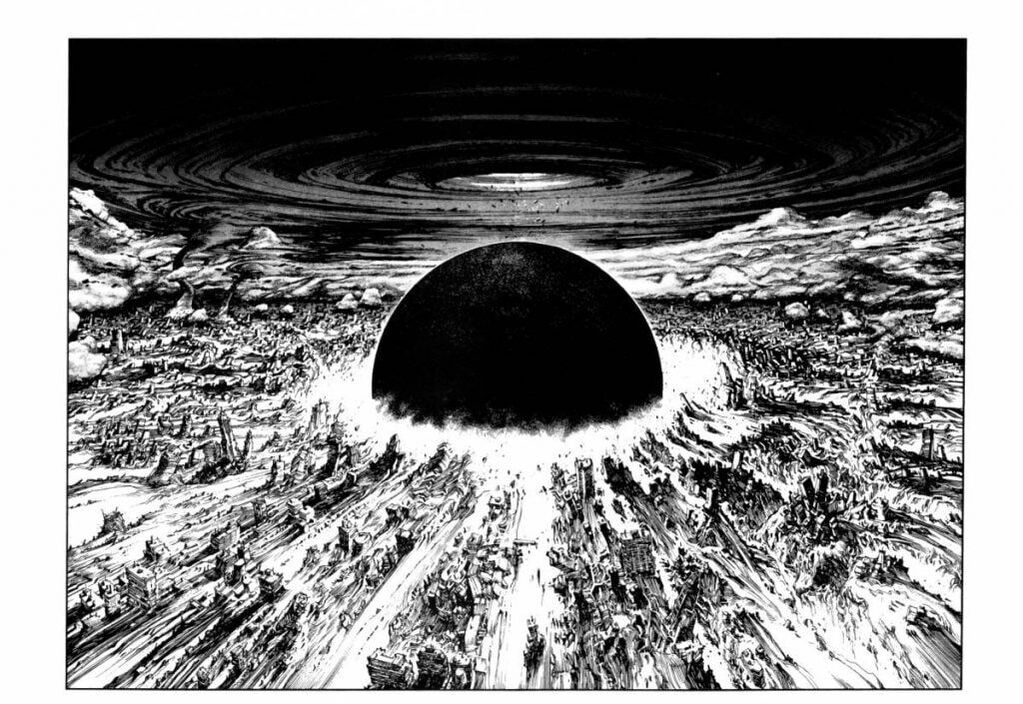
Outcome I think that I would have changed this experience to have more of a ‘choice’ once the user filled up the meter. Though, making them re-do the experience if they guessed wrong might push back the notion to continue in the first place (my subjects might get tired). I could just have a glaring noise if they guessed wrong, and allow them to continue the experience. I also wanted to use the choice through an object or a body to make the decision. Things to think about for next time! -Taylor 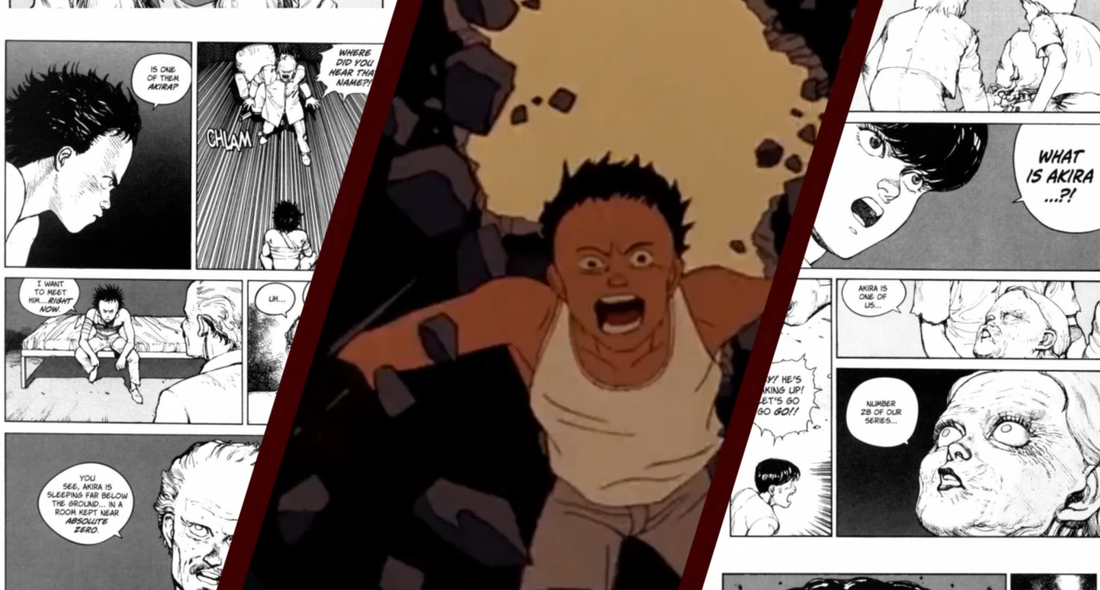 Example Still from the story of Akira
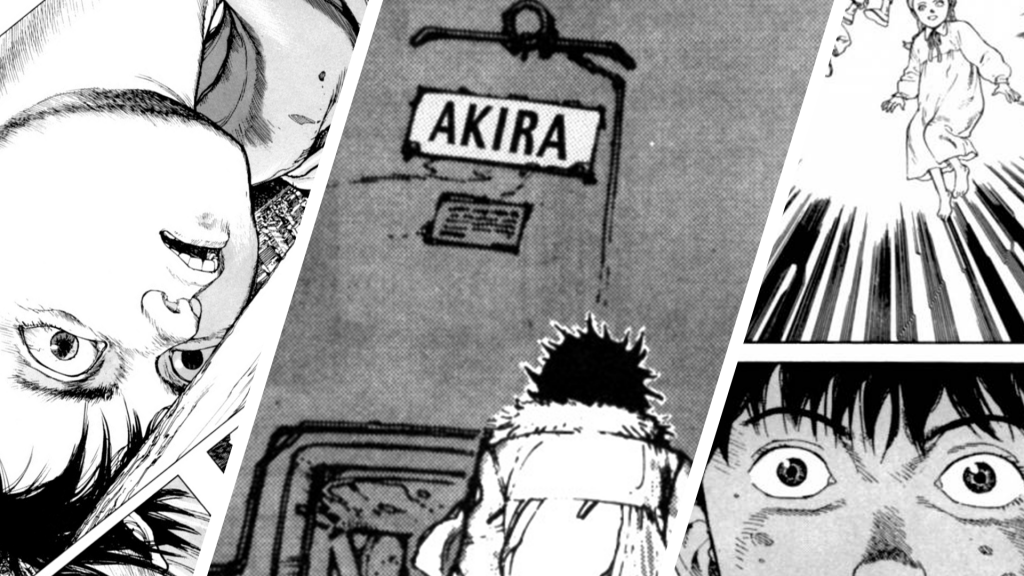
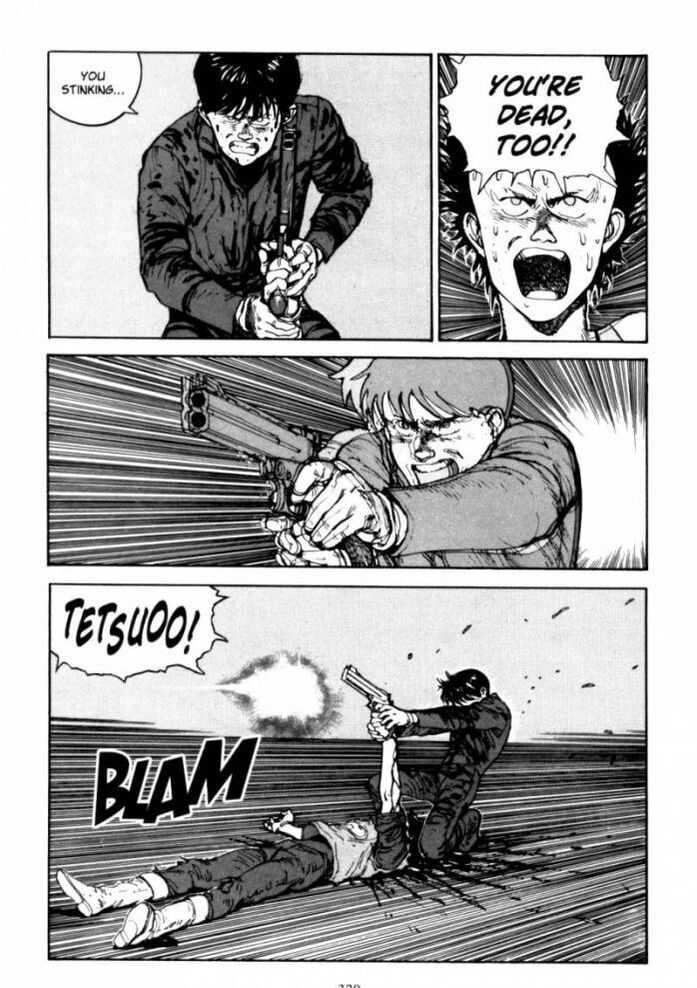
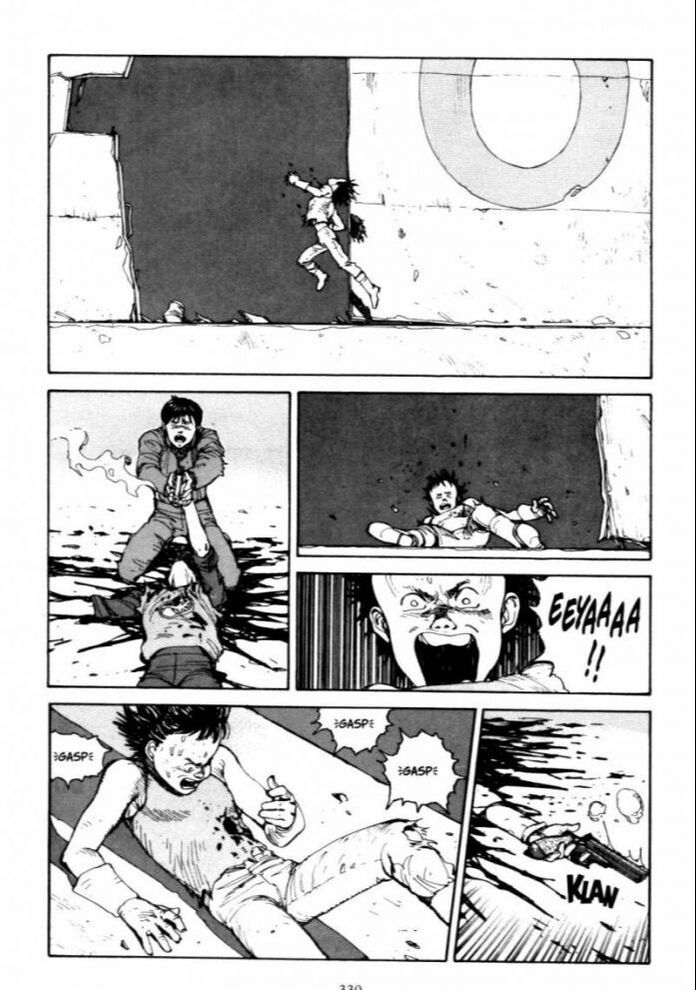
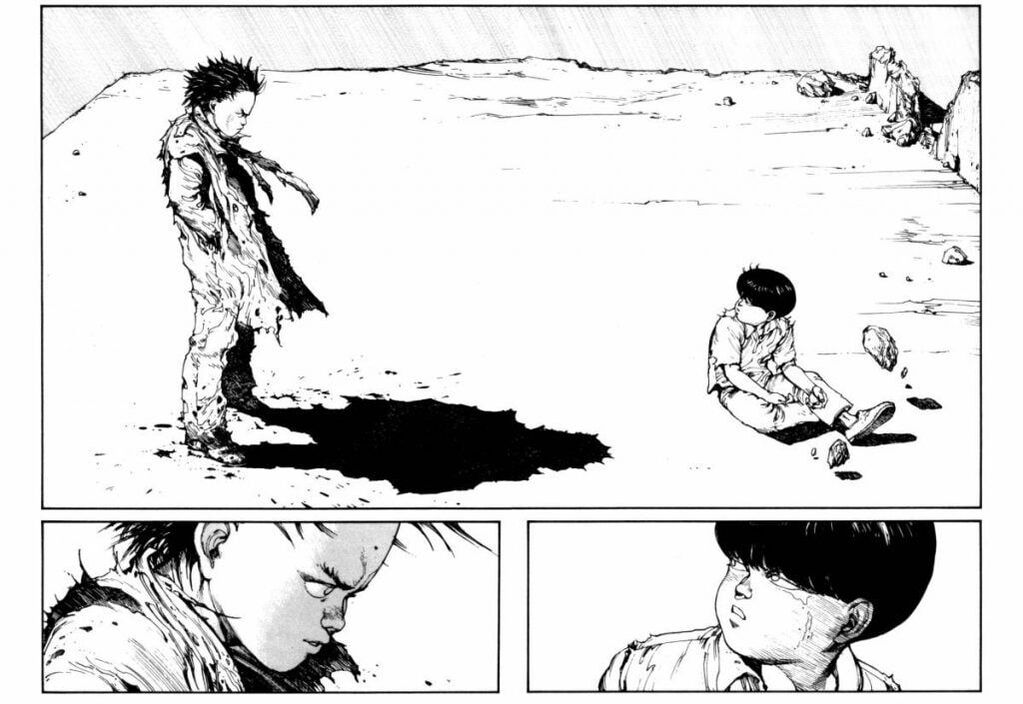
**ALL MANGA IMAGERY, ANIMATION SEQUENCES, FROM CREATOR KATSUHIRO OTOMO.** This pressure project utilized 5-hours to tell a culturally significant, folk, or personal story in under 1-minute — using one of the following: 1. Audio 2. Visuals 3. Audio & Visuals **Attached above is a Word doc of my idea** Ideation Initially for my Pressure Project I decided to retell the story of AKIRA. This is a story that I have always held close to me and has strong cultural significance regarding War, Honor, Politics, and Science & Engineering. Process To start:
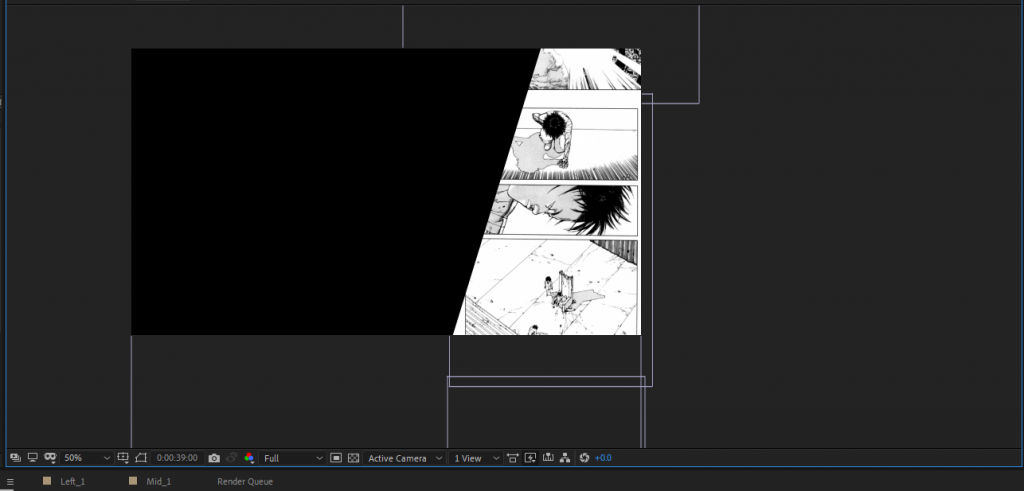
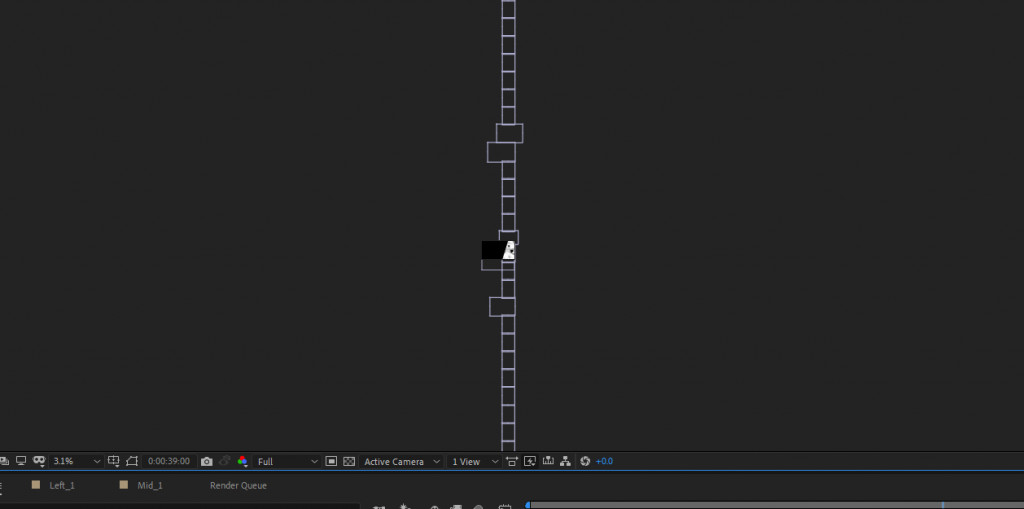
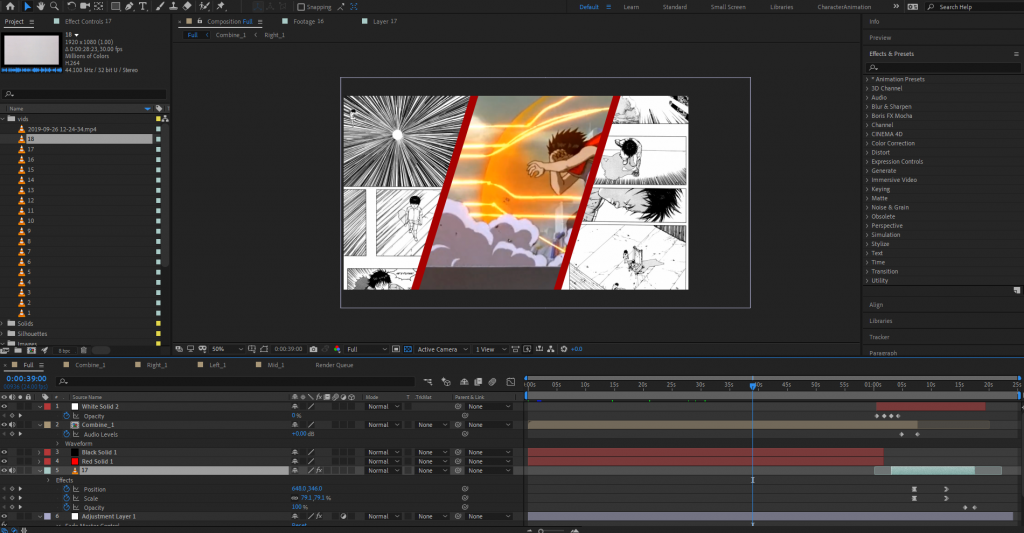
To begin I created 3 different B&W-luma images to section off the content in After Effects. I could have also used masking techniques, but since I already had an example of the split imagery available, I decided that this was an easier way to use my time. Below is some of the example imagery from the manga I decided to go with. I was initially scanning them in from the physical books, but this process was taking too much time to produce results. I went online and found a manga-reader that allowed people to download the pages instead.
"AKIRA" Imagery from Katsuhiro Otomo used for the project. Outcome Attached below is the final video that I rendered out from the process. I think it was an effective use of time in terms of getting all of my content in an organized space–but the story of AKIRA is quite hefty and very difficult to tell in under 1-minute. I think that this is where the project fell short; having a primer about the story might have been important to letting it unfold rather than throwing the audience directly into the action. Also, I think my visuals might have been heavy-handed from the animation, the scrolling effect, and too much to look at / respond to while the video was playing. I did appreciate that the class decided to listen to just the audio one time through without the visuals–it created a different experience for them in the sense that they were able to pick out more characters than having it coupled with the visuals. 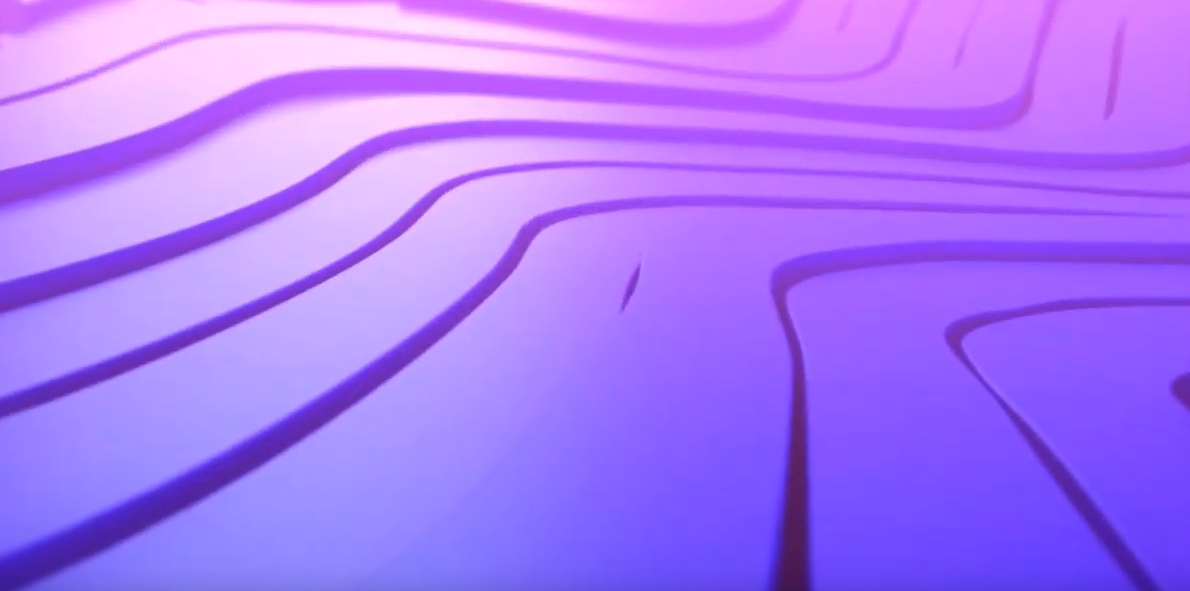
Pt. 1:
The Ohio Dance documentary is a project that ties together dance, animation, and history to create a uniform and experimental view of the cultures that influence modern dancers today. For this project, I have been tasked with taking motion-capture data and transcribing the motion into an artistic visualization (as directed by Ohio Dance). The animations themselves will use the data to create paths from motion that will then lead into other paths of motion, creating a rhizomatic structure showing the interconnections between the geographic distribution of these dances among Ohio. Some considerations and questions that I have coming into the project:
Pt. 2:
I met with Jess and Vita (last week) to discuss their intentions with the project. Jess is a very affluent dancer, and Vita is a very affluent animator and motion capture specialist. Some of my notes (however floaty - updating and archiving them now) are listed below:
Pt. 3:
I combined 3 different dances (Athens - Toledo, Cincinnati to Cleveland, Cincinnati to Toledo) into a single video for viewing, and attempted to use 3 different camera angles for each in order to get a better sense of the motion of the dancer. These different views allow us to engage more directly with the dance, rather than seeing it from one static angle. These dances might not be used within the final product, but this gives a clear mode of viewing the motion from different viewpoints that can further infer camera angles for the future (within the animation). Below is the video:
There is a great amount of data to work with regarding where the paths lie. I see a good amount of potential just from looking at the data and seeing how the paths could possibly intersect. I will probably attempt to add in motion paths to the data as the next step. Being able to see these motion paths will be a great use for visualizing the final animation - I think I'll work with camera angles at a different time, more towards the end when I and the project team have better visualizations. The most pertinent information at this time is being able to use clean MoCap data to get a better sense of how all the pieces will fit together.
Pt. 4:
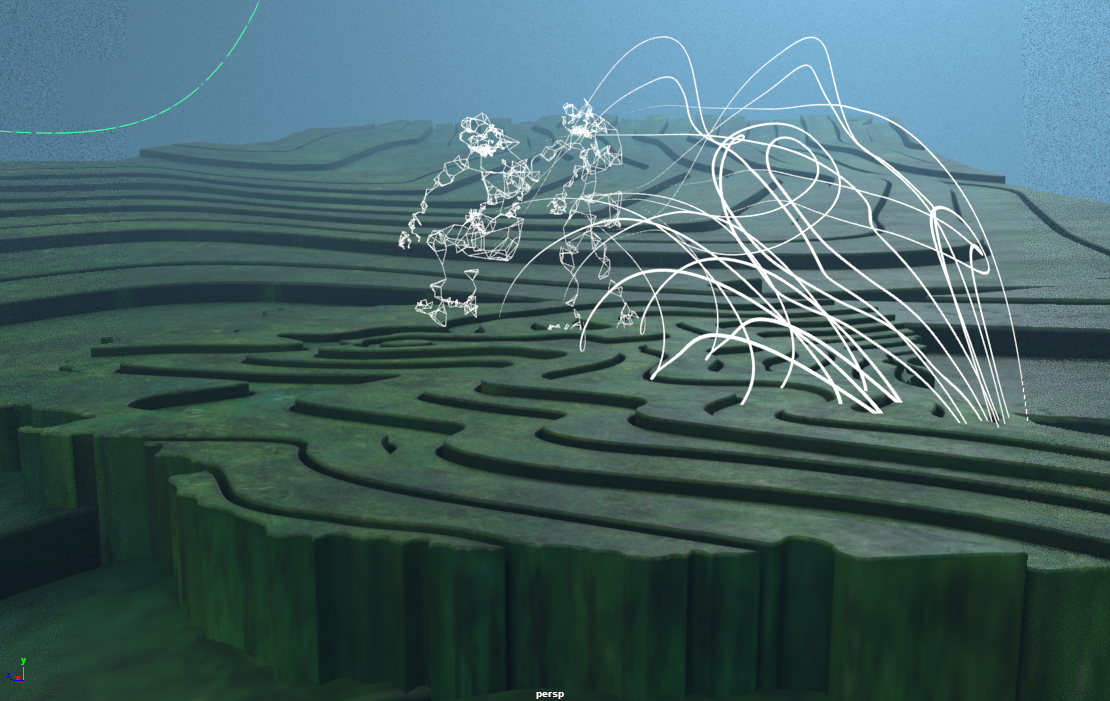
I began with creating a development video showing the process / progress of the visualizations. The video first shows the initial dances without the map or all of the figures together. The second part is the visualizations with the motion trails - the paths of the Mocap data was adjusted to match the Ohio map on the ground. The last piece of the video is the combination of the 3 overall paths. This includes all of the pre/post paths of the arms/legs/head. Seeing these altogether gives a good sense of where there is opportunity to diverge from one Mocap path to the next. The visualization of the lines is also great for seeing a 'final' rhizomatic path for the data.
Using this, some of the paths for other dances (not shown) had to be scaled in order to fit the transference from city to city. Right now, I am not sure if this will have a considerable impact on how the dances will be affected via skin-weights when applying a mesh. So, I decided to rather line them up based on their starting position, scale/rotate the path of the figure until they lined up with their start/end destination, and return them to their original size while maintaining the central pivot from their starting city. This way when it came time to associate them with their appropriate paths, it would be easy to scale them appropriately. 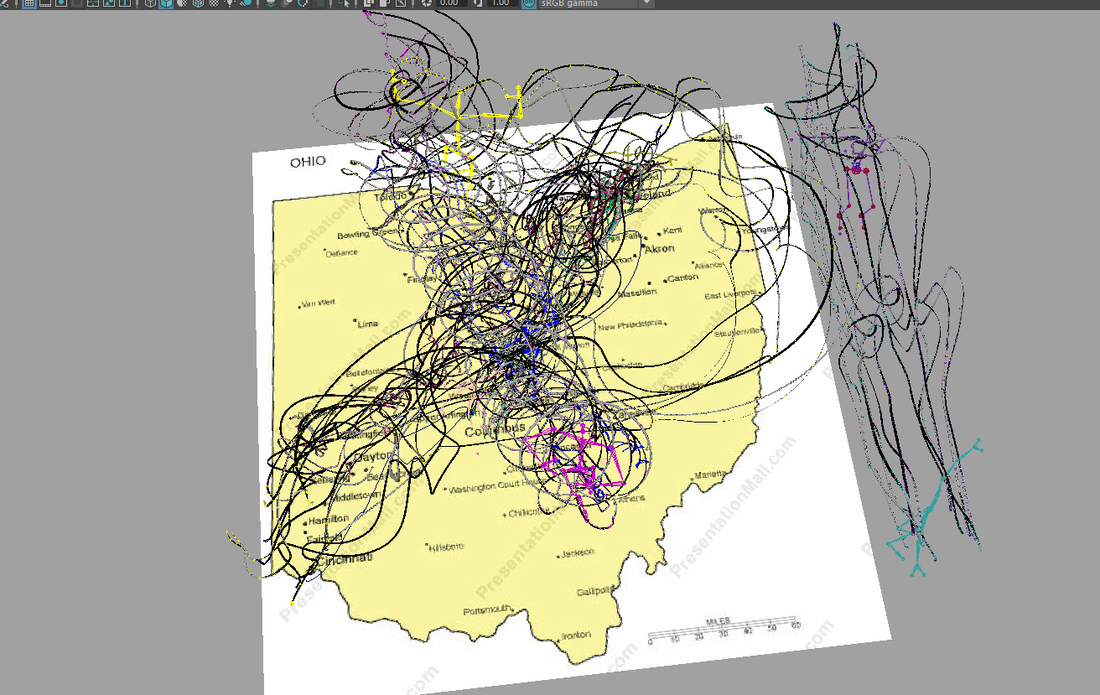
A test trail of all the paths
Pt. 5:
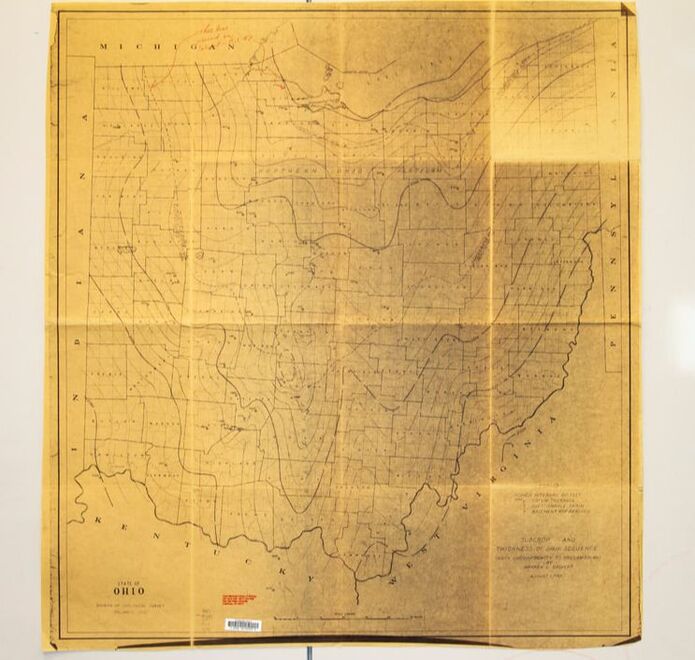
After considering the paths of the data we moved onto creating the physical map layout of the environment. I took a trip to OSU's Orton Hall to find topographical representations of the state of Ohio. Out of all of the different maps there, most were just elevation charts that used color to represent the highs/lows of the state. [shown below]
While these proved valuable in the sense of considering the importance of highlighting the elevation of the area, they seemed to lack an artistic quality that could be extracted from them in a considerable way. Speaking with Jess, she considered having more of a flow to the map to contrast/highlight the figures dancing above them. After more scanning through different maps, I happened to find one with hand-drawn line work from the 70's showcasing the flow of wind throughout the state. I hung the maps and took photos of them (their size was about 4x4ft -- OSU seems to lack a large scale scanner that can be used by the public). [line work map shown below]
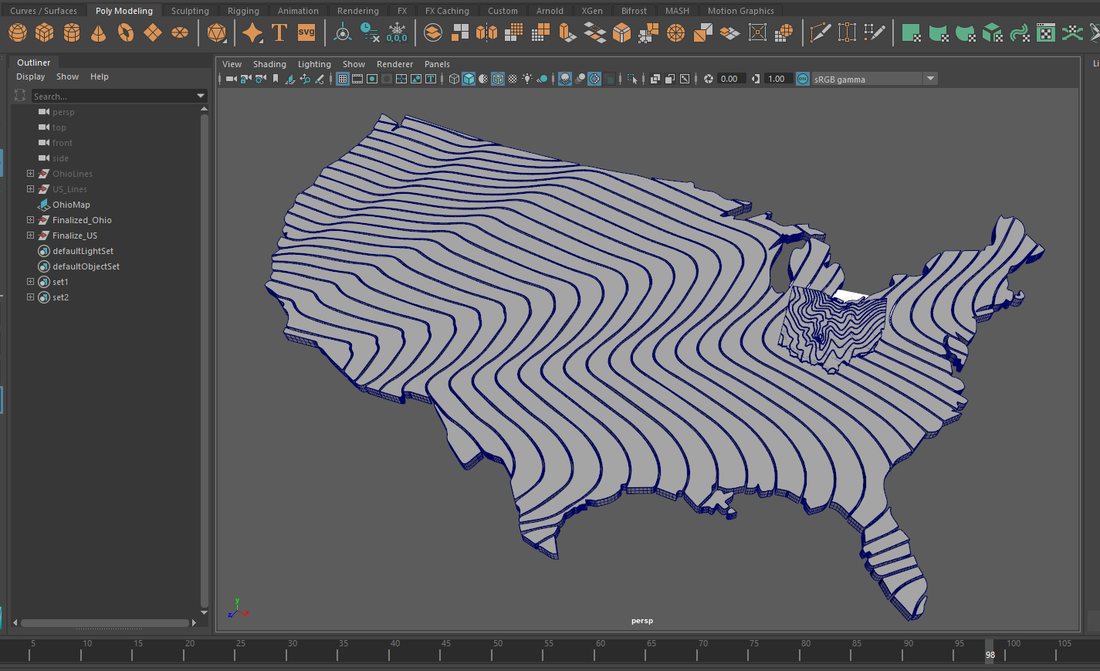
With the map of the line-work in a digitized format, I took them into illustrator and traced the lines with the pen tool. I added a thickness to the line work by increasing the stroke thickness within Illustrator. I played with a few different variations to consider how crowded we wanted the lines to be. The decision eventually became to use the less dense line work as this would clearly showcase the variety of movement throughout the state without becoming too visually heavy. [shown below]
This made the transference from Illustrator to Maya an easy process as I could save out the line work and use the Bevel+ option within Maya to extrude the line work into solid form. [Great tutorial example here: https://www.youtube.com/watch?v=D88qe05IUx0] After creating the map pieces, I futzed around with testing how I wanted the expansion of the map to appear. Below is an example of using a sphere as a subtractive boolean operator to reveal the map. This isn't how the final map was going to be revealed. This isn't how the final map was going to be revealed (as decided later) but it was a nice test to experiment with moving the camera throughout the area.
Pt. 6:
Speaking with Jess (and Jane D'Angelo -- head of Ohio Dance), she mentioned maybe using GOT as an inspiration for the reveal of the map sections. The GOT intro uses a convex world view (or a fish-eye lens) to make the pieces of the map appear to 'bend' upward towards the camera. I eventually went the route of using the previously mentioned map creation method as a basis for an addition to the entire US map being incorporated as well. 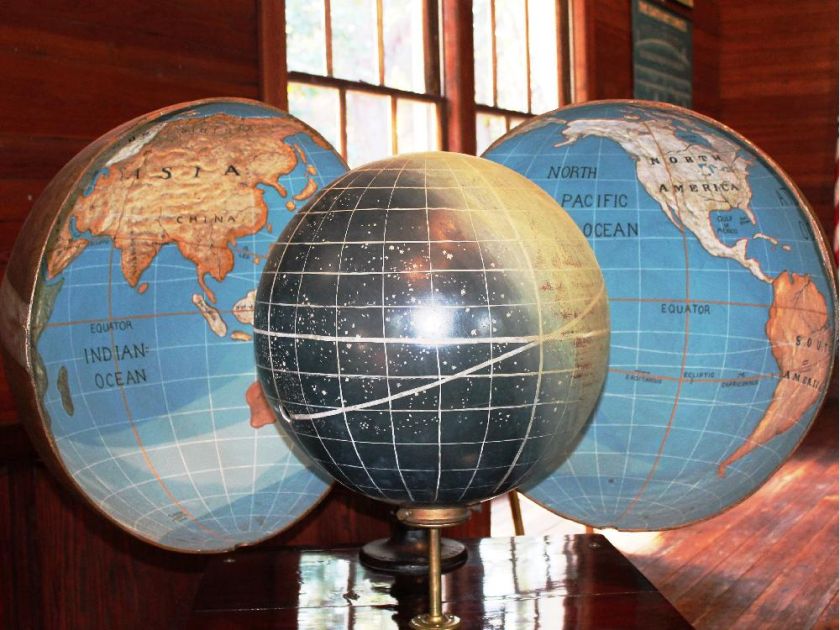
Concave World Example (retrieved from Google). Notice how the inside of the shell is the view of the world, while the middle is the night sky.
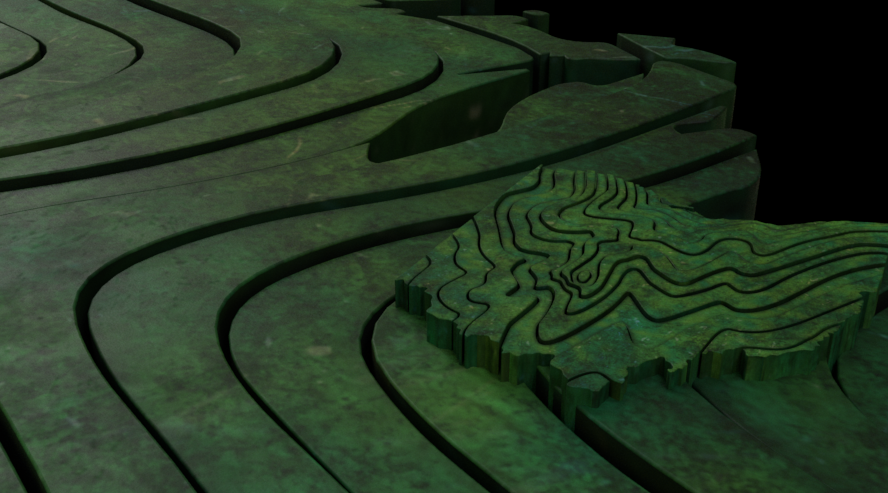
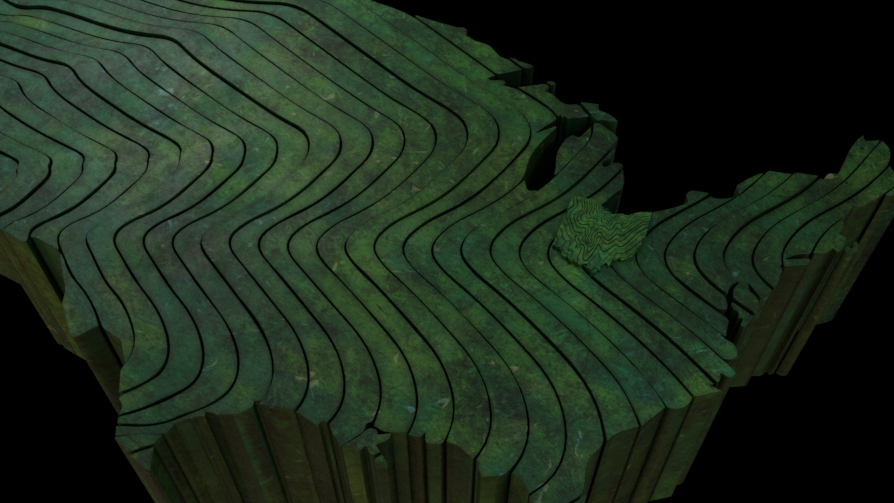
Going off of this consideration, I created another piece of map line-work that encompassed the entire US. These pieces aren't necessarily as small as the pieces used for the Ohio map, but this makes a considerable stylistic difference in the map types allowing the viewer to clearly discern the shape of Ohio from the rest of the United States. Different colors for the US vs. Ohio pushes this consideration further.
I took all of the pieces of the US map and animated them on separate timings to create a sense of movement that wasn't just static pieces that the camera would eventually 'fly' through. After this, I grouped all the separate pieces and added a curve deformation to the map (still being able to maintain the animation of the pieces). The deformation could be animated and easily turned off/on depending on how we wanted to review the work.
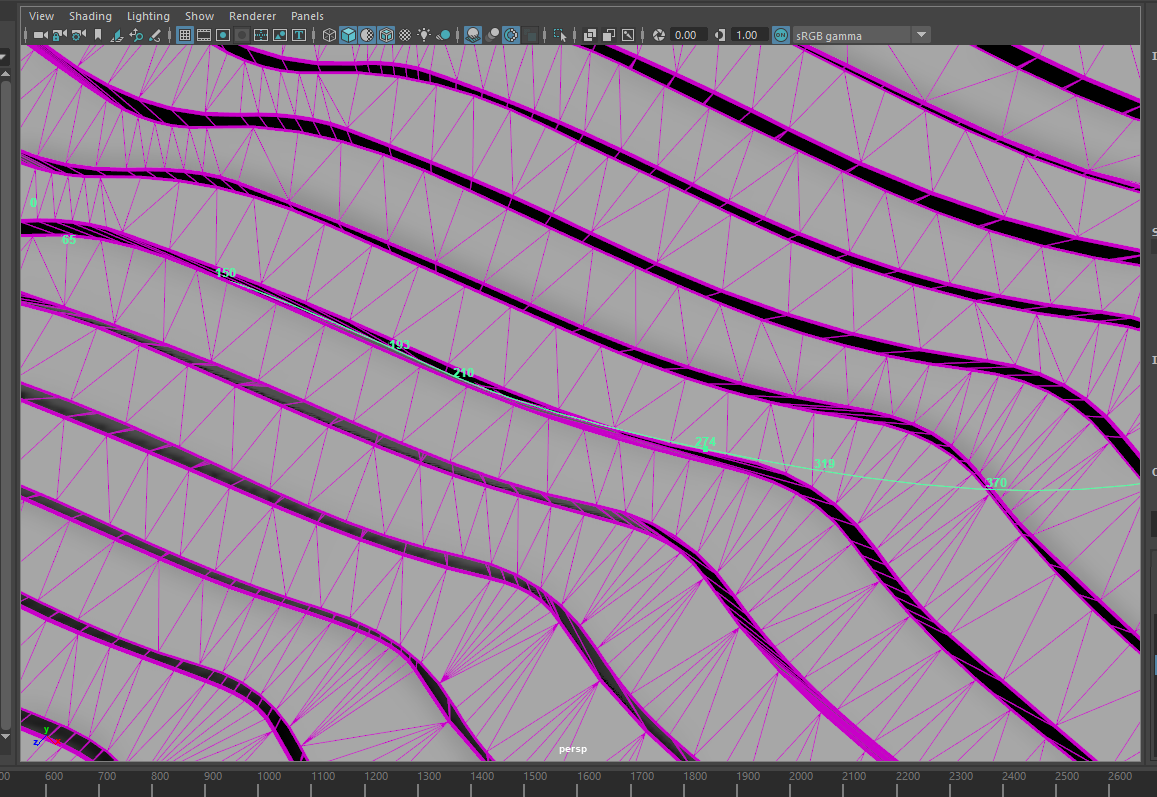
--Something to consider for the map pieces itself: because the superficial pieces of the map are completely flat, there's weird fragmenting that happens when I did some test renders. To solve, I triangulated the mesh to absolve this issue. This added necessary geometry to where the map would bend and prevent any unsightly renderings.
After triangulating the mesh, I animated the bend deforms to test if the mesh would be maintained. The lines that are running through the other parts of the frame is the path of the camera throughout the terrain.
Part of the challenge was to get the camera to come 'out' of separations in the map pieces themselves while simultaneously adhering to the deformations of of the bend deformers. To do this, I duplicated the mesh of one of the pieces of the map and added an edge loop to the piece.
I then used the "extract isoparm" command to create a nurb curve from the meandering geometry of the piece. This allowed me to attached a camera to the "motion trail" of the curve and adjust the timing as necessary. Some slight tweaks allowed me to scoot the trail over out of the way of the geometry. I did a test play-blast of the result; after the amount of time it takes with the extra geometry, curve deformations, and animated pieces, returning to flat geometry will make more sense for times-sake.
Pt. 7:
After exploring the different ways to animate the map, it was time to plot out the different paths of the motion capture content. I made a basic representation of all the paths over the map of Ohio, and color coded the different paths for easy differentiation. We eventually used a few of the same paths of mocap data in reverse to simulate a separate dance for those that weren't included in the initial takes. This included Dayton (not shown) to Cleveland. 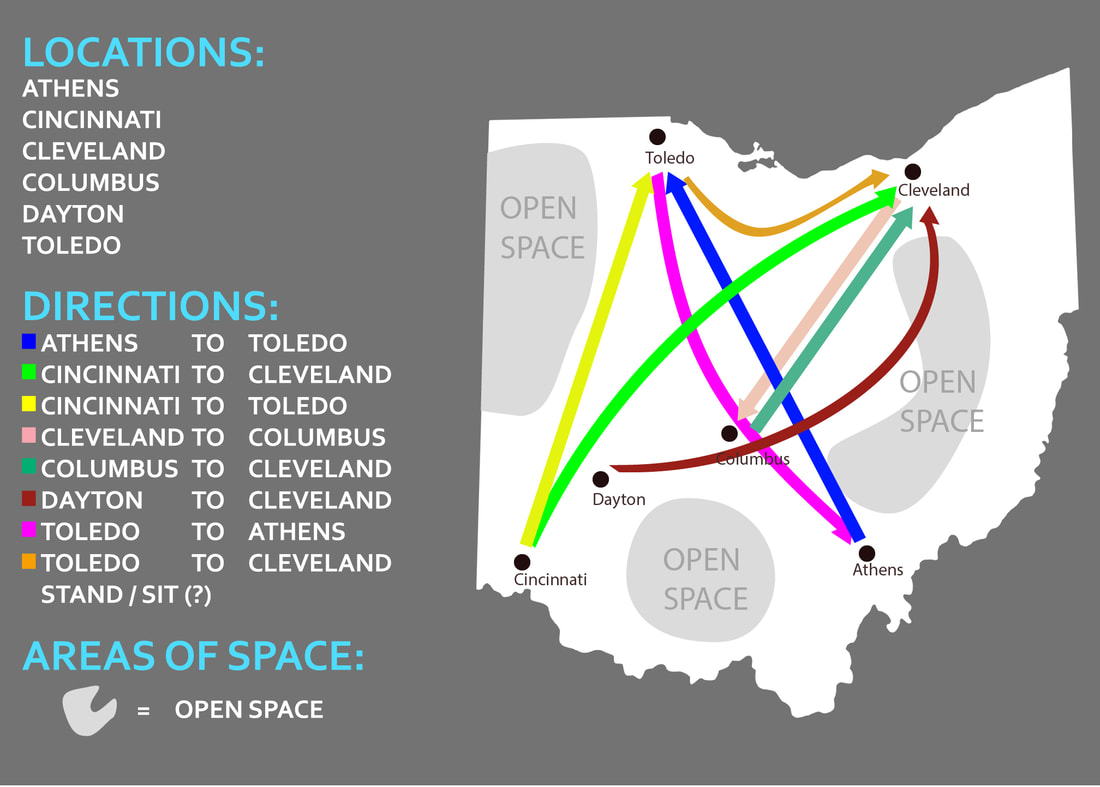
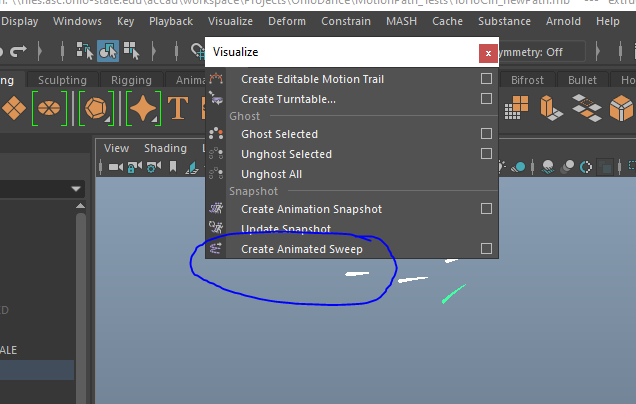
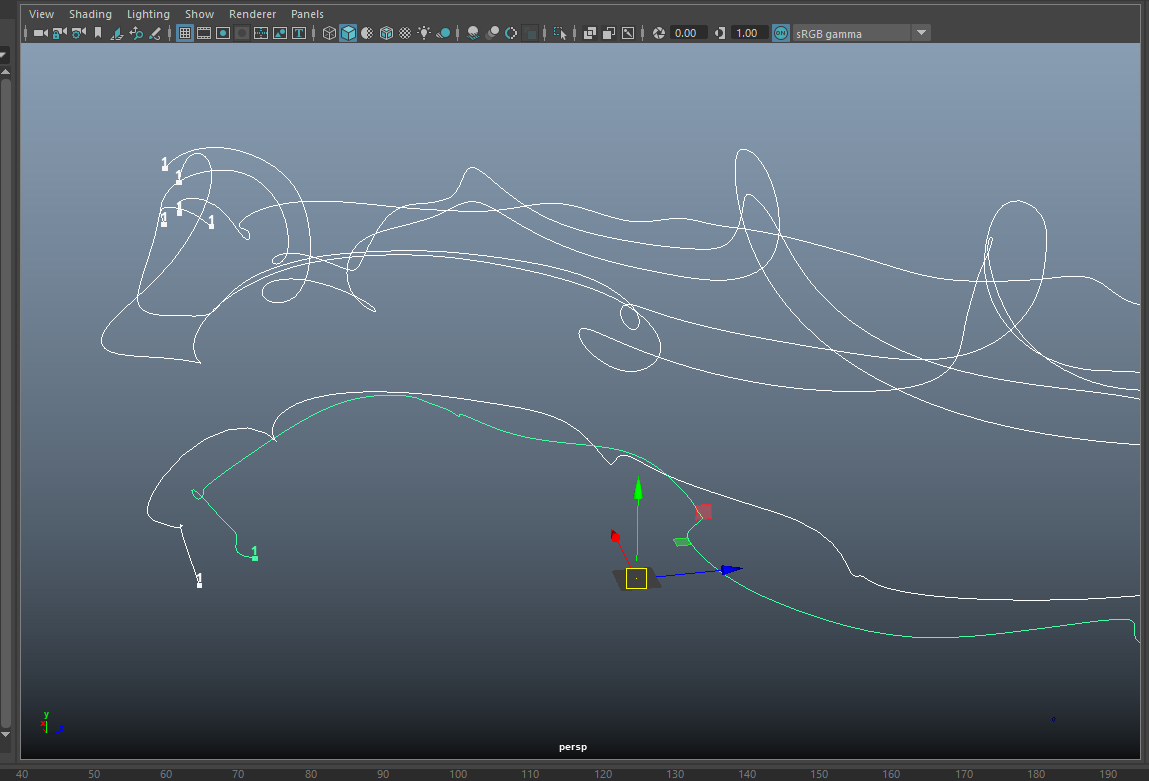
To begin, I took the Mocap data and parent-constrained separate nurbs circles onto the rig. I went into the animation tab of Maya and used the "create animated sweep" option to visualize the curves of data from the nurb surfaces. Using the animated sweep option allows you to control what the output becomes. For the easiest solution, I used the nurb setting to get a smooth path, rather than a somewhat 'chunky' path of the polygon method.
After this, I used the 'select isoparm' option on the nurb surface. In the curves tab, there is an option to 'duplicate surface curves'. This was then used as a single nurb curve from the animated sweep before.

Using this allowed the baseline path of different extrusions along the way and easily allowed changes of the paths themselves if they needed extra points for definition, or would collapse on themselves and have funky geometry as a result.
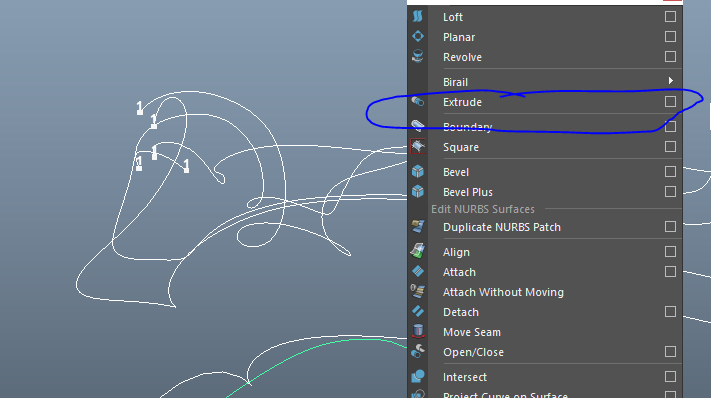
I then added a nurb circle to the start of these paths and used the extrude option while also having the path selected. This created a path that could be controlled over keyframes (like a trim path in After Effects). This also allows you to control whether the path is nurbs or polygons, with further control over how many polys (dimension, spans) would be created from extrusion command.
On top of this, you're able to control how long the path will take to extrude, whether or not the path will grow like a vine (with a pointed tip), and how the path can be scaled over time. Below is an example of the extrusion following the paths themselves. [good example of this process here: https://www.youtube.com/watch?v=c-Zpamrvj6s]
Pt. 8:
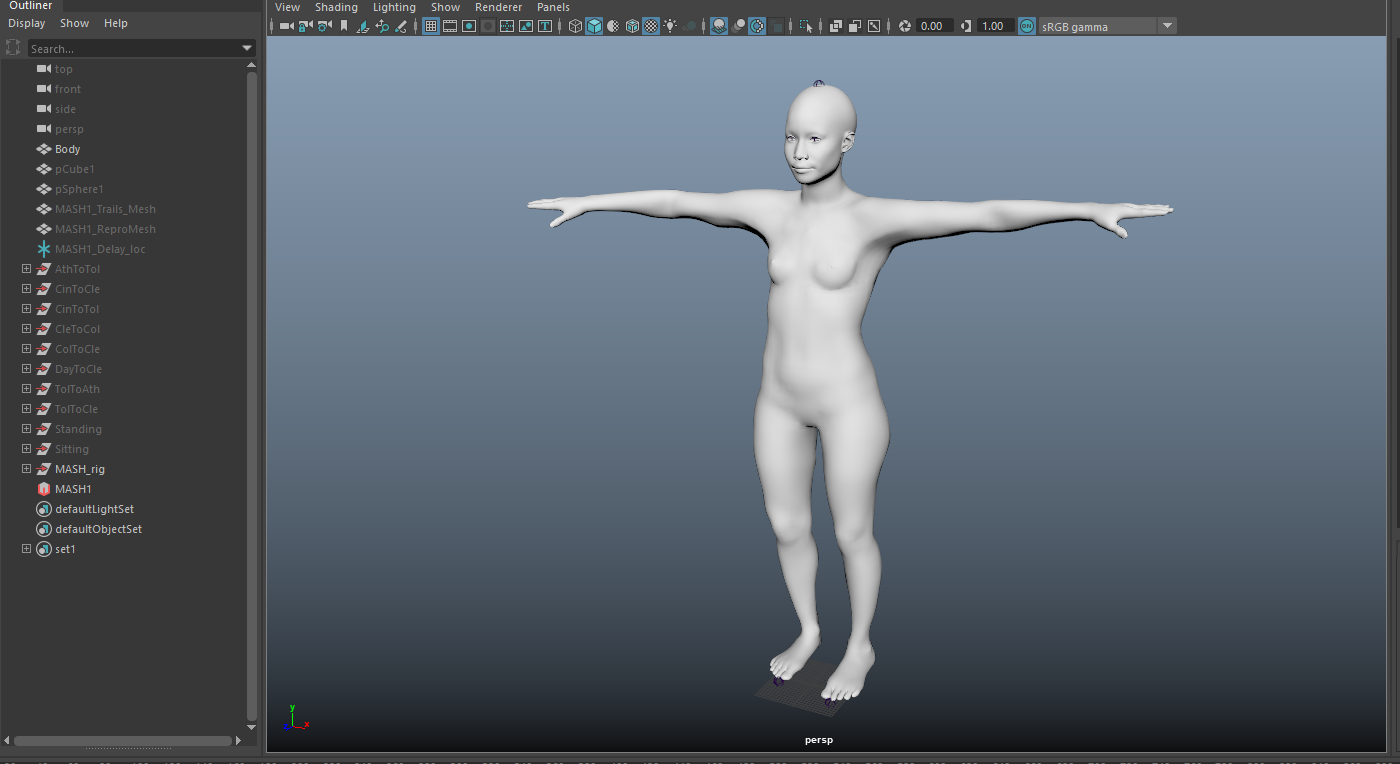
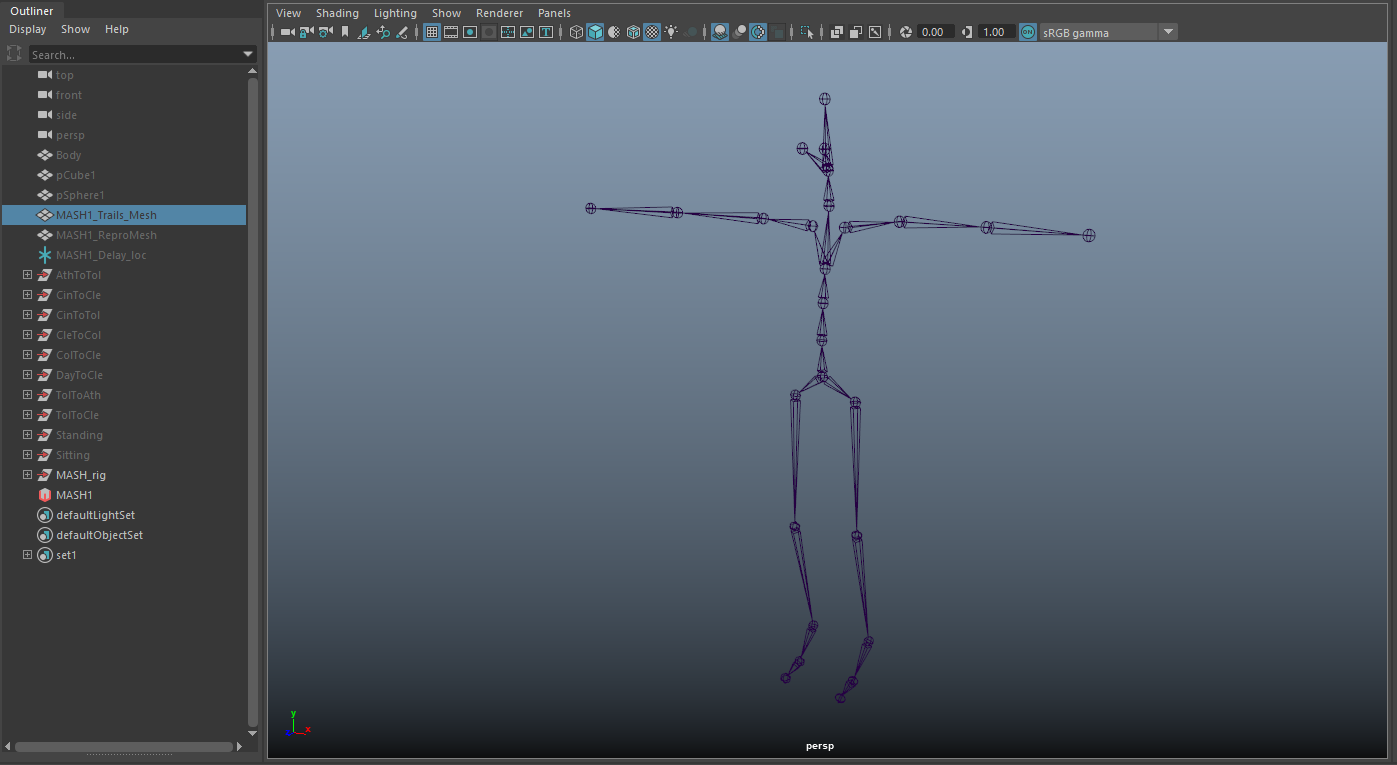
After creating the paths that would be used to compliment the dancers, I went into Adobe Fuse and created a base character to be used as a container for the procedural animations that were initially proposed. After creating the character, I sent it to Mixamo for a quick rigging solution. Using this rig, I went into Motionbuilder and attached the Mixamo rig to the motion capture animations.
There were some tweaks to be made to the "reach" and "stretch" factors of the rigs, but this wasn't necessarily as important since the form of the body was abstracted. This allowed me (rather than having to completely match the body to the mocap data), to transfer the mocap animations to the bodies of the Mixamo character and easily interchange them as necessary. I cached the files for moving onto the manipulation stage of deforming the geometry to "grow" out of the ground plane.
Pt. 9:
After using the mixamo characters and the separate mocap sessions as a base, I was able to easily interchange the procedural animations using the MASH setting within Maya. There is the ability to control how many points, how to interconnect the trails, and how to animate them over time. Adding in a 'noise' factor to the mix, the trails and positions of the points moved around to their own accord. Below is an example of different tests including the mocap data, mixamo rig, and different tests using the MASH pipeline.
While not all of the paths were used in the end animations, it was a good way to test the capabilities of the MASH pipeline and how quickly results could be created from such. Below is an example of how fast I was able to interchange the different uses of MASH plugins. I created a basic cube, applied the MASH node, added a signal, scattered the MASH node over a specified geometry, animated the base geo, and futzed with the settings. The use of this pipeline has many other possibilities, including color, physics, motion trails, animation delays, and distribution among a path (and much more).
After this, I took all the geometry data from the paths and the bodies, and the deforms, and cached them so that they would be a solid file that could be used for rendering later. This also allowed me to create individual textures and distribute the paths among desired locations rather than having to switch between them in different Maya files. I will say, though, that once you work on a certain machine, it can be hard for the ram to re-read the paths in the correct location. Make sure you know if you're going to be working on a dedicated machine, otherwise if you attempt to load the alembic files again they will be in a different position.
Pt. 10:
Using these cached files (mentioned in Pt. 8), I had to do multiple tests with how to deform the geometry to appear out of the ground and disappear back into the ground. This dealt with using different curve & flare deformers, and animated the both of them to make it look natural and not manipulated in a visually harsh manner. With these deforms, I also animated the number of points on the bodies, starting with 0-750-0, making an animated graph similar to a bell curve. 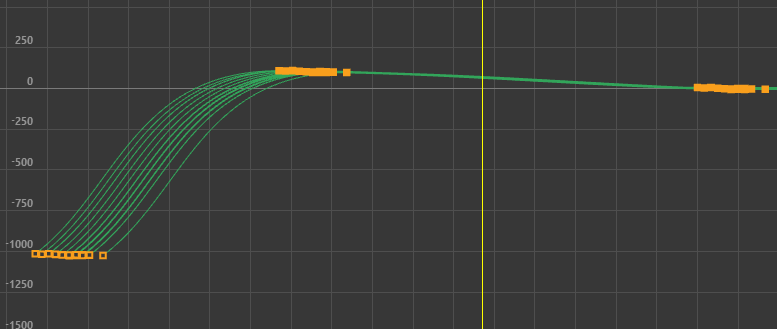
I moved onto animating the camera after having all of the paths laid out. This included creating a camera with an 'aim' to control it's focal point. I used a curve to attach the camera group along a motion path, and a locator along the other path. I then point-constrained the aim of the camera to the locator, allowing the ability to easily visualize and change both the camera and aim over a set amount of time. Below, you will find an example of this process, as well as the separate tests of the paths using this technique to follow the motion of the dancers and their trailing elements.
You might notice that one of the paths actually has a "bouncing" look to the motion. This is actually a post-wheelchair motion added to that of the dancer. I created a nurb circle, attached 4 more to the edge of the wheelchair, about the predicted size of the wheel while animating the motion alongside that of the dancer. I used the animated sweep option on the 4 circles along the edges, extracted the isoparms, extruded the polygons along the curves, duplicated the motion, and re-inserted the motion into the original deformation hierarchy.
Pt. 11:
Currently, I am waiting for the moment to create textures and hit "render" for these separate paths of motion. But for the moment, here is an excerpt of the beginning camera motion that reveals the map of the US.
Pt. 12:
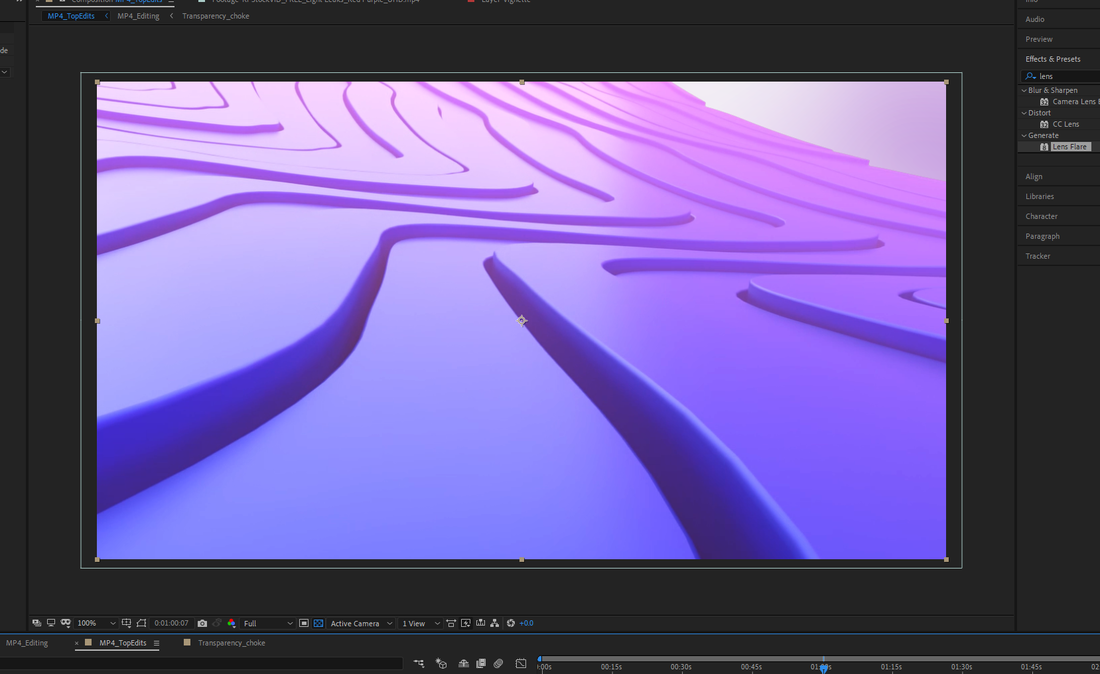
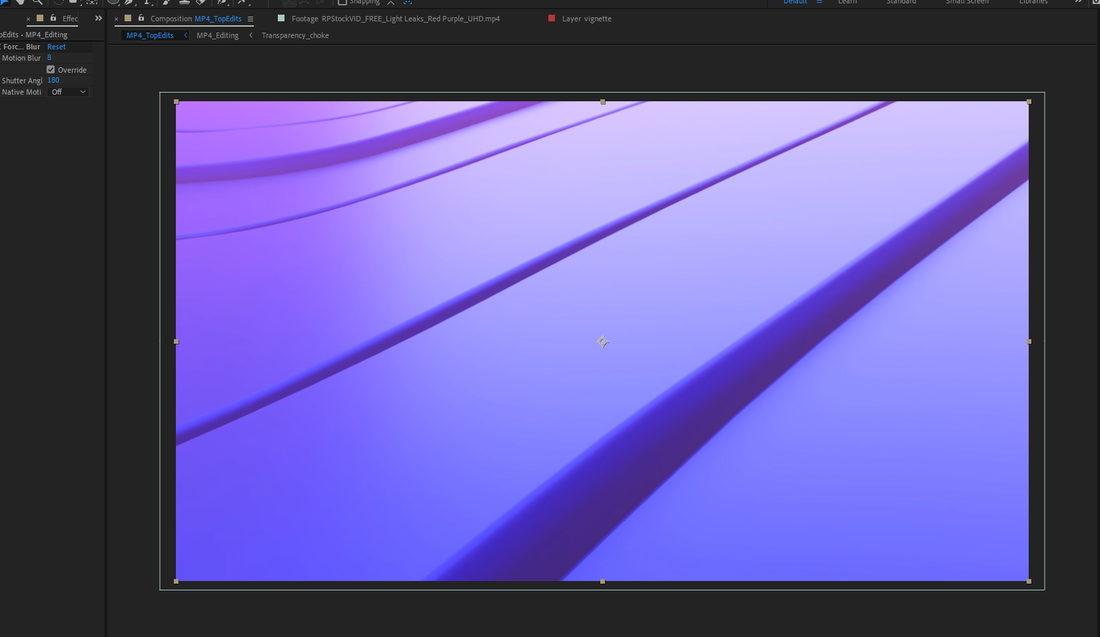
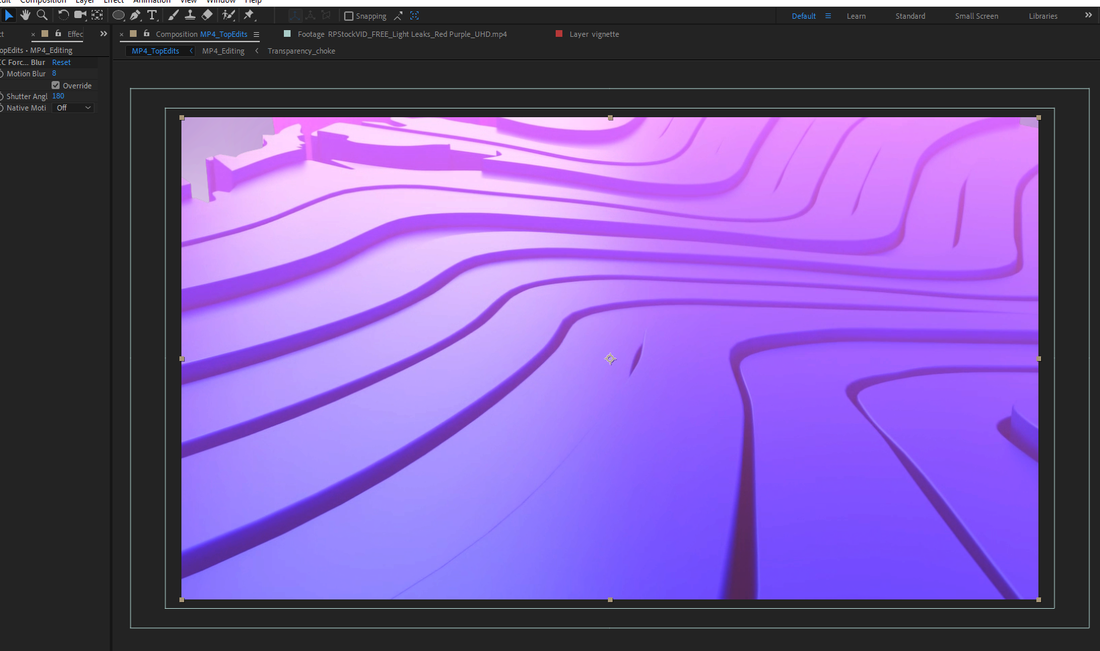
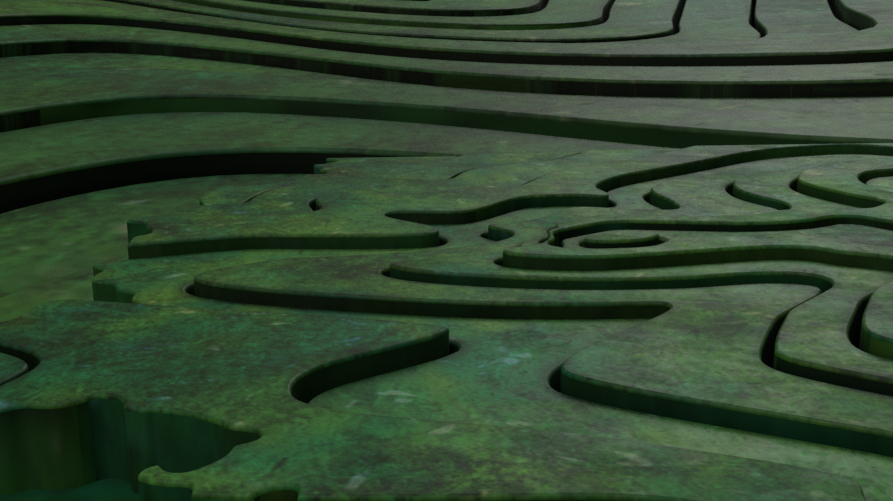
After some deliberation between the media designers, we have decided to move in a different direction than that of the animations already utilized. We're making changes to the animations themselves, focusing more on the motion and less on the "swooping" reveal of the lines that the dancers create. We're also considering moving towards a more "grassy/dirt" feel for the map portion of the animations. We're now working on numerous tests to have Ohio more prominent in the full scope of the project. Below are some screenshots of the newly redesigned landscapes and possible textures for the dancers/trails: 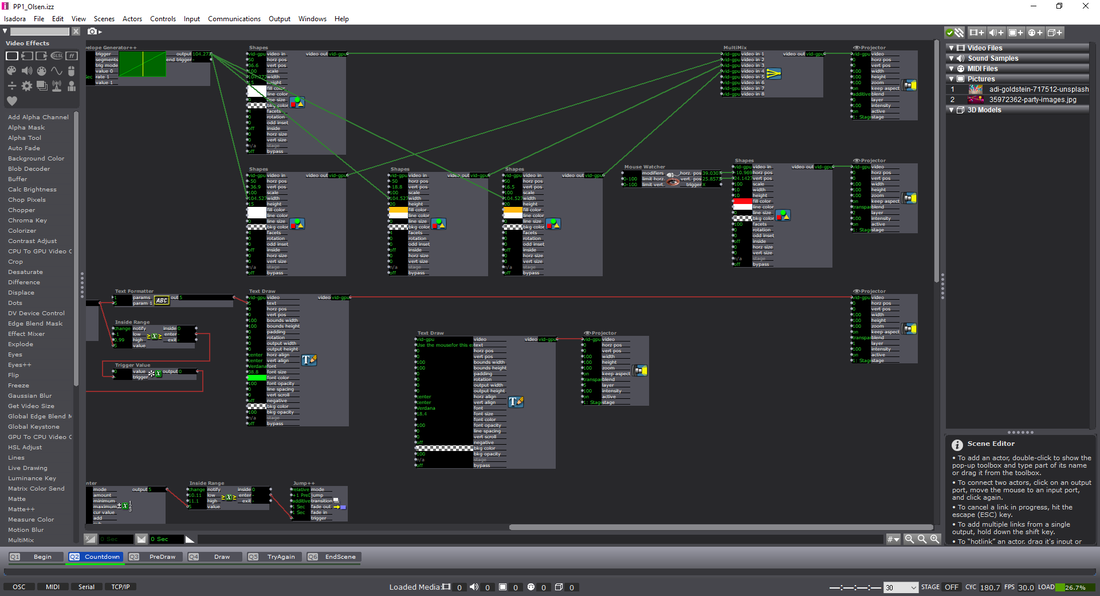 Isadora Visual Programming Example
For this pressure project we had 4-hours and some “goals” to attempt to achieve: 1. Someone laughs 2. Maintain surprise for more than 10sec 3. Maintain surprise for more than 30sec 4. Picks up a number between ‘1’ and ‘5’ and reacts Ideation Initially for my Pressure Project I decided on 3 different scenarios:
The way I spent my time for this pressure project was as follows: Hour 1: Ideation of the different scenarios Hour 2: Setting up the different scenes Hour 3: Asking for help on ‘actors’ I didn’t know existed or how to do certain things within Isadora. (Thank you Oded!) Hour 4: Playing, debugging, watching, fixing. Process: For those who are interested (and for my own reference) here’s the list of actors that I used within the patch:
Feedback: (sorry I haven’t learned everyone’s names!)
–Izzy patch could use more of a choice for what color is used to draw on the screen. –The clear instructions to push certain keys and what was going to be used for the experience was a good touch. –The sense of urgency was nice. –Fix the small bug where if you restart the experience it jumps to the end without letting the user draw. –Change the color countdown on the draw screen to something more noticeable (white?) Response: -I think this was a wonderful experience. I haven’t ever considered the idea of a ‘pressure project’ before. But after working through, I am excited for the next one! My approach was pretty straightforward in terms of design process: Ideate, Create, Test, Fix, Test, etc. -I think next time I will have more people try it before I get the chance to present again as I only had one other person attempt the experience. But, this showcase actually helped me find the bug in my system as well! I couldn’t find the time (or the solution) to why it was happening, but it shows the power of ‘performing’ your piece before the final show to find any errors. -I’m grateful to have seen everyone else’s project too, and I also appreciated being able to look at the ‘guts’ of their Izzy patches. I learned a few new things in terms of using ‘User Actors’ in an effective way–as I didn’t use any in the first place. It was unfortunate that I couldn’t connect up a “Listener” actor correctly in the end, but the only state change would have changed the ending photo. Regardless I enjoyed working on this, the experience, and the feedback from my peers. -Tay Approach: Well it was the last week of my independent study and I know that i won't be able to finish the animation in time--but that's okay! I want to keep working on it as I see fit; and unfortunately I have found more and more errors in the seamless-ness of the animation that I am attempting to create. It's made a good amount of headache for me to go back and fix all these little errors, but every time I fix one I seem to find another. Oh well, such is the life of an animator! Choices Made: I think that for this next week and the following few weeks of the summer I'l be continuing to animate this piece for myself. I want to see it through, I think right now is a matter of fixing the small issues so that I can actually move forward. Some things I learned from working in loops:
Inspirational Sources: I really can't get enough of Ori Toor. His animation style and his tenacity to figure out how using a small piece of animation can become a larger entity is always intriguing. If I look here at this animation, I only see about 9-10 different loops, but layering them in a way with a slight offset in the timing of the animation makes it look almost like a living/breathing creature.
Next Steps: I will be continuing my work with the animation if I find more time during the summer to do so--it will probably become a weekend project depending on how it has been going to far. I am really pleased with the amount of progress that I have completed with it, and the information from the sources that I initially proposed have proven pretty useful in working towards sources for my thesis; even though the animation in this project doesn't necessarily pertain to my thesis-it was more an exercise in experimenting in loops. -Taylor Olsen Approach: This week I became that much closer to the section of the song that has lyrics in it. I know this isn't as far as I wanted to be at this point, but having lyrics can drive the animation as well, so this is good to have at this point too (seeing as I feel like I'm running out of 'shapes' to work with that don't take up too much of the screen). Choices Made: This week was just a good amount of working through Photoshop woes. I had some issues with layering within the program where I would duplicate or draw on the incorrect layer for a set amount of frames--I would then have to delete these frames and start over. Or, I would begin an animation of an object on the incorrect layer and finish the animation of another object on a layer that was 10 frames before; this makes everything line up incorrectly and breaks the visual flow of the objects. I would just tell myself 'keep going and fix it later', but having everything fall in line correctly beforehand is vital to the rest of the animation working. Inspirational Sources: Questions Raised:
Next Steps: Keep working on the animation and finish up the readings! I'm excited to continue working on this knowing that I won't have a time-crunch on when it is complete. I consider it a test for my technical skills as an animator and an artist too; I learned a great deal about loops and considering all the different ways that we can visually manifest new forms that are either recognizable, entertaining to look at, or just there for motion. -Taylor Olsen Approach: This week I unfortunately became ill and had to make a trip to the hospital. So, I spent most of the time recovering and doing readings for the week. Because of this, there's not much to say in terms of progress on the animation, but more the theoretical side of sound and animation information. Inspirational Sources: Though I didn't make progress in animation, I did find a number of inspirational videos that will help to elucidate more ideas out of my animations to come. Some are from are from past animators, and some are from present animators.
Next Steps:
This week I am still recovering from being ill, but will be vigilant in continuing to animate. From the progress I've made, I am not sure that I will have time to finish, but will have a rough outline of the animated shapes synchronized with the music. 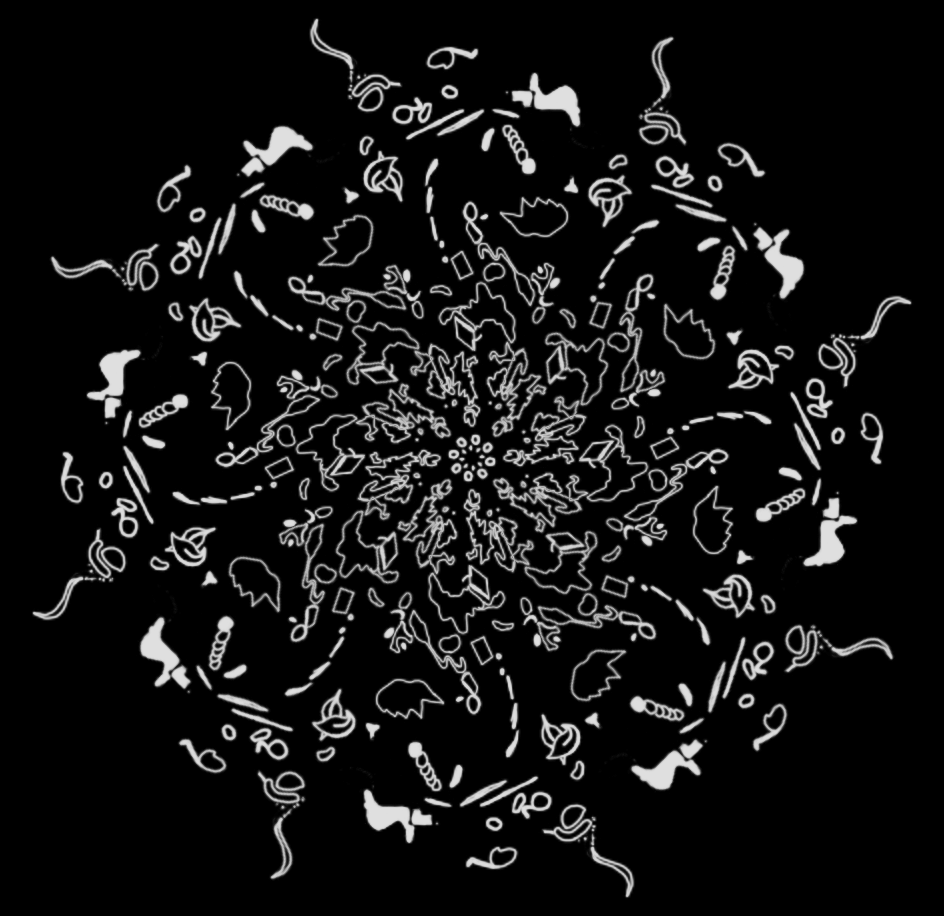
*Animation still from the test composite for BBNG "Time Moves Slow"*
Approach:
This week for my animation I decided to test out putting together the introductory title sequence and compositing all the pieces of the animation into a whole piece. The resulting animation in my opinion is very nice to look at. It's mesmerizing and makes me very pleased to see how this will eventually become larger than it already has become. Choices Made: I believe there are 8 separate pieces to this animation. Though they are not perfectly aligned in the center, I think having a small gap between the pieces makes it easier for the eye to discern what section belongs to what piece. I added a layer of white to the animation itself on top of the black to easily see what was happening to the shapes. Now, for the video itself, I am wondering if I should stick with a traditional 16:9 or 16:10 aspect ratio, or just do a 1:1? The frame itself of the animation is a large circle, so this might make more sense in the end. LINK // BBNG - TestingAnimation Inspirational Sources:
Even though this is a 3D animation, I appreciate the amount of work that went into the timing of the assets, the background composites of the clouds, and the nice typography that accompanied the animation. The color scheme was also well chosen, giving a good amount of contrast for the shapes to stand out from one another.
Next Steps: I'm feeling pretty good about my progress this week, I have a feeling it will take me past these 8 weeks to complete this animation, but that makes me more excited to keep working on it! I'll also be continuing my proposed readings and notating them as necessary--most of the them seem to be helping so far. -Taylor Olsen Approach: For the week I continued to animate. There's not a whole lot to say in terms of textual-context, but the animation itself is coming along. There is a number of different avenues I can go down in terms of the number of forms to work with on the screen -- though this does cause some headaches with trying to keep track of all the different objects. I've also been notating my readings and I will be using them for later thesis writing. I mainly just want to get the gist of the information out of the sources and find more resources that might be even more helpful than some of my more outdated sources. Choices Made: I know that last week I mentioned I would be working with purely non-objective forms, but I decided to add in more solid forms that make sense to the audience. Mainly, it's just foliage right now as I am not sure what other forms should be involved (perhaps I should take a look at the lyrics of the song), but I am really enjoying the variety of movements, shapes, and explorations from this process. I will be uploading an in-progress video soon, but for now I want to keep it as under-the-radar as possible. Inspirational Sources: I want to consider how color will play an effect on the animation. Though, based on the video below from Ori Toor and Animal Collective, the song is much more dynamic and seems like a necessity to show color rather than not. My animation is focusing more on the forms that are present rather than the color. It's also trying to incorporate the 12 principles as non-objective perceived motion. *Ori Toor - Animal Collective - "Lion in a Coma"* Next Steps:
Keep animating, keep reading, and keep going! I know this is only a single-credit independent study, but it feels like I've been doing about the same work of a 2-3 credit course. I might need to dial it back in order to feel like the amount of time I spend on this is appropriate. -Taylor
Approach:
For this week I began with laying out and experimenting with some rough animation. I'll be getting to reading the articles later this week, as I spent most of my time animating content for week 3. Below is the animation in it's current form. As you can see I spent time trying to get as much as the path complete that I could for the sake of having time to add more depth/line-work later. I also knew that I wanted the complexity/amount of forms to increase over time, though I now consider that going back to do this how much of it will matter. Choices Made: For the animation itself, I decided to stick with non-objective forms and wait to use those until the lyrics begin. For the moment, I only allude to some basic foliage within the animation (I think it is a leaf or two). I also kept a list of frame numbers for myself to reference when the beat of the song had a strong indication that it could line up with the animation. I believe there is a part where a form separates into four individual blobs and lines up with the strumming of the 3 guitar chords. Inspirational Sources: This week I found a video that I thought was a more typical approach to the creativity of letting the music influence the visuals. I think they utilized color and composition well, though leaving the forms in the direct center of the screen can sometimes become dull. If the ability of the entire screen is available, why not explore other parts of it?
Questions Raised & Needs:
The only question that I have for myself is how representational I want to get with the animation. If I continue on a 10-frame loop path that builds a form over a span of 100 frames, it becomes a little dicey in terms of changing the flow of the animation after this -- as the form is always present throughout the rest of the animation rather than changing/morphing. Next Steps: My next steps for this week are to read as much of the articles as I can, notate them, and determine whether or not they're relevant to my research. I'll also be doing more animation and hopefully hitting the halfway point on the total amount of frames I'd like to accomplish. Getting to the part of the song with the dialect will help with representation within the animation. -Taylor Olsen Approach: This week I decided to go back and evaluate what I would have enjoyed about working with my proposed songs. I found that they lacked a strong repetitive depth to them, and often had too many instruments and/or vocals that would detract away from the animation being played. I searched for another song and stumbled upon one by the band BADBADNOTGOOD:
Choices Made: For the music choice, I realize that I wouldn't have time to animate over 3-min of content so I ended up trimming the song for a more reasonable goal. The full piece is about 1:45-sec. I went about creating the initial template for the piece that would be a growing radial pattern. After realizing that I could section off the other parts of the animation, I decided to cut a slice of the full radial pattern and work with this as a piece of the whole animation. After I create the animation, I'll duplicate and arrange them together in the center to create an almost 'madala' effect. I plan on slowly trucking-out from the imagery in the center as the song progresses.
Inspirational Sources: TBU Questions Raised & Needs: TBU Next Steps: TBU
Approach: This marks the first blog post for my single, 8-week, Independent study credit. Attached above is the outline for the study, and what I will be addressing and creating. To sum up the requirements I've set for myself:
Choices Made: For the music choice (for the animation project), I decided that I wanted a more slow and somber tracks, reflecting the growing nature of the animation from small parts to an encompassed whole on the screen. I also decided to skim most of the articles this week and highlight parts that I need to go back and record. I will attempt to either compile the sources together with all of the highlighted content or to respond to more specific sections from the pieces of the articles. Inspirational Sources: Below are the two [current] sources that I decided to use:
Questions Raised & Needs:
Next Steps: Keep reading and begin to work with creating a layout for the animation. I will also be continuing to compile notes and will be interacting with my adviser about my progress and keeping them updated through my blog posts. 
*The Illusion of Life - Essays On Animation - Edited by Alan Cholodenko*
Phase II Updates
Approach: Because of the issues from last week put me back somewhat on my proposed timeline:
Choices Made: I began small with attributing the numbers (after they had been scaled to a frequency) into a 'cycle' object. This will, instead of how I originally had it with pure MIDI tones, give a broader range to the already-received values from the data, partially eliminating the 'jumping' between notes. I also realized that when it wasn't 'playing' something on the screen, it was also attempting to still output a MIDI note -- if I listened closely I could hear consistent 'clicks' coming from the patch, meaning it was still playing even though I had told it to not play until it recognized that there was an object in front of it. This week I also went back to basics with building the patch and got to incorporate the size of the blob attributed to the amount of amplitude it gives off (this method of getting the size had been found in the previous weeks, but I couldn't get it to work up until now). I tested this using a growing/shrinking circle that would be 1:1 with pixel space on the screen and the amount of amplitude outputted. I threw in a couple of other circles to make sure it still recognized multiple objects on the screen. I investigated a patch as well called HS Flow that incorporated the detection of movement between subsequent frames. I want to further this use and make it so I'll have a version of my work that only updates/turns on the Digital Audio Converter (dac) object when it notices movement. I eventually got the color tracking working as well, but the actual use of this seems like it may not be beneficial to me yet. I wouldn't know exactly what to attribute it to, as I doesn't necessarily have a big factor in what I am doing. Part of the issue with this patch as well, is that it has to be 'set-up' to find certain colors in an area, not lending itself to automatically matching the colors in a scene. I think this would find it's use somewhere in the future, but for now I don't imagine it helping me as much as I thought it would. Another issue is that lighting conditions are constantly different in multiple settings, and wouldn't yield the same results as other settings that are dimly/brightly lit. Inspirational Sources:
*Using Color and x/y Position as pitch on/off music tests*
List of Interactive ways to create Instruments
During the class discussion, it was mentioned to me:
Questions Raised & Needs:
Next Steps: When I talk to Jessica and Janet, I want to remind them that I am interested in the idea of these projects becoming useful in the medical field, but it was solely created first as a tool for the artist, and that's what I'll be focusing on. For the patch, I'll incorporate more steps into the patcher itself regarding blob elongation/direction. I've also been given some Kinect patches from Matt that I can utilize and experiment with over the summer. I'll be investing more ways of current audio/visual readings and examples. I've begun using p5js as a function for coding sounds as well. -Taylor Olsen *Above you'll find some screenshots of the different modules needed for scale distribution, dimension allocations, poly objects for multiple sounds, etc.* Approach:
I took the main considerations of last weeks Open House and attempted to implement any comments that guests may have made about the patch itself. Some of the comments I overheard while individuals were interacting with the patch:
Choices Made: This week I pushed more of the comments from the Open House into actual results. Up above in the image slideshow, starting from the first image:
Inspirational Sources: This week I've continued with reading Chion's "Audio-Vision." The book is fascinating, and I sincerely can't believe that I hadn't found it before. He does reference Walter Murch, a famous sound engineer, who gives a wonderful foreword and sets the mood for the rest of the book. "We gestate in Sound, and are born into Sight. Cinema gestated in Sight, and was born into Sound." -Walter Murch Questions Raised & Needs:
Next Steps: The motto for this week, for me, sounds like this: ---Conceptually, it's easy! But, easy concepts usually have the most complex underlying potential just waiting to be tapped into. I'm excited to see where this project goes, and I can't wait to speak more with Janet, my friends and family, classmates, and any others who have insight. I'm going to miss having this semester end, but I'll be glad to have more free time to work on the things I enjoy - including this! -Taylor Olsen  Approach: This week was the ACCAD open house: a wonderful time for research projects, students/academics, and the general public alike to come together and appreciate what the DAIM and DRD track at Ohio State have to offer. I spent more of this week preparing for the installation and presentation of my project rather than the actual project itself. But. the open house gave me a new appreciation for what I was doing. Seeing everyone enjoy and experiment with my "Visual Audio-izer" created innumerous conversations between physcial therapists, and installation artists the like. One such individual, Janet Weisenberger, who is affiliated with physical therapy and is a speech and hearing science professor, suggested that the work could be used as a means of helping those who're in need of music therapy in an unrestricted environment. Using it would be another means of informing a patient how they're moving their body in a sonic setting, rather than having to focus solely on coaching of a therapist. Choices Made: This week I did more research into the different researchers behind sound settings within the animation world. I went an re-rented Paul Wells', "Understanding Animation", and chose to copy those pages as well. Below you there is links to the full Chion document and Deutsch aspects of synchrony in animation. I figured out this week how to get the amplitude distributed among selected objects depending on the screen space it takes up. This means a value of 1000px out of 3000px would produce 1/3 of the total amplitude allowed out of the speakers. Many people also noticed that the feedback was a little slow--I'll have to look into this, but I think it's because the computer is located in a different room, and the usb-connection to the webcam is on a connection-splitter. I also considered that I should have the webcam on the ceiling but found that I didn't have a long enough cord/way to prop it up there. During the open house though, Oded (a theatre/dance specialist at ACCAD), said that he could help. I'll be asking him soon for this. Many children liked moving around the space as well. They enjoyed the small lights within the paper boxes that simulated the sound. A good amount of adults also became curious of how it worked. I usually just explained that the box was the catalyst that activated the sound, and it noticed the light within the room. I would sometimes pull out my phone and use it as an example. The screen or the light from the flash was noticed as an object. ---Once I left for a few minutes for a drink/restroom break, and came back into the sound room and had a group of six people shaking the cubes and dancing randomly throughout the room.
Inspirational Sources:
Using the Open House as a means to find inspiration within the work that I've done, as well as my other classmates and people of ACCAD, made me appreciate again how hard everyone works towards their projects. I feel as though the general public is very welcoming of everything we do. just being able to hear, "Oh, this is cool." as subtle as it is, has an effect on the one who made the piece they're experiencing. Questions Raised & Needs:
Keep working towards having the ability of a better sound to be translated. Use the amplitude and scale attributes as synonymous relationship. Making the ability of the patch to notice multiple objects within the scene. -Taylor Olsen
Approach:
This week marked the beginning of the next 4-5 weeks of further developing my visual-audioizer project. I also spent time this week working towards writing for a Graduate Fellowship (pg 14-15): Link: Global Arts & Humanities Brochure Attached above is the paper I submitted, as well as the current project proposal for the next few weeks. During this week I also attempted to find more scholarly articles dealing sound and animation - it's been somewhat difficult finding any relevant information that could be used towards my research. I seem to keep returning to Paul Wells, Normal McLaren, Peter Greenway, and recently found Rebecca Coyle. I also took this week as a chance to familiarize myself more with the topic I'm working with. As stated in my previous journal, I decided that the relationship between my sound and visuals should be reliant on each other, rather than equivocal/synonymous/related. Choices Made: This week I decided to further evaluate how to split up the amplitude of sounds within my patch. First, I had to determine the width/height of the composition that the patch was rendering and send that information to the synthesizer. To clarify: Find/Set the dimensions of Video/Webcam >> Find/track the blobs on the screen >> find the total number of visible blobs on the screen >> send this data for individual blobs to Scalar value >> attribute this to a number and eventually an amplitude adjustment >> attribute this to a divisional operator that equally distributes a total amplitude range to total amount of pixels noticed on screen >> output data to synthesizer that equally shows the correct blob on another screen. Easy enough, right? Inspirational Sources: Unfortunately I haven't had the best of luck when it comes to finding information about the subject. Most of it is dealing with experiments that individuals have gone through, but not about the synonymous/ambivalent relationship between visuals and audio. I find one by a woman named Rebecca Coyle who examines animation as an audio-visual film form but she instead focuses more on the importance of sound within animated films. Link: "Drawn to Sound" A quote from her article (pg. 4): "Sound cannot be freeze-framed in the same way that images can be presented on the page, despite the best efforts of musicologists to capture dynamic elements by notating melodies and arrangements. Sound is constant movement." I love the ending sentence about sound being "constant movement", because in a literal and figurative sense, this is true. Sound is only created in an environment in which motion is possible and noticeable. If we as a person were able to move our hand back and forth in front of our faces quickly enough, we would eventually create a sound in front of ourselves. In this sense, just clapping our hands creates enough of a vibration for us to hear, as well as us stomping our foot. All sound is created by motion, but not the other way around (I think). This article also has a slew of other references that I will be eventually addressing and finding a stronger connection between the relationship of audio and visuals in the animation realm. Questions Raised & Needs:
Next Steps: I need to do a little catch-up in terms of creating the synthesizer (as mentioned in my previous post). I have started re-working what I already had, because the previous way that I was attempting to implement it was through having all the values simultaneously work through the synth before it would output a sound. I need to have some set values already so that I can work with the synth, and pre-determining these before switching them out with dynamically changing values will help with the creation of a more coherent synthesizer. -Taylor Olsen
*Prototyping example from a screen-capture using the blob-tracking linked to audio output.*
Visual Audioizer - Google Slides
Approach: This week I decided to focus on interactivity for a user's body in some way. Though I didn't think it came out the way that I initially intended with the use of the webcam. I realized through experimenting with what objects it noticed, I could either use a black-on-white or white-on-black array that would give me opposite results of the objects noticed (changing a "<" to ">"). Knowing I had the ability to do this I decided to create a few different tests to see how the interactivity worked. Above you'll notice that the patch is reacting only to the visible 'blobs' in the room, it has the ability to notice a change in position as well. I knew I wouldn't have time to incorporate the RGB-data this time around, but I'm hoping to continue working on this project for the next couple of weeks. I realized that changing the size of the rendered area will also yield different results. This makes deeper/higher notation for the sound output. Choices Made: Regarding the black&white or white&black decision: when I used the notation of black objects, I would draw a small dot on a piece of paper to test and place that where the webcam was noticing it as a single object. For the other (and the video above) I went into a dimly lit room and eventually shut off the lights. Afterwords, I placed a small paper cube over the flashlight on my phone and used it as the only 'noticed' object in the room. if I had my flash fully lit in the room, it would mess with what the webcam was seeing. I suppose finding a dimly lit object (a glowstick, orb of light, glow in the dark bouncy ball?) would work better with the current settings. Even eliminating any small objects within the view of the camera (lights on the speakers in the background, reflections, etc.) would aid in the detection of the main light source. 
Inspirational Sources:
Above is a few quotes and the reasoning behind this 5-week project from a few animators that I seem to keep coming back to. Just like I've come to question, I'm not sure whether or not the imagery/music side is more important in this relationship. The idea that I've been thinking they're in an equivocal relationship is all wrong; I should actually be assuming their relationship is "reliant" upon one another. This creates a whole different feeling rather than having the assumption that I have to make one better than the other. I want to design the patch using both as a means of testing each-other's capabilities (and adjust after) rather than letting one become much more interesting than the other. -- A way I've considered doing this is somewhat similar to drawing a face: one shouldn't draw high detail in one half, but rather take steps on both halves of the face back-and-forth to create and equal relationship between the two. 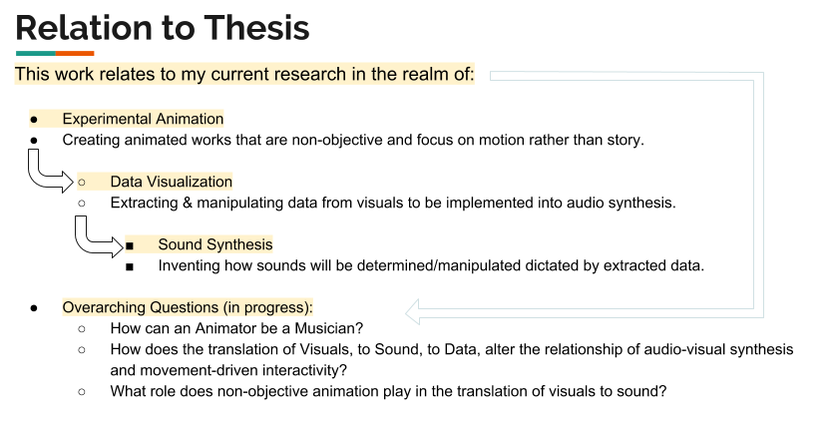
Questions and Next Steps:
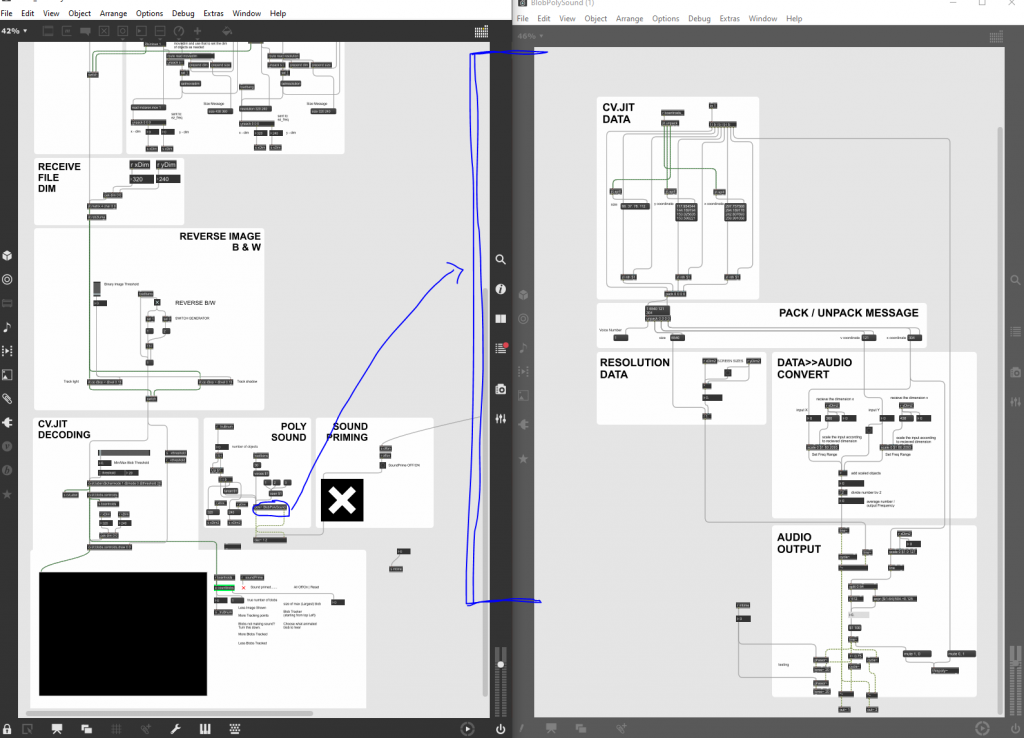
Above is an attempt to show the relationship to my current research topics i'm exploring. This includes: Experimental Animation, Data visualization, and Sound Synthesis. For my current questions above, I think I've yet to come close to answering/showing an example for how an animator can be musician, but in the sense that I could create individual pieces of movement for each sound in a piece of music. I could also do the same and orchestrate something related to body movement, but that will be something to experiment with in the future. 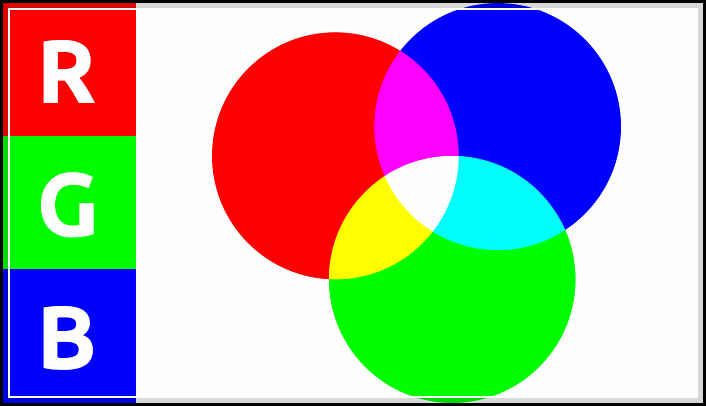 Approach: This week I concluded that I have more availability in terms of data collection using patches withing Max/MSP. I wanted to approach this week with understanding that I can take out RGB/greyscale values out of the video process, but it took a while of digging around the internet to find some proper cv.jit (computer vision) videos regarding the process. I also wanted to organize all the elements of the patch itself to make better use of organization elements within Max's visual layout. I also wanted to approach creating a more stable audio patch for the program and build it up piece by piece, rather than make it more complicated than it needs to be right off the bat. Choices Made: I chose to focus on finding reference information and video examples of finding grey-scale/rgb values for this week. We also presented our in-progress work to the rest of our graduate class; I realized that I am a little behind on my schedule but I'm staying on track to have more completed over the break at hand. I want to get the synthesizer built up this week as well as plug in and test different variations of values in terms of change in direction/movement speed. Inspirational Sources: Here are some of the video sources I found below:
The videos above a great examples of using the cv.jit functionality coupled with an RGB screen reader that each respectively could be utilized for my patches. I might heavily consider that because I have more control over one object, that I could create pre-rendered compositions with one solid object as the focus. This allows me to compile tracks on top of one another, and create a composition of my own.
I have also considered the implications of having this patch used as a means of creating unison between dancers. For example, if there was an overhead camera tracking their movements and their hands, elbows, shoulders, were different colors would there be a way for the dancer to hear the unison between each other dancer they happen to be working with. Factually our senses, and in this specific case of hearing vs seeing, we're much more able to hear differences in pressure (sound) than we are with light (visual). There could be different color patches on their shoulders, elbows, knees, etc, to indicate to any computer vision software the extremities of "one" individual. Questions Raised & Needs:
Next steps: My next steps are to keep working within the bounds of data that I can currently collect and assign them accordingly to what I think/will test what is proper values for the synth. I'll begin by building up first the frequency, then move onto amplitude, and amplitude envelope. |
||||||||||||||||||||||||||||||||||||||||||||||||||||||||