Approach & Proposal:
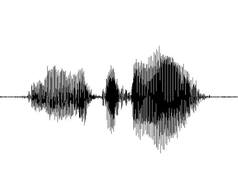
We’re used to seeing music visualizers and how sound is translated into imagery. And while music visualizers are visually impressive, I am interested in reversing the process of translating music into visuals. So, I began to explore the visuals creating the sound, rather than the sound making visuals. Link to original proposal: 6400 - 10wk Proposal Link to final presentation: 6400 - 10wk Presentation
Choices Made:
Part of the interest in pursuing this idea came from animation theorist Paul Wells: "Experimental animation has a strong relationship to music and, indeed, it may be suggested that if music could be visualized it would look like colors and shapes moving through time with differing rhythms, movements and speeds...Sound is important in any animated film, but has particular resonance in the experimental film, as it is often resisting dialogue, the cliche sound effects of the cartoon, or the easy emotive-ness of certain kinds of sounds.” - Paul Wells Working with looping animations as well as non-objective forms was the best way to determine how sound would be affected in the final program output. I found a few references online on how past animators such as Norman McLaren would create sounds in his animations.
*Loops created as part of an older project.*
*Below is examples provided from Caleb Wood, the creator of the concept of "Weaving Loops"*
Link: Weaving Loops 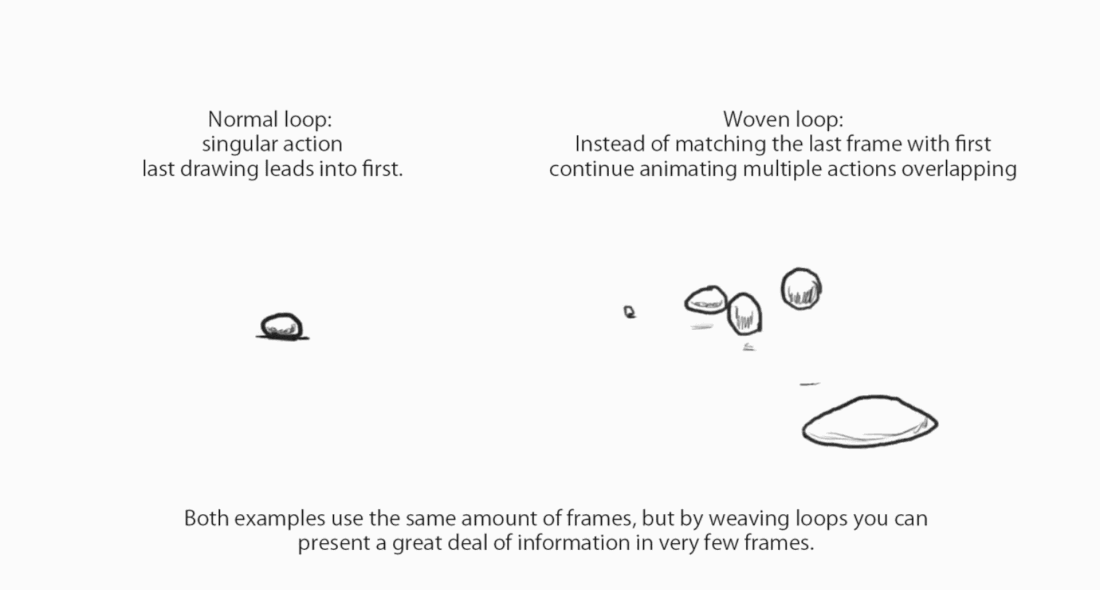
I found that having control of the animation, I could essentially control rhythms, beats, colors and transparency dictating sounds, etc. Paul wells went on to say,
“[Abstract] Experimental animation either redefines ‘the body’ or resists using it as an illustrative image. Abstract films are more concerned with rhythm and movement in their own right as opposed to the rhythm and movement of a particular character.” Paul Wells then quotes another animator and theorist [William Moritz], “Non-Objective animation is without doubt the purest and most difficult form of animation...inventing interesting forms, shapes and colours, creating new, imaginative and expressive motions…”
When Norman McLaren drew the sounds on the film, I thought that I had already been beat to the punch; but what I learned from McLaren is that he merely drew the sounds, but didn't use them as a visual in his animation. --My process wanted to take an animation and analyze it real-time, and output sound variables based on size, position, color, shape, elongation, etc. This would include testing some different methods of creating these visuals.
Another method explored is from a man who goes by Jerobeam Fenderson. He utilizes Oscilloscopes to create the visuals for his music, but not necessarily in a true way that "what you see is what you hear". He creates the lines out of sound waves, and manipulates them to create the shapes, then software to multiply and change the beats.
What Jerobeam does is utilize the sound from the oscillator to create the lines and dots, and eventually imagery in his animation. The sound is already being produced. So, what we hear is what we see in his videos. I was interested in a process that is reverse of what Jerobeam does. This included taking the animations, and have sound outputted from what motion or imagery is seen. What we see is what we hear.
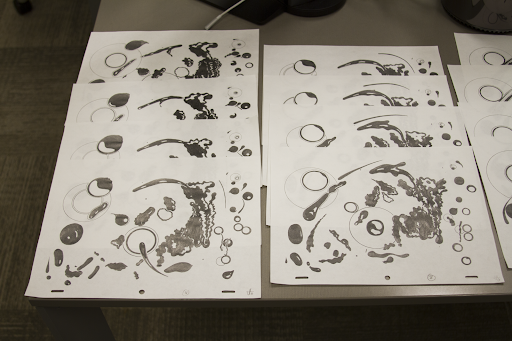
Initially I ended up working on some looping animations for one of my old classes, and eventually decided to move to a physical medium to see how this affected the process of creating them.
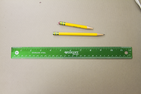
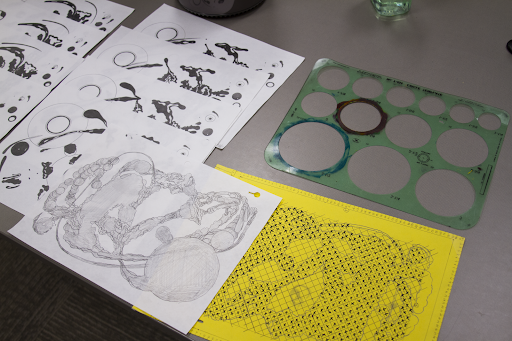
*Stencils, rulers, paper, and Ticonderoga 2B pencils.*
*Influenced by Adam Beckett, Ori Toor, and Caleb Wood.*
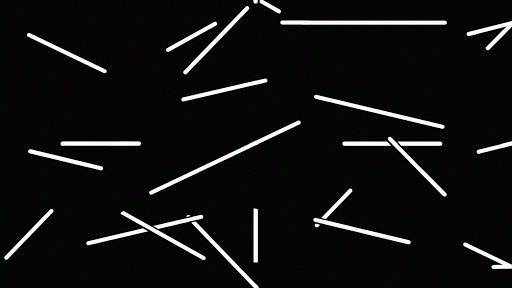
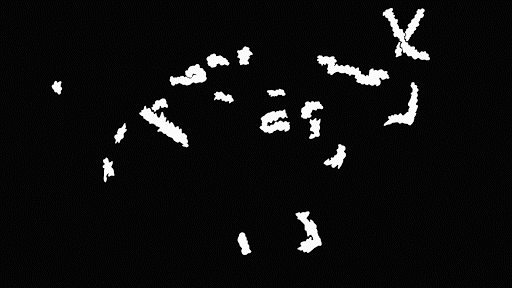
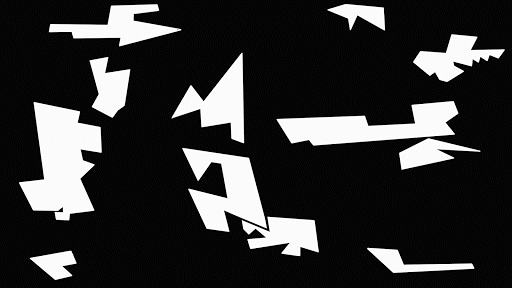
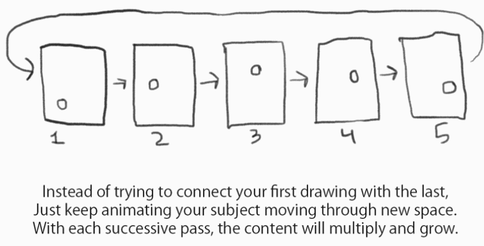
*What would this sound like if each shape's movement made it's own sound?*
- 12-frame hand-drawn "weaving" loop -
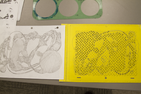
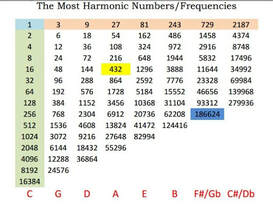
Next after doing some digging online, I found an individual named Victor Khashchanskiy that made software to scans images and translate the photo into sound. I would eventually end up plugging in each image respectively to gain an audio track.
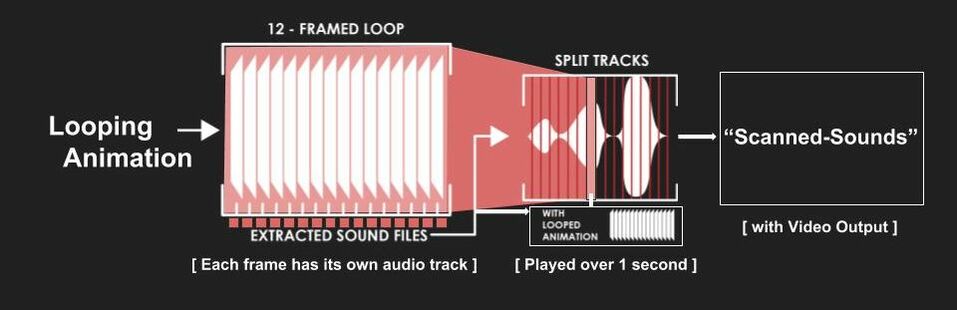
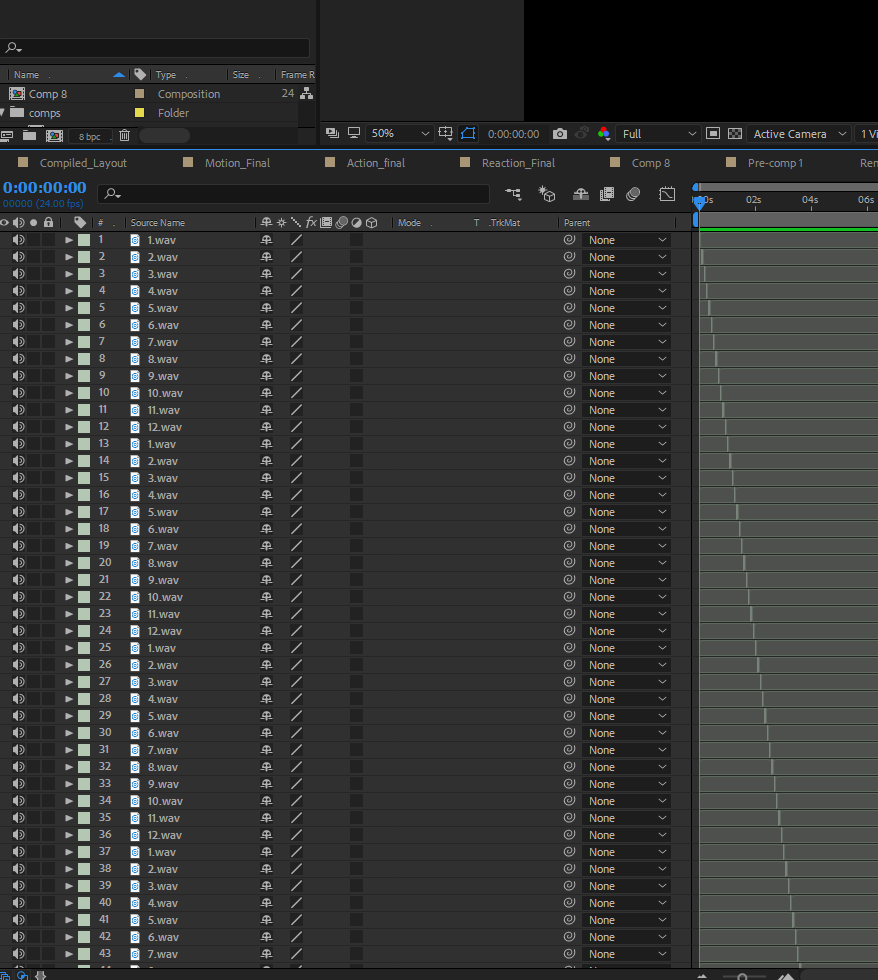
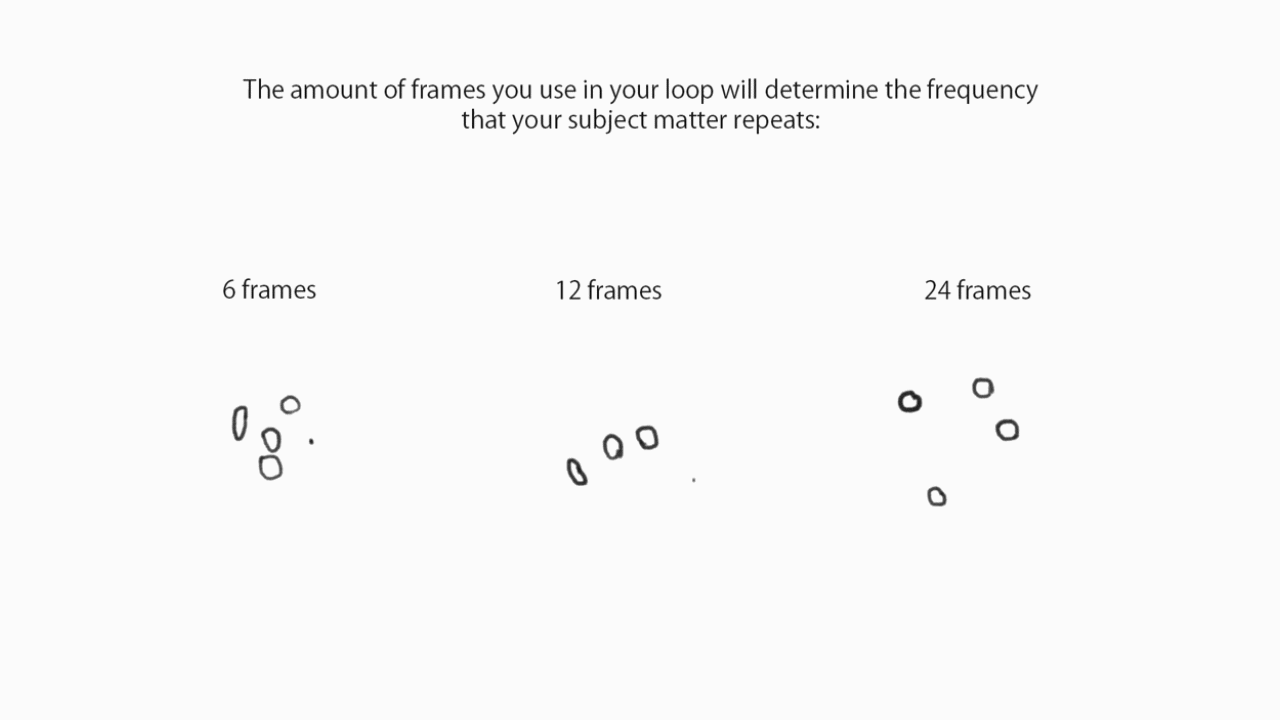
As shown above, I planned on taking the animation from the loop and plugging it into the software. After obtaining a track for each image, I went into After Effects and split up the sounds into separated 2-frame playbacks that cycled through each visuals "track" (1 through 12) and repeated as necessary. The process of splitting up the tracks was the most time consuming, but eventually as I copy/pasted and used AE shortcuts it only took about 5 min. Below you can find an example of how this worked.
After fidgeting with how to represent the layout of the sounds, I found out that the software only captured a small section of the actual image. I could have had it scan the entire image, but that would have resulted in a 5-7min track that I would have had to split up even more than necessary for this exploitative process. I find it peculiar that it also scanned from the bottom to the top of the image, when assumedely it should scan from left to right. I had to make a few changes to represent it correctly, the final product is below:
information about 12 principles process...TBC
Final layout...TBC
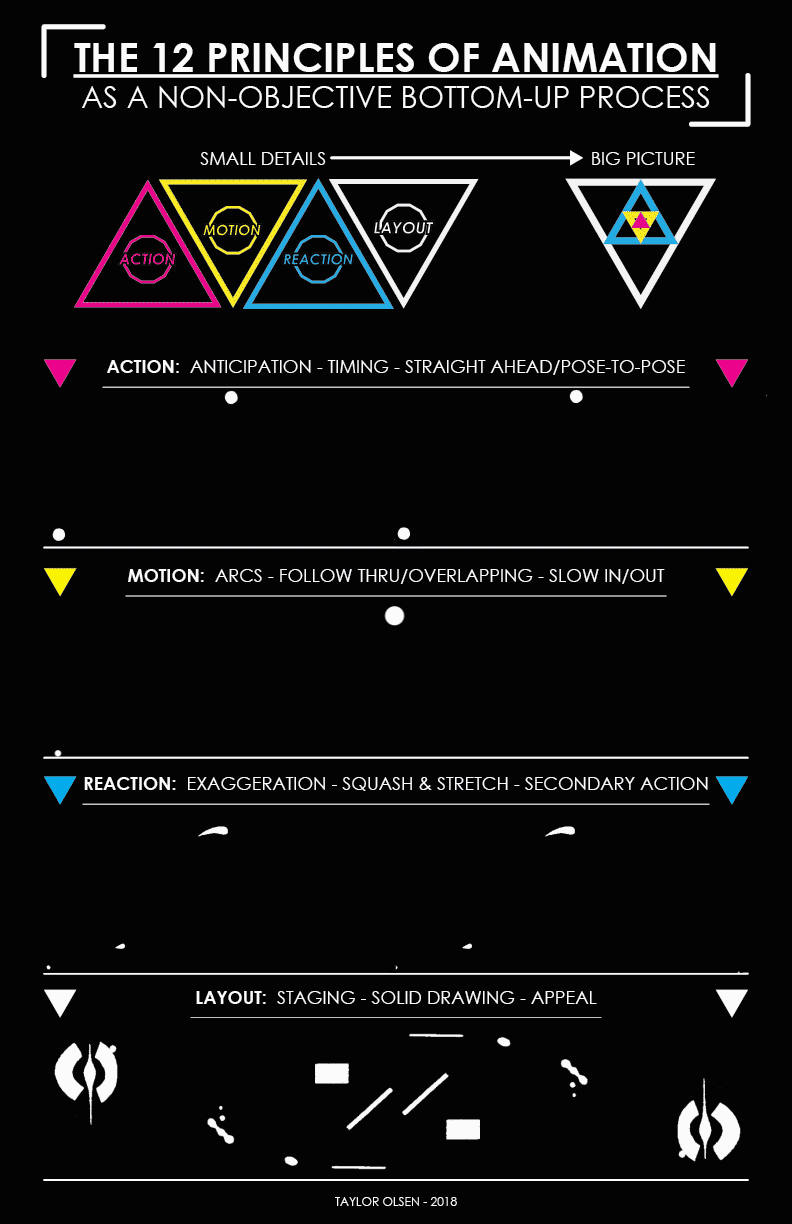
max/msp/jitter example...TBC
This project dealt with picking an object to be digitized into a 3D model. To begin, numerous tests of different objects were attempted to understand the complexity of photographing a model in a specific lighting situation that would produce optimal results. This in turn ended with working with Andrew Frueh in the department of art and his photogrammetry setup. Part of the emphasis of this project was to also lower the amount of polygons in the resulting model, lower the image resolution, and create a stable and easily loaded model.
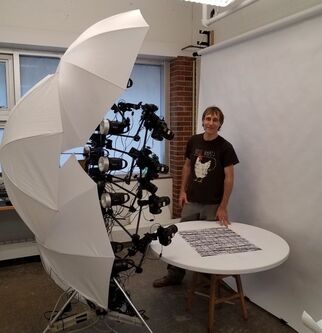
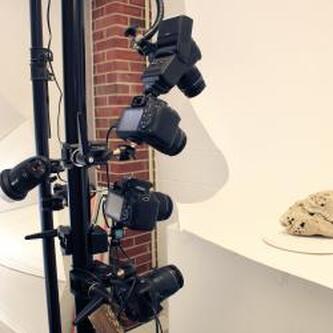
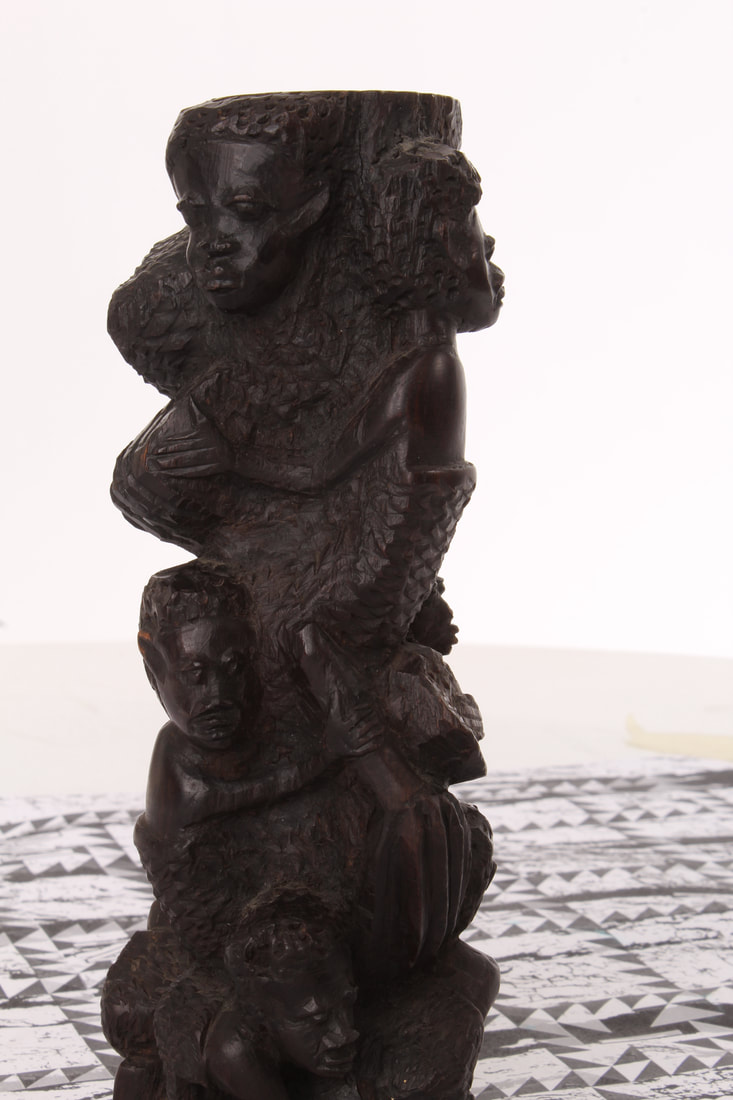
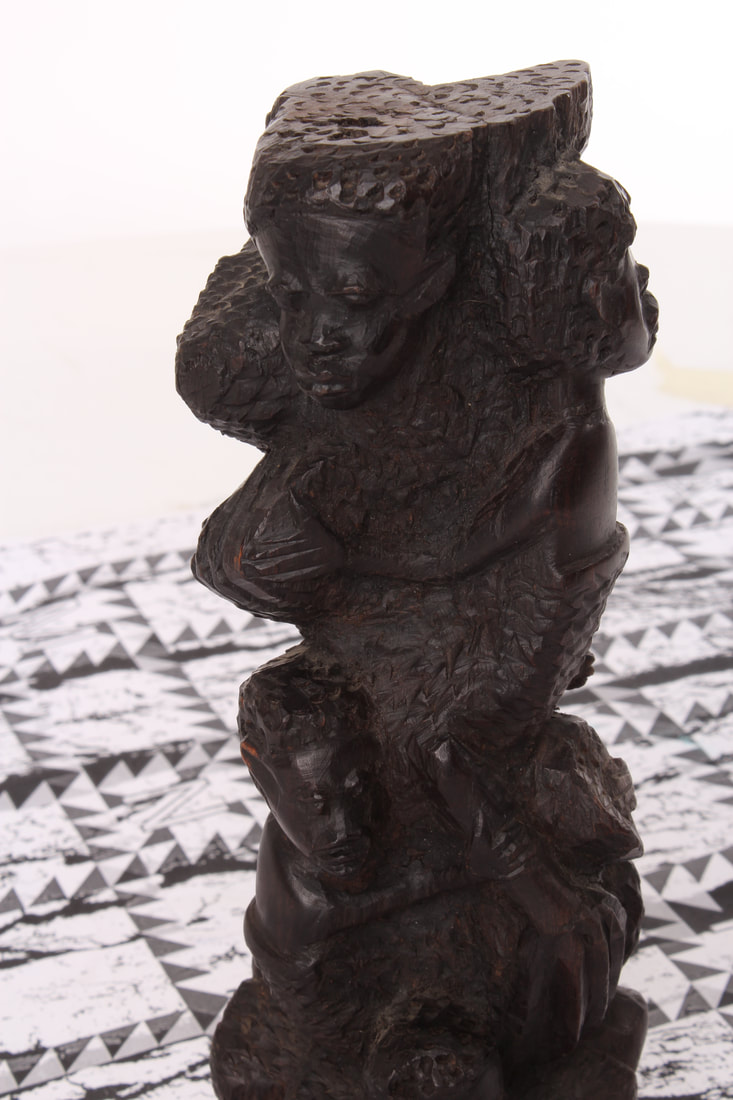
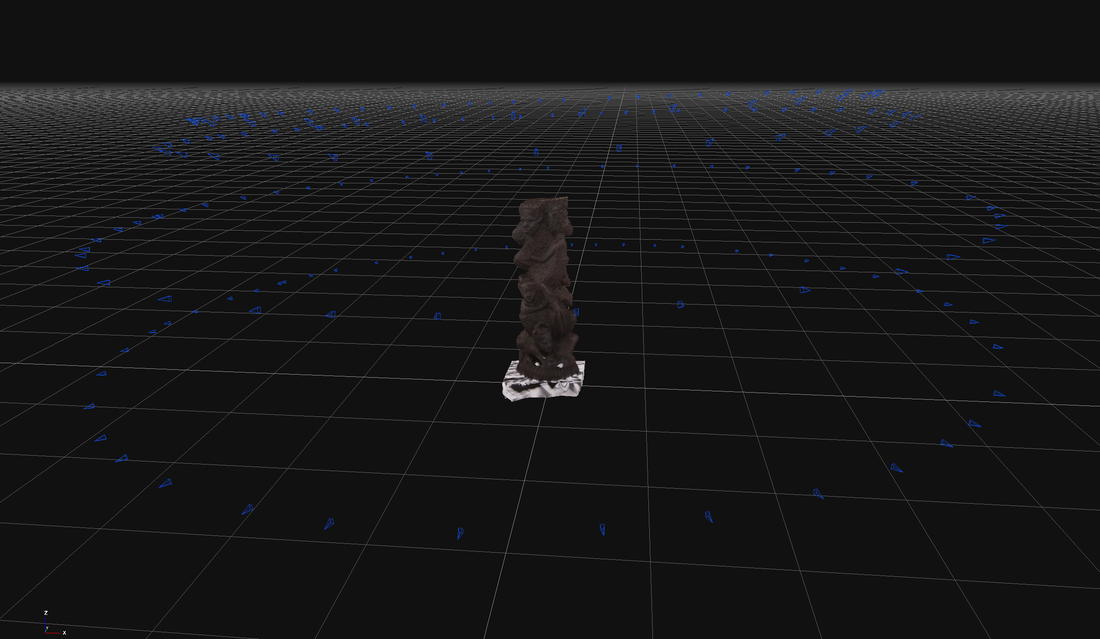
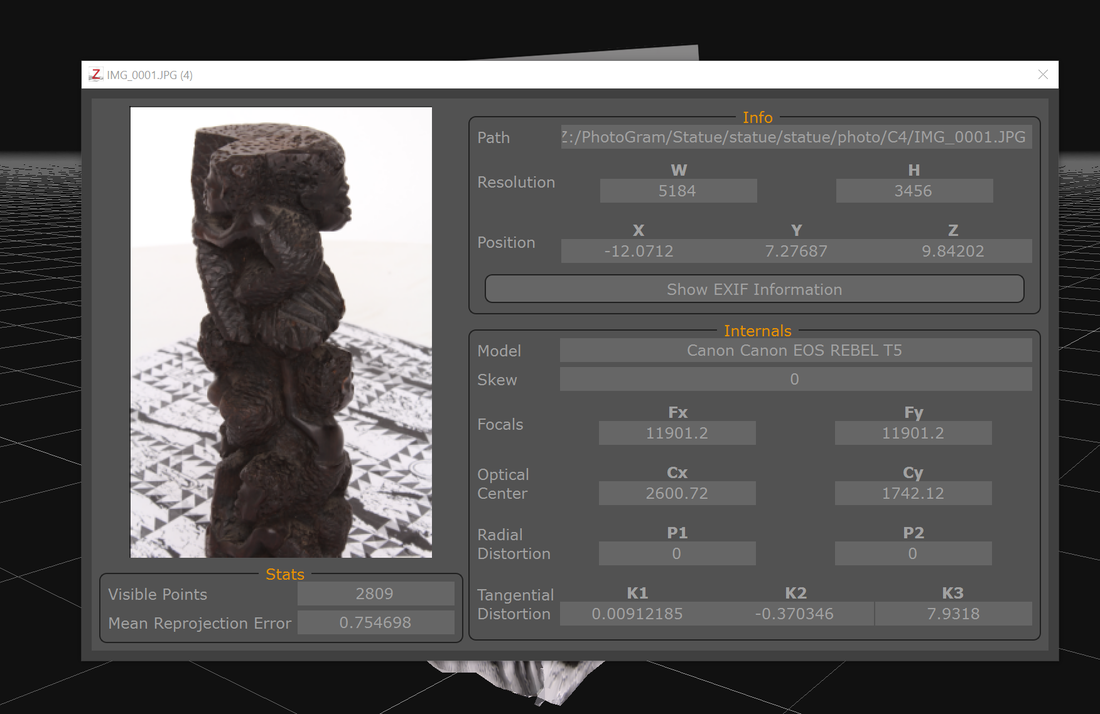
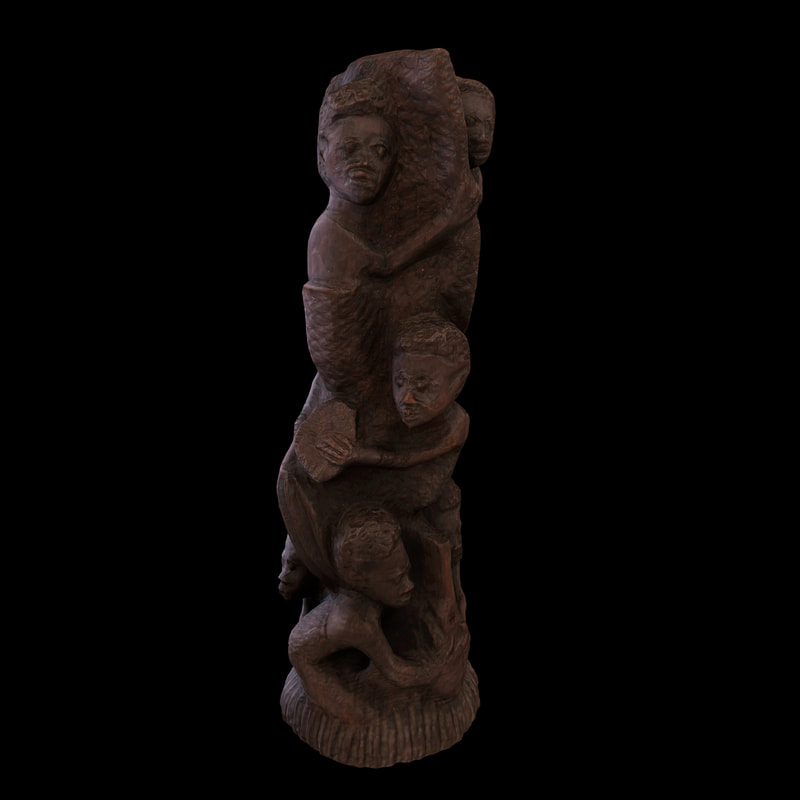
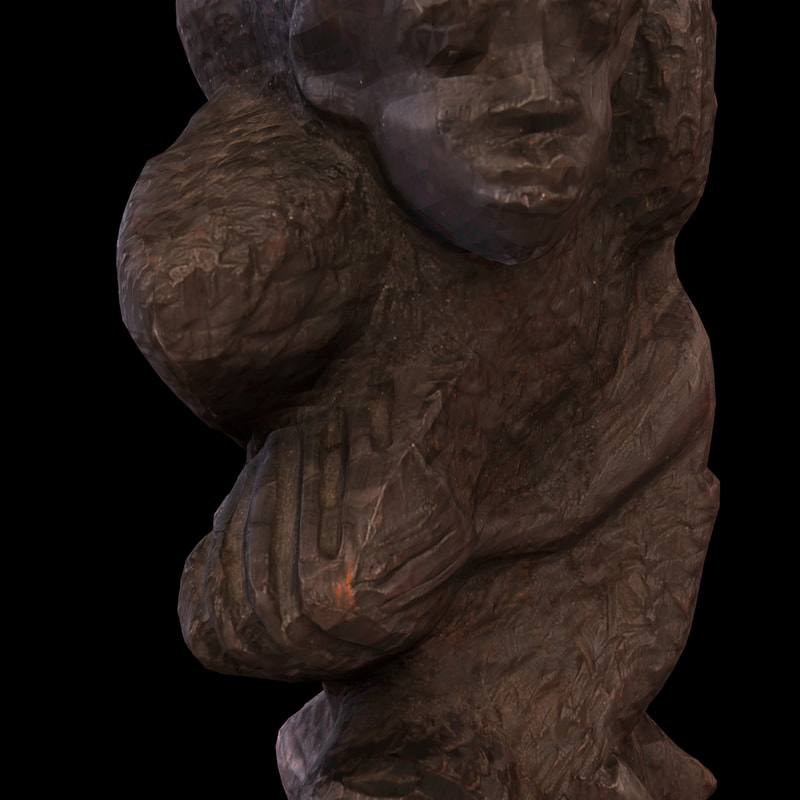
Andrew Frueh and his setup in the department of Art @ OSU (Images from OSU) The object that I decided/attempted to digitize was an antique statue from an African-based tribe. The statue itself had many crevices and holes to attempt to capture, as well as specular highlights and minute textures. The process of generating a stable amount of photos includes having a proper background and foreground, allowing the software to denote 'markers' within the space to generate a solid 3D model for later manipulation. Images of the statue at different angles -- captured from the setup. *Click to enlarge* Above you can see the setup of where the object was stationed. We would place them down and take photos (in multiples of 6), for a single 6-10 degree rotation. The different heights allowed all of the cameras to capture different angles of the object itself. The total amount of photos taken in about 2-3 minutes was 300. Things to note:
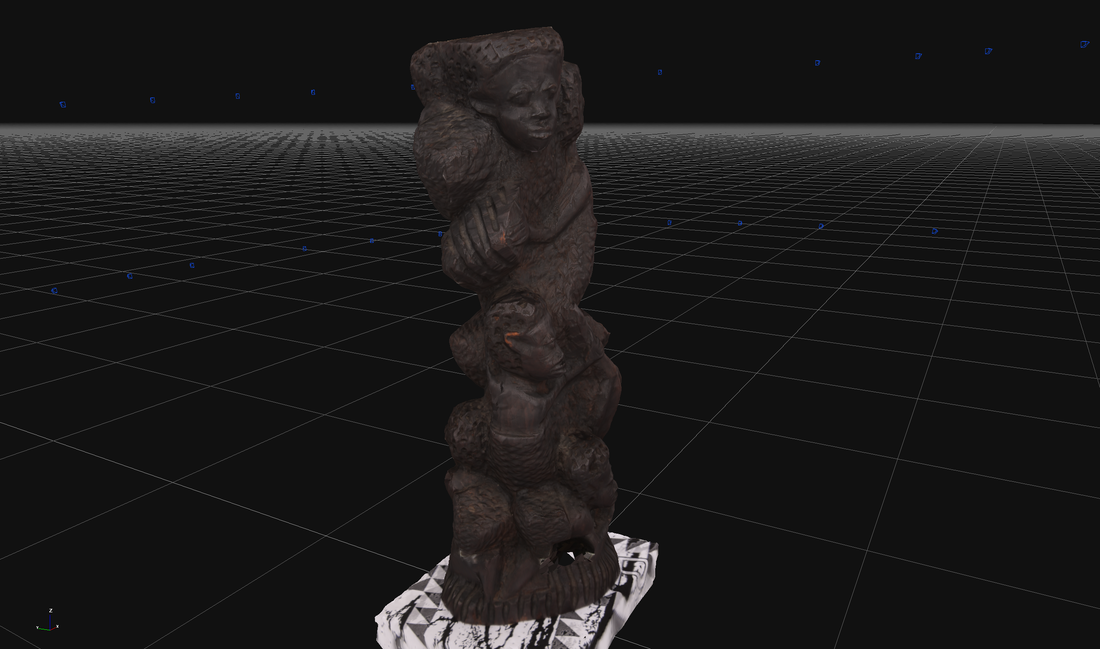
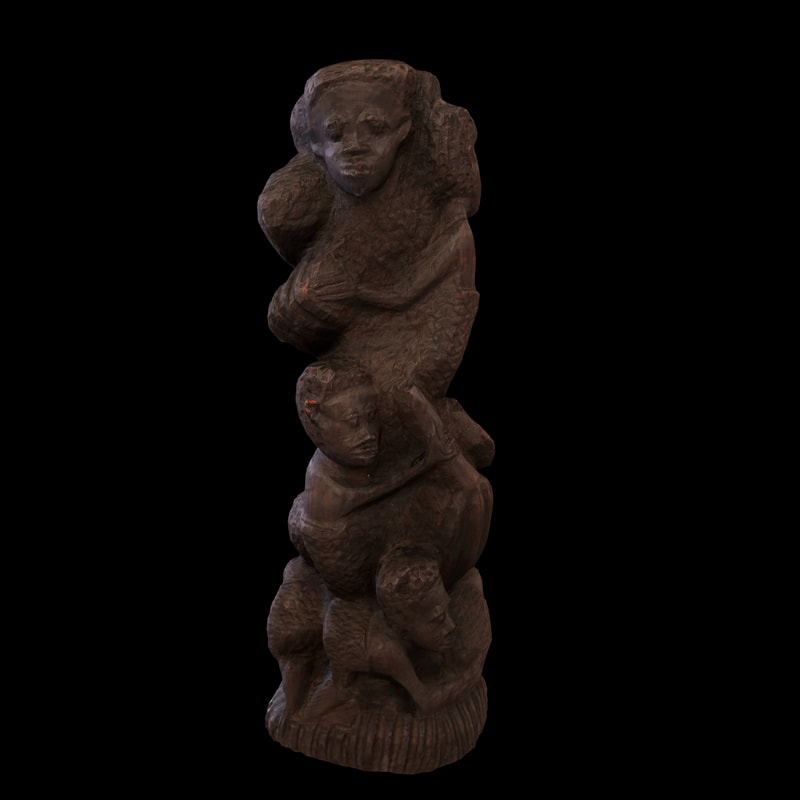
Zephyr software reconstructing the photographs in 3D. *Click to enlarge.* Above you can see the images being shown in Zephyr. In the first photo is a representation of the different cameras with the 360 degree coverage. Here you can see the circular representation of the false camera position based on the position of the object. The second is a closer image of the actual object in the space; the last is a live photo of the object that was digitized. Notice how the white background was completely exempt from compilation of the model. 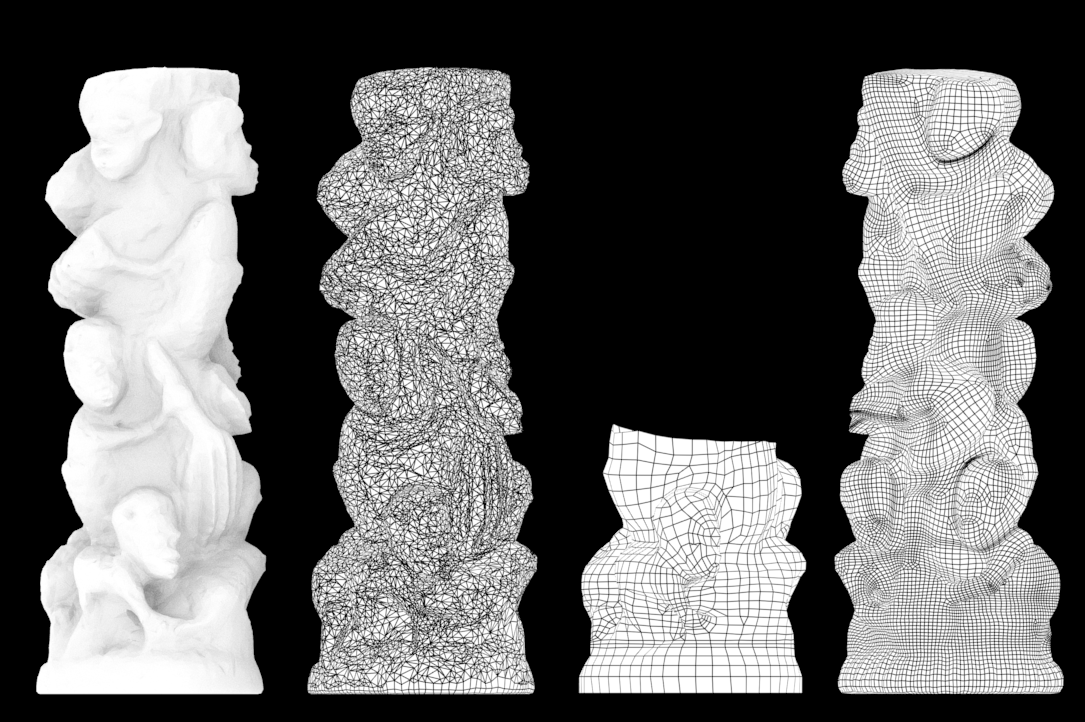 1 - Base statue || 2 - Base geometry of statue || 3 - WIP of statue retopology || 4 - Retopology of state After exporting the base geometry model from Zephyr, the model has a good amount of fragmenting from the dense cloud-points. I used the quad-draw feature in Maya to create the new topology from scratch, because at the moment of using Mudbox 2018 there were some retopology issues that couldn't be fixed. This was partially because of the small holes in the statue itself, along with the complex model of the statue in the first place. I unfortunately made a mistake after retopologizing my model by sending it over to Mudbox and accidentally overwriting my work with a higher resolution in the poly count. I'm sure it's noticable to see the difference in the amount of polys in the quad-draw vs. the final output. But, something to remember for next time! (always have back-up saves) Process video of retopology breakdown. After retopologizing in Maya, I sent the model over to Mudbox to adjust and add in detail to the Normal, bump, and diffuse maps. This included using different tools like the clone stamp, a subtractive wax brush, and switching between the layers as necessary to make sure everything was lined up correctly. Using the option of the 'tone-mapper' view in Mudbox, I was able to see all of the darker areas of the model--making it easier to fix/fill those areas as needed. Some render shots of the final output. *Click image to enlarge* While the render itself is much lighter in hue than the actual statue, I believe this is part of the ability of being able to digitize the textures. Having the freedom to change how the statue looks and perhaps *improve* upon what is initially visible is in my opinion, a viable way to capture an object. It's still unfortunate that I lost the low-res base that I had created, otherwise it would have been 5k in the poly count--rather than 20k. I can always go back into Mudbox and retopo it as necessary; there's a function to set out specific curves for the program to recognize to at least make it clean. Regardless, below is a turn-around of the statue and a comparison of the wire-frame. Enjoy! |