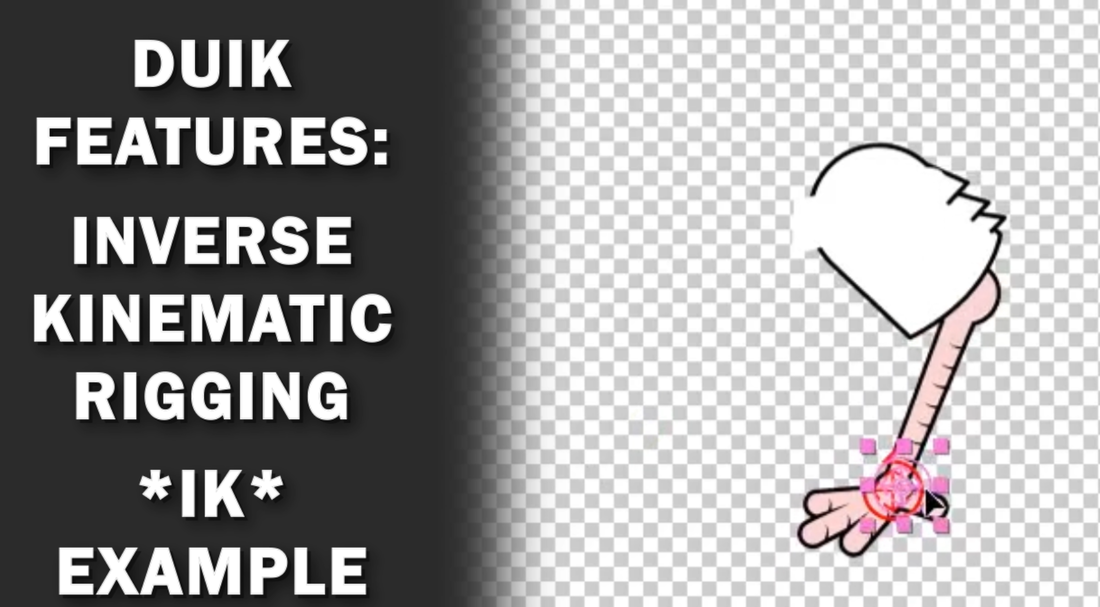
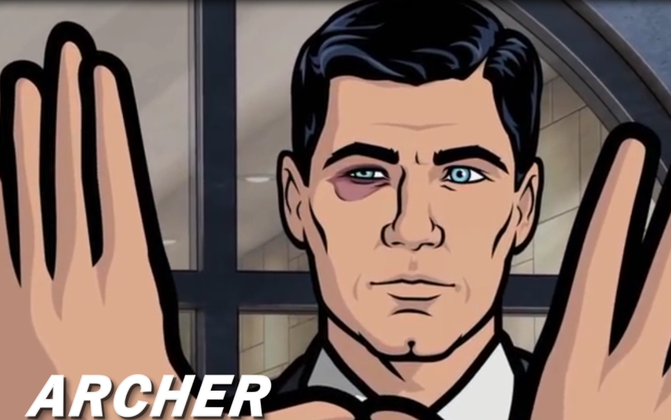
 Approach: This week included creating and discovering better ways of improving my explainer video and where to begin with my research topic for this semester. It mainly began with myself realizing that I did not have a clear idea as to what I should study for the next 4 weeks, as this would serve as the stepping stone to more research or switching my idea entirely to a new topic. For my topic, I want to explore and possibly better understand the developmental effects of humor on people throughout their childhood, adolescence, and adulthood; but aimed specifically towards how animated works could be the main cause or an influencing factor. I’m still finishing up my progress on my explainer video and have uploaded my current progress to my Vimeo page. Parts that I still want to change are the sections that explain the masking techniques and the Inverse Kinematic part. I also went to the Ohio State University library (Thompson) and checked out some books based on the philosophy, anatomy, intricacies, and depth of different types of humor to begin my research on my topic. I do not want to fully upload this video for self-preservation reasons and fear of someone copying my character, so I will use screenshots instead. My script was also re-written to accommodate extra spaces between the explanations and a "breather" for the audience between different sections (you can find the download link above). *A screenshot of "Archer" - One of the inspirations for my character* Choices Made: For this week I mainly worked on my explainer video. Some of the choices I wanted to explore were how to make the video more interesting than my initial animatic. I used a flat grey background and white text to emphasize what I wanted to explain visually versus through audio. I feel if the backgrounds were too highly detailed, it would detract from me giving a clear explanation about the overall project. I also made all of my textual elements and visual cues fade in/out, shift position smoothly, and used masking along the edges of my videos for clean transitions and for side-by-side comparisons. My actual outcome I thought came across much stronger than my initial animatic, which makes me believe that I should create animatics for these types of projects in After Effects first rather than later; unless it’s an actual animation versus explanation video. I also used a dual drop-shadow technique on the text. The first was for a solid drop shadow that made the text pop-out with some depth, the next was a soft drop shadow to make the text look like it was even further out as separate from the flat background. I also used some subtle animation techniques such as rotation and opacity changes, as well as a trim-path for animating a pen-strokes regarding my “next steps” sections. I also went back and re-recorded my audio in the video itself and made sure to fix the issues with the MONO vs STEREO tracks I was having such a hard time with. Relevant Sources: I used a channel on YouTube that I often go to for motion-graphics inspirations called “Mount MoGraph”. I have listed his channel link below: www.youtube.com/user/mtmograph His tutorial videos are often helpful and go through the steps clearly when he needs to make sure his audience understands. It also helps that he shows the final product in the beginning and then proceeds to act like you will have no prior knowledge; I often find this the most effective way to teach as it makes a clearly defined path to the current problems and future uses of After Effects techniques. I also checked out a number of books that I believe will help me with my research in the future for my topic this semester. I have also listed them below (note – not cited correctly):
Questions Raised & Needs: Some questions I have regarding my video:
Some questions for my books I’ve checked out:
Next Steps: For my next steps I plan to edit my video one last time to make sure that I have all the assets I need and the explanations are clear and concise. I want to record a short section involving DUIK controls and how they can be controlled by "your friend" moving your hand to a specified location (this will be in live-action). For the other, I want to start reading my books and come up with a clearly defined idea for my research about humor, existentialism, and behavioral psychology. I will review the notes from my professor regarding what to change and expand upon, and come up with a better reasoning behind my research and where it will lead myself and the audience that happens to find interest. -Taylor Olsen  *An image of yours truly. Being weird as usual.*
Approach:
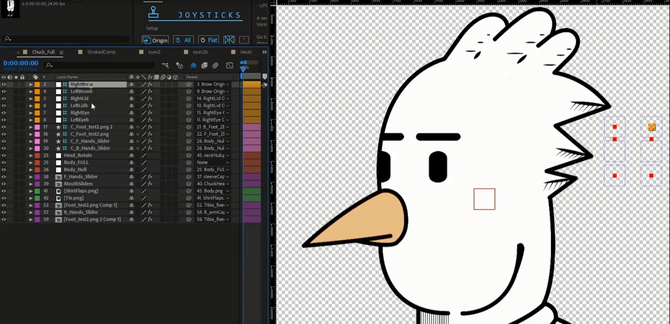
This week I began to create the animatic for the video explaining about my rigged bird character "Chuck". It began with me refining my script down to what I and my Professor thought to be the most beneficial for me to explain, as well as any visuals that would compliment the structure. As well as making the script, I also refined some storyboards that had been compiled from my initial script layouts. I also began to download video clips and images of inspirational sources and opened After Effects to create and section out my video. I ended with finishing the animatic and getting the timing of certain aspects to make sense when they needed to be on screen. Although my first draft of my animatic is finished, I think there is still room to change and make it better. After reviewing my video, something also happened to the audio playback as it happened to become abnormally quiet. I'm not sure if there was a difference when I was listening under headphones, as I could hear it clearly. This will obviously have to change, as my audience will not have a clue what I am talking about if they can only see visuals and not audio. Choices Made: For the audio, I made the choice to initially use Adobe Audition as my source of recording software. After finding out that it would only record in Mono format, I tried changing the settings to have it come out of both channels. I couldn't for the life of me figure out how to have it come in both channels without having the audio sound scratchy and metallic. I consulted other classmates; one suggested Audacity but ended in the same result. Two others suggested using a different mic similar to a Tascam handheld recorder, but it ultimately ended with only one channel again. After fiddling with the programs for a good hour, I just stuck with the already plugged in recorder (handheld) and moved forward. As I finished the recording, I went back through in Audition's capable sound editing and clipped out the sections that I jumbled or messed up. The end audio was about 3.5 minutes long, and I realized after cleaning up the audio that I had sounded extremely fast when I was speaking. This coupled with the slower visuals conclusively made the video droll and slow in my opinion, but could still be used as a jumping off point to continue editing the video. Inspirational Sources: For this weeks video, most of the inspirational sources I used were from Youtube tutorial videos such as: https://www.youtube.com/watch?v=dp3NK7TMMzw -A video for what is the best style to show your for your business https://www.youtube.com/watch?v=s7wmiS2mSXY -A video example of how to condense complicated information into more understandable content. and the ones provided from our professor that showed products on Kickstarter and Vimeo. https://vimeo.com/160493174 https://www.kickstarter.com/projects/489540660/designercise-a-creative-thinking-game-and-ideation I like the idea of using motion graphics and making the video itself look appealing to an audience, but also not too showy that it detracts from the explanation. I want it to look minimal but also engaging. Questions Raised & Needs: This week raised many questions regarding how I would create the video and how it would be edited. Mainly what I asked my myself was:
Next Steps: Some next steps I that I have realized is I need to focus more on this project, and less on creating content for other classes. I'm not sure how this is going to work out, as I don't want one class to suffer for the other, nor do I want to treat one professor over the other as more important. Another step I need to do is find someone who knows how to use the Audio room. As I haven't a clue who to ask. Or I should go online and find a tutorial for how to properly set up Adobe Audition. I also need to make the school install DUIK and other software that is relevant to my studies. As what is currently installed does not work and doesn't seem to install correctly when I try. -Taylor Olsen
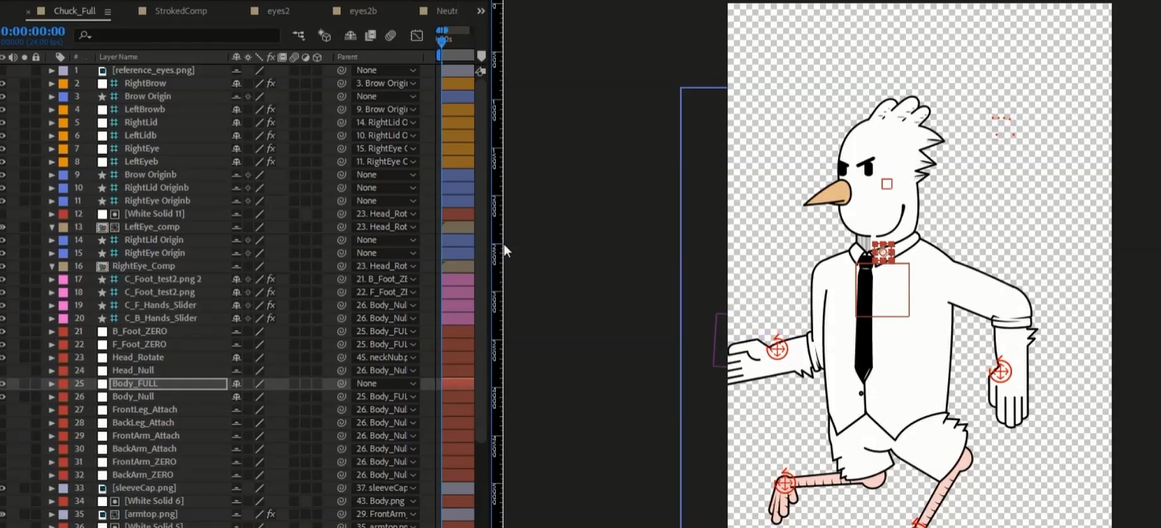
*Screenshots of "Chuck"* Approach: For this week, I began the task of creating an explanation-video for the work I accomplished in the previous semester. My research was based on using 3D rigging techniques and applying them to 2D animation software (After Effects) that would end up being used by myself and possibly other animators in the future. Beginning steps included writing and initial script and including aspects of our research in said script. I honestly couldn’t think of what to write at first, so it just ended up with my expressing all my thoughts onto my initial proposed script. I then went back and sectioned what I thought would make more sense in the scope of the writing and the explanation to the audience. Afterword, I created some preliminary storyboards and tried to export them as a GIF sequence, but ultimately failed in my attempt to do so as I’m not familiar with Photoshop’s GIF creation. Currently I am still obtaining assets for my presentation, as I have my rig created, but I am not sure how to fully break down the video. Choices Made: After receiving some feedback from my professor in class, I attempted to revise what I thought would be a better read for an audience and make my script less word-heavy and more visually interesting. I tried to think in the aspect that I would be using motion graphics to make the video itself appealing and easier to look at, with supporting research visuals and text that would make it more self-explanatory. After revising, I emailed my professor for further comments and revisions, received such, and moved forward with tweaking my script more. I will have to end up changing my storyboards and most likely change my script once or twice more before coming to a satisfactory and informative end, as I feel very incompetent in my skill so far. I went back through my rig and decided what parts were more important to mention than others, and attempted to explain in an easier fashion what would make sense to an audience (such as IK or FK control schemes). Inspirational Sources: A main source of inspiration for actually creating this rig is based off of the FX series Archer. Every piece is made in Illustrator with specific rotation points that eventually become the basis for the rig. This in turn leads the animation team to rig the character in after effects, and be able to fully utilize the wide range of tools it offers in order to make the character resemble a stylistic "comic" rendering, as well as being able to have anyone on their team animate the character easily. 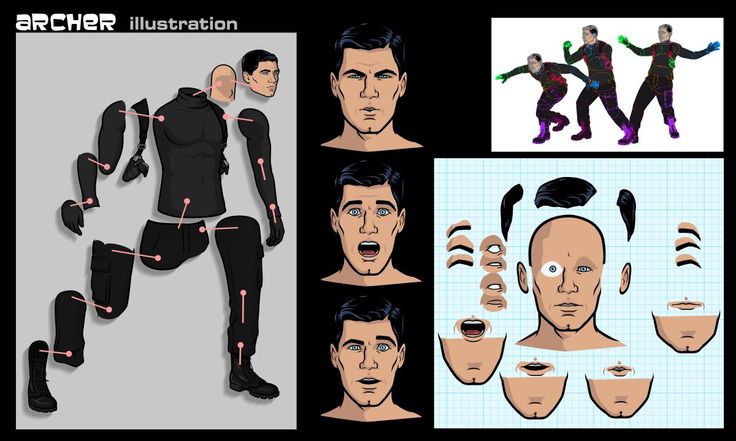 *Example breakdown of "Archer" from the FX-based series Archer* Questions Raised & Needs: Some issues that I had while going into this concept of creating an explanation video:
Next Steps: What I need to do next is to gather my assets and create new storyboards based on the feedback from my peers. I would also have to ask others to try my rig for the moment and see what they have to offer in regards to its structure, its versatility (as limited as it is), and what they have to offer to make it easier for them and myself to control in the future. I would like to also record and possibly refine my script if necessary if it happens to become too wordy for the video. I was told about the notion of "Say vs. Show" in regards to how much is needed to actually get the point across. In the case of this explanation video, I believe the idea of "Less is More" makes sense with how much should be said. And of course I would love to continue working on this rig as it has a significant importance to me as an animator and storyteller. In regards to that, Chuck will eventually (and hopefully) be able to turn around, look left and right, and interact with different objects around them. I'm deciding whether or not he will interact with live-action objects, 2D objects, or 3D generated objects. This will lead to more interesting tests in the future. -Taylor Olsen |
|||||||