Pt. 1:
The Ohio Dance documentary is a project that ties together dance, animation, and history to create a uniform and experimental view of the cultures that influence modern dancers today. For this project, I have been tasked with taking motion-capture data and transcribing the motion into an artistic visualization (as directed by Ohio Dance). The animations themselves will use the data to create paths from motion that will then lead into other paths of motion, creating a rhizomatic structure showing the interconnections between the geographic distribution of these dances among Ohio. Some considerations and questions that I have coming into the project:
Pt. 2:
I met with Jess and Vita (last week) to discuss their intentions with the project. Jess is a very affluent dancer, and Vita is a very affluent animator and motion capture specialist. Some of my notes (however floaty - updating and archiving them now) are listed below:
Pt. 3:
I combined 3 different dances (Athens - Toledo, Cincinnati to Cleveland, Cincinnati to Toledo) into a single video for viewing, and attempted to use 3 different camera angles for each in order to get a better sense of the motion of the dancer. These different views allow us to engage more directly with the dance, rather than seeing it from one static angle. These dances might not be used within the final product, but this gives a clear mode of viewing the motion from different viewpoints that can further infer camera angles for the future (within the animation). Below is the video:
There is a great amount of data to work with regarding where the paths lie. I see a good amount of potential just from looking at the data and seeing how the paths could possibly intersect. I will probably attempt to add in motion paths to the data as the next step. Being able to see these motion paths will be a great use for visualizing the final animation - I think I'll work with camera angles at a different time, more towards the end when I and the project team have better visualizations. The most pertinent information at this time is being able to use clean MoCap data to get a better sense of how all the pieces will fit together.
Pt. 4:
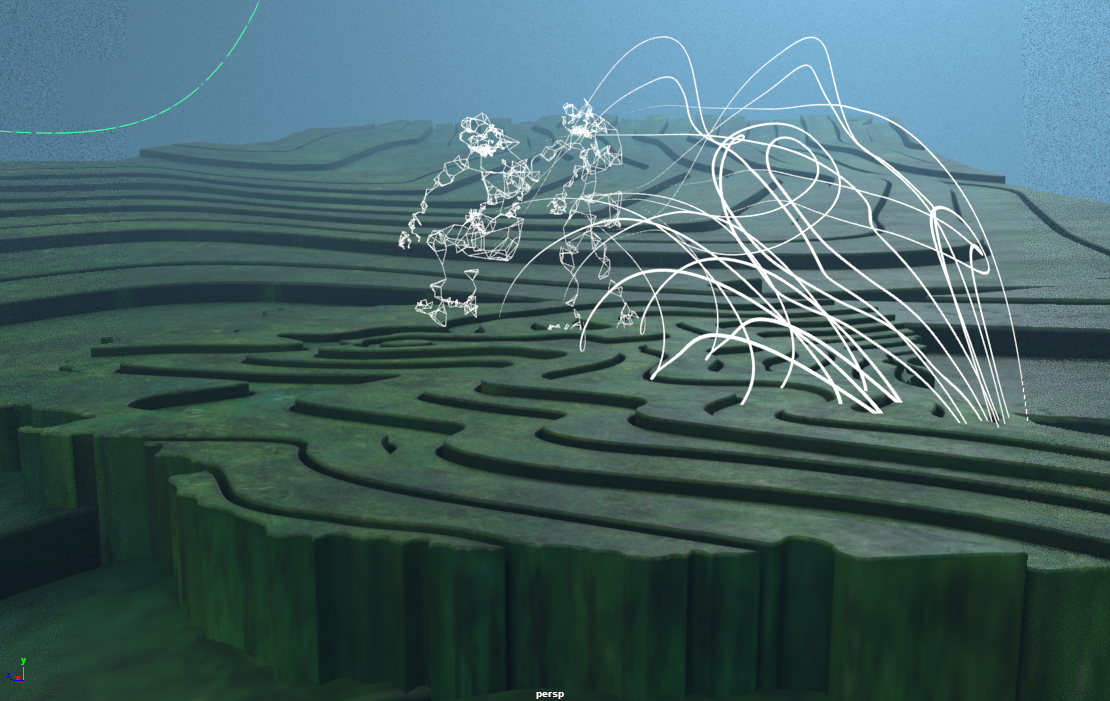
I began with creating a development video showing the process / progress of the visualizations. The video first shows the initial dances without the map or all of the figures together. The second part is the visualizations with the motion trails - the paths of the Mocap data was adjusted to match the Ohio map on the ground. The last piece of the video is the combination of the 3 overall paths. This includes all of the pre/post paths of the arms/legs/head. Seeing these altogether gives a good sense of where there is opportunity to diverge from one Mocap path to the next. The visualization of the lines is also great for seeing a 'final' rhizomatic path for the data.
Using this, some of the paths for other dances (not shown) had to be scaled in order to fit the transference from city to city. Right now, I am not sure if this will have a considerable impact on how the dances will be affected via skin-weights when applying a mesh. So, I decided to rather line them up based on their starting position, scale/rotate the path of the figure until they lined up with their start/end destination, and return them to their original size while maintaining the central pivot from their starting city. This way when it came time to associate them with their appropriate paths, it would be easy to scale them appropriately. 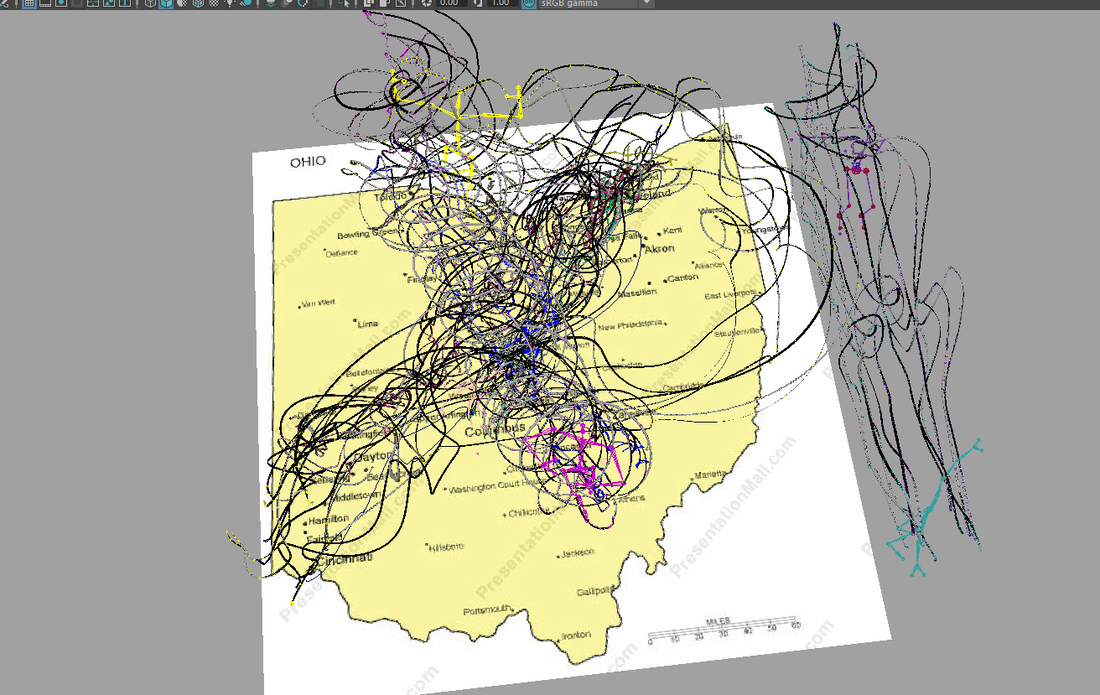
A test trail of all the paths
Pt. 5:
After considering the paths of the data we moved onto creating the physical map layout of the environment. I took a trip to OSU's Orton Hall to find topographical representations of the state of Ohio. Out of all of the different maps there, most were just elevation charts that used color to represent the highs/lows of the state. [shown below]
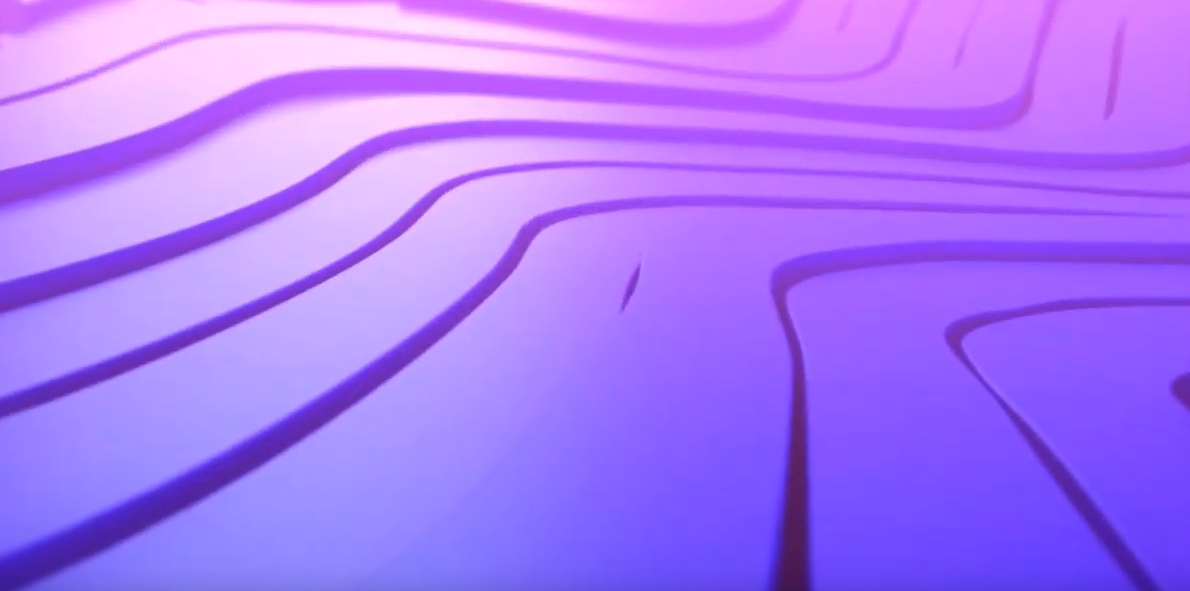
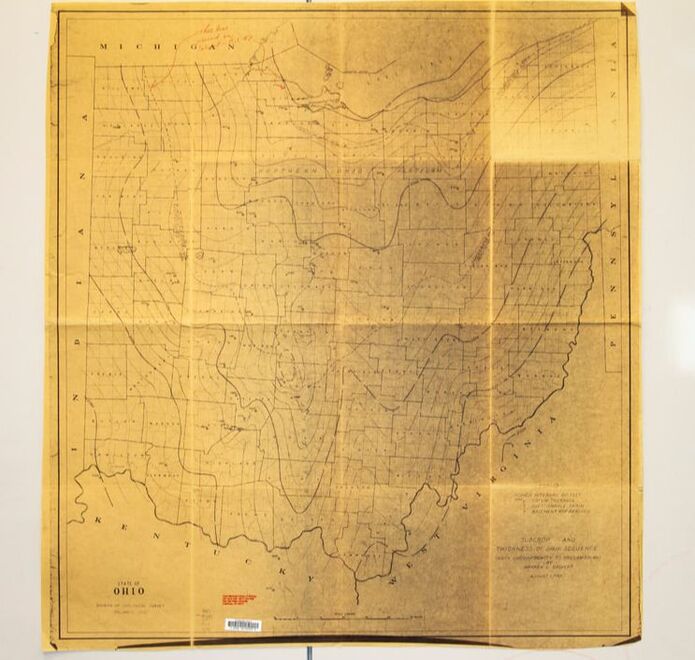
While these proved valuable in the sense of considering the importance of highlighting the elevation of the area, they seemed to lack an artistic quality that could be extracted from them in a considerable way. Speaking with Jess, she considered having more of a flow to the map to contrast/highlight the figures dancing above them. After more scanning through different maps, I happened to find one with hand-drawn line work from the 70's showcasing the flow of wind throughout the state. I hung the maps and took photos of them (their size was about 4x4ft -- OSU seems to lack a large scale scanner that can be used by the public). [line work map shown below]
With the map of the line-work in a digitized format, I took them into illustrator and traced the lines with the pen tool. I added a thickness to the line work by increasing the stroke thickness within Illustrator. I played with a few different variations to consider how crowded we wanted the lines to be. The decision eventually became to use the less dense line work as this would clearly showcase the variety of movement throughout the state without becoming too visually heavy. [shown below]
This made the transference from Illustrator to Maya an easy process as I could save out the line work and use the Bevel+ option within Maya to extrude the line work into solid form. [Great tutorial example here: https://www.youtube.com/watch?v=D88qe05IUx0] After creating the map pieces, I futzed around with testing how I wanted the expansion of the map to appear. Below is an example of using a sphere as a subtractive boolean operator to reveal the map. This isn't how the final map was going to be revealed. This isn't how the final map was going to be revealed (as decided later) but it was a nice test to experiment with moving the camera throughout the area.
Pt. 6:
Speaking with Jess (and Jane D'Angelo -- head of Ohio Dance), she mentioned maybe using GOT as an inspiration for the reveal of the map sections. The GOT intro uses a convex world view (or a fish-eye lens) to make the pieces of the map appear to 'bend' upward towards the camera. I eventually went the route of using the previously mentioned map creation method as a basis for an addition to the entire US map being incorporated as well. 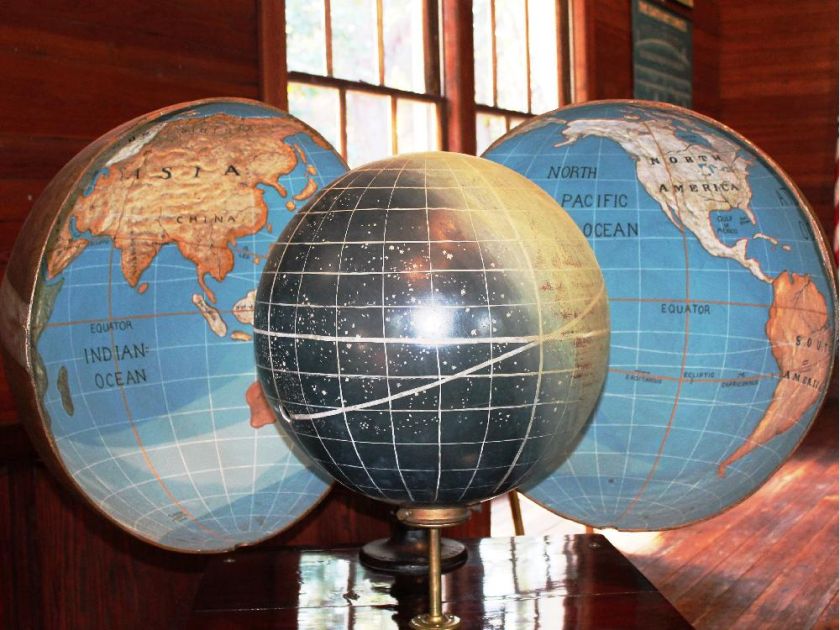
Concave World Example (retrieved from Google). Notice how the inside of the shell is the view of the world, while the middle is the night sky.
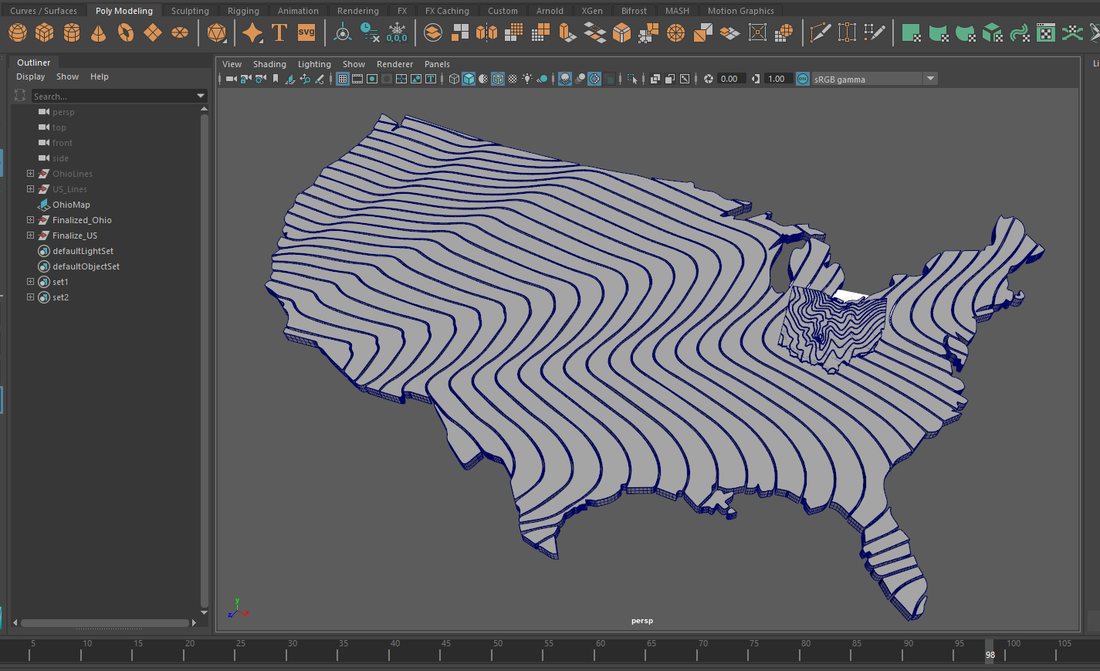
Going off of this consideration, I created another piece of map line-work that encompassed the entire US. These pieces aren't necessarily as small as the pieces used for the Ohio map, but this makes a considerable stylistic difference in the map types allowing the viewer to clearly discern the shape of Ohio from the rest of the United States. Different colors for the US vs. Ohio pushes this consideration further.
I took all of the pieces of the US map and animated them on separate timings to create a sense of movement that wasn't just static pieces that the camera would eventually 'fly' through. After this, I grouped all the separate pieces and added a curve deformation to the map (still being able to maintain the animation of the pieces). The deformation could be animated and easily turned off/on depending on how we wanted to review the work.
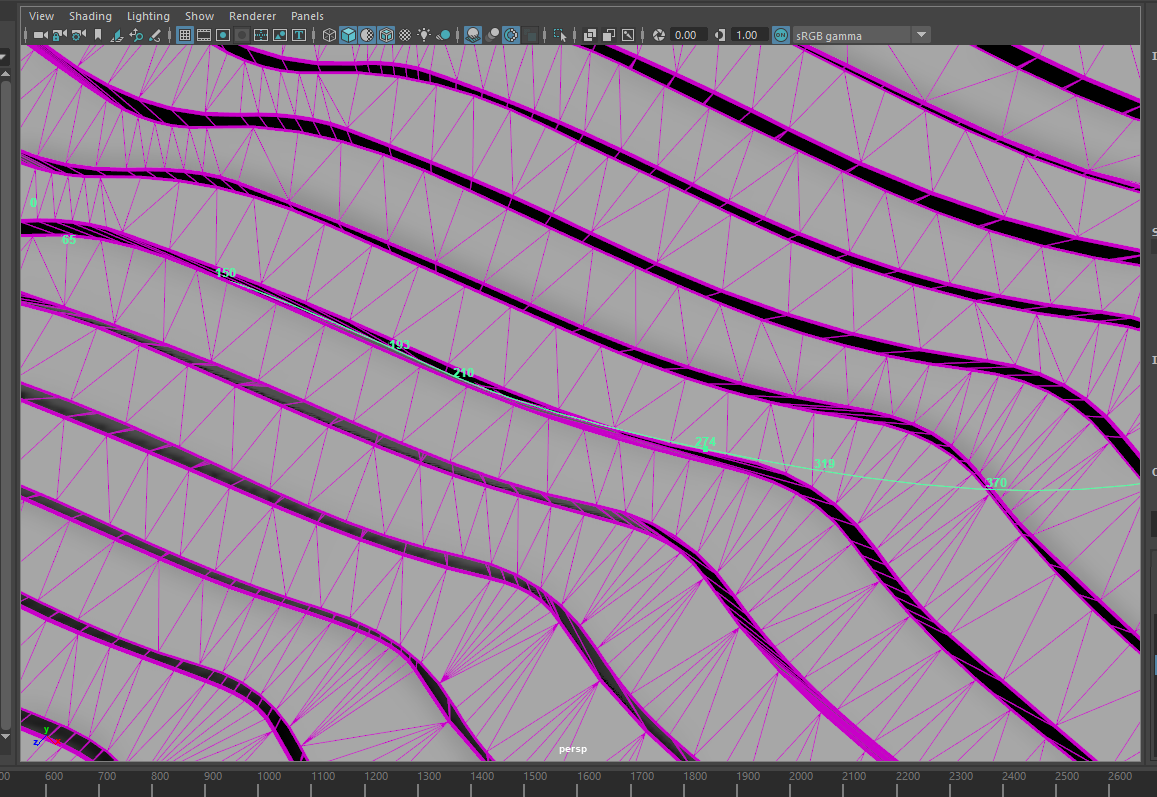
--Something to consider for the map pieces itself: because the superficial pieces of the map are completely flat, there's weird fragmenting that happens when I did some test renders. To solve, I triangulated the mesh to absolve this issue. This added necessary geometry to where the map would bend and prevent any unsightly renderings.
After triangulating the mesh, I animated the bend deforms to test if the mesh would be maintained. The lines that are running through the other parts of the frame is the path of the camera throughout the terrain.
Part of the challenge was to get the camera to come 'out' of separations in the map pieces themselves while simultaneously adhering to the deformations of of the bend deformers. To do this, I duplicated the mesh of one of the pieces of the map and added an edge loop to the piece.
I then used the "extract isoparm" command to create a nurb curve from the meandering geometry of the piece. This allowed me to attached a camera to the "motion trail" of the curve and adjust the timing as necessary. Some slight tweaks allowed me to scoot the trail over out of the way of the geometry. I did a test play-blast of the result; after the amount of time it takes with the extra geometry, curve deformations, and animated pieces, returning to flat geometry will make more sense for times-sake.
Pt. 7:
After exploring the different ways to animate the map, it was time to plot out the different paths of the motion capture content. I made a basic representation of all the paths over the map of Ohio, and color coded the different paths for easy differentiation. We eventually used a few of the same paths of mocap data in reverse to simulate a separate dance for those that weren't included in the initial takes. This included Dayton (not shown) to Cleveland. 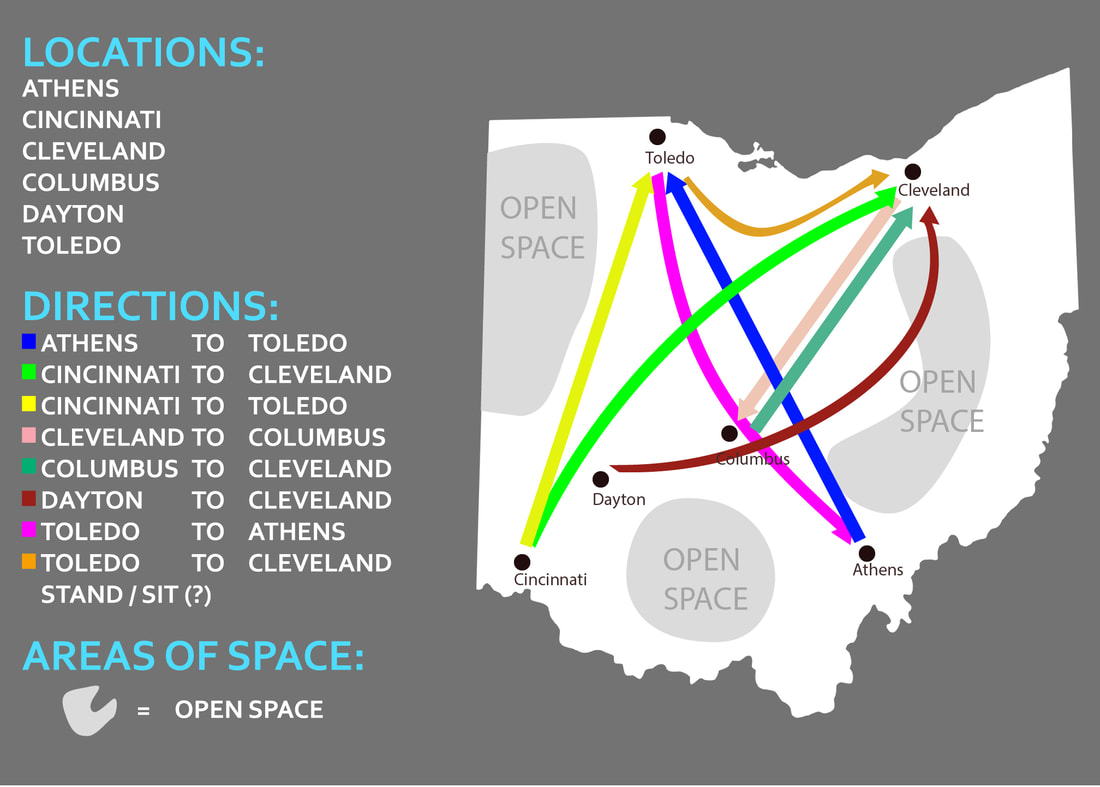
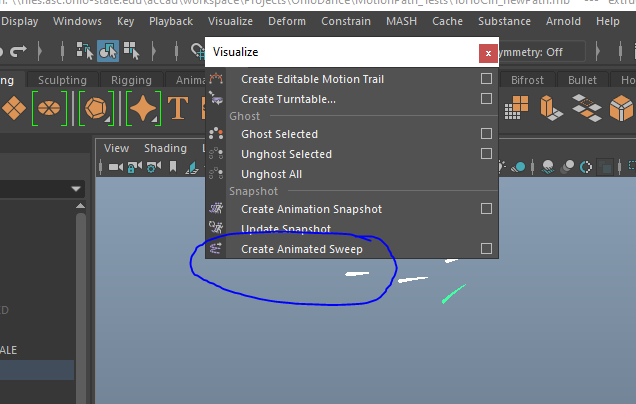
To begin, I took the Mocap data and parent-constrained separate nurbs circles onto the rig. I went into the animation tab of Maya and used the "create animated sweep" option to visualize the curves of data from the nurb surfaces. Using the animated sweep option allows you to control what the output becomes. For the easiest solution, I used the nurb setting to get a smooth path, rather than a somewhat 'chunky' path of the polygon method.
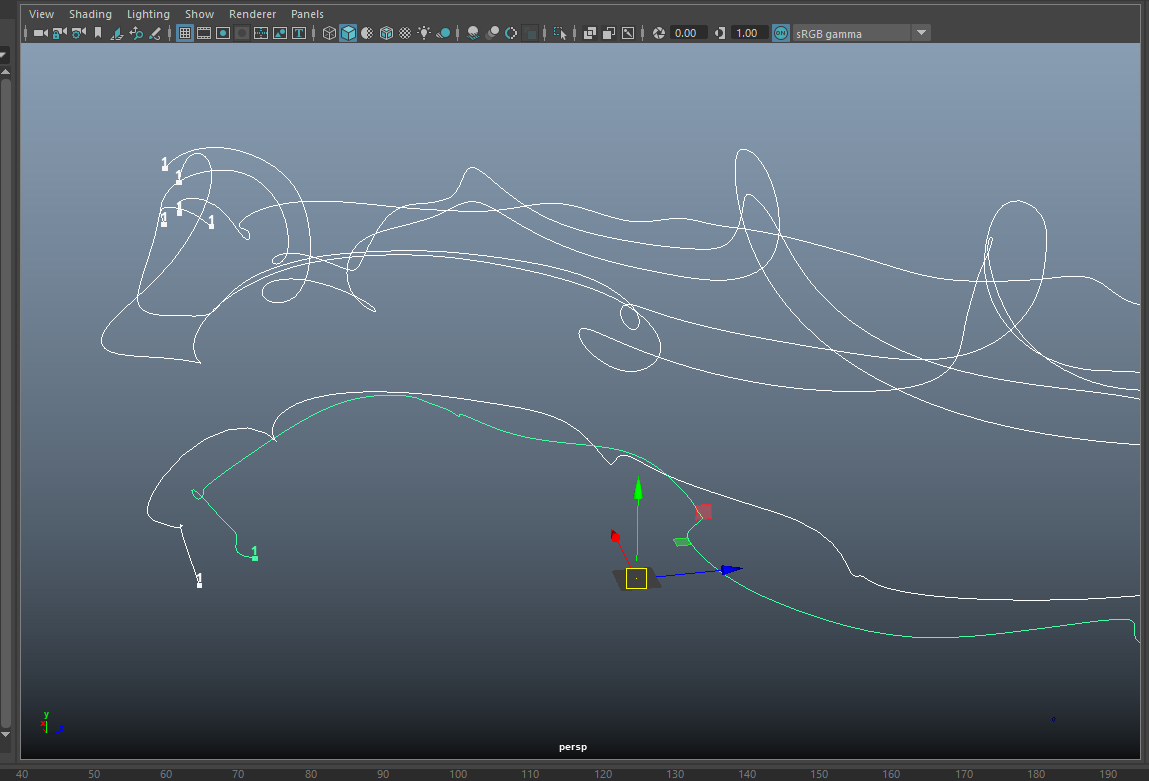
After this, I used the 'select isoparm' option on the nurb surface. In the curves tab, there is an option to 'duplicate surface curves'. This was then used as a single nurb curve from the animated sweep before.

Using this allowed the baseline path of different extrusions along the way and easily allowed changes of the paths themselves if they needed extra points for definition, or would collapse on themselves and have funky geometry as a result.
I then added a nurb circle to the start of these paths and used the extrude option while also having the path selected. This created a path that could be controlled over keyframes (like a trim path in After Effects). This also allows you to control whether the path is nurbs or polygons, with further control over how many polys (dimension, spans) would be created from extrusion command.
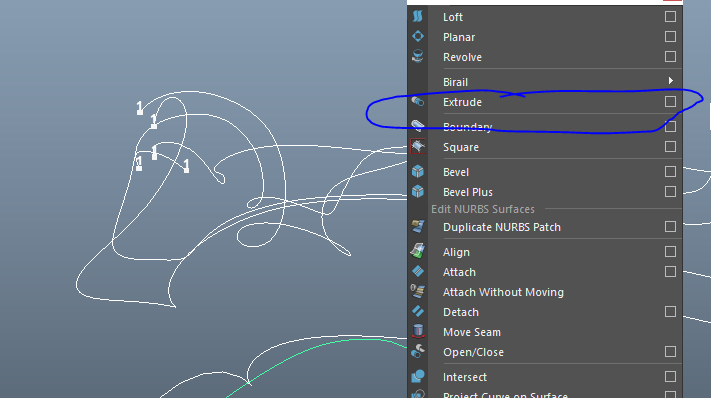
On top of this, you're able to control how long the path will take to extrude, whether or not the path will grow like a vine (with a pointed tip), and how the path can be scaled over time. Below is an example of the extrusion following the paths themselves. [good example of this process here: https://www.youtube.com/watch?v=c-Zpamrvj6s]
Pt. 8:
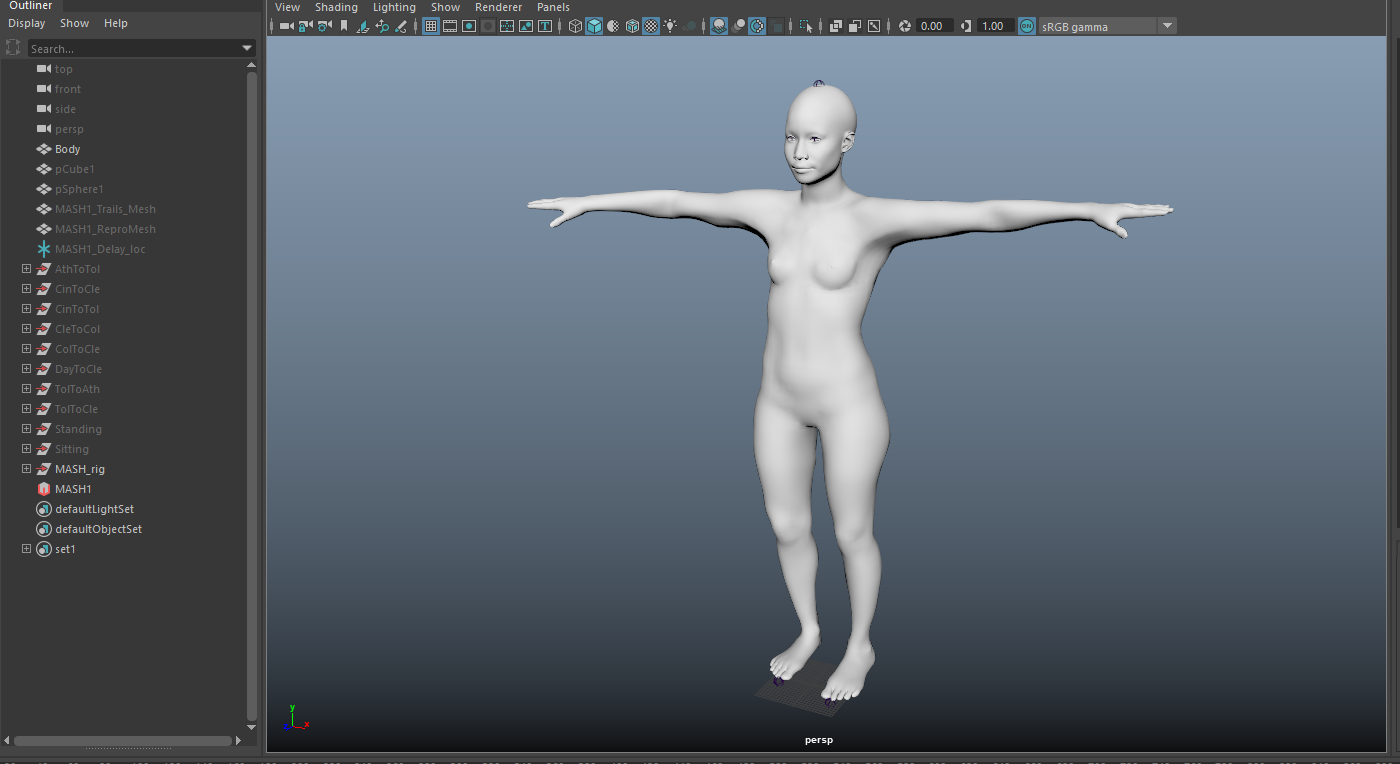
After creating the paths that would be used to compliment the dancers, I went into Adobe Fuse and created a base character to be used as a container for the procedural animations that were initially proposed. After creating the character, I sent it to Mixamo for a quick rigging solution. Using this rig, I went into Motionbuilder and attached the Mixamo rig to the motion capture animations.
There were some tweaks to be made to the "reach" and "stretch" factors of the rigs, but this wasn't necessarily as important since the form of the body was abstracted. This allowed me (rather than having to completely match the body to the mocap data), to transfer the mocap animations to the bodies of the Mixamo character and easily interchange them as necessary. I cached the files for moving onto the manipulation stage of deforming the geometry to "grow" out of the ground plane.
Pt. 9:
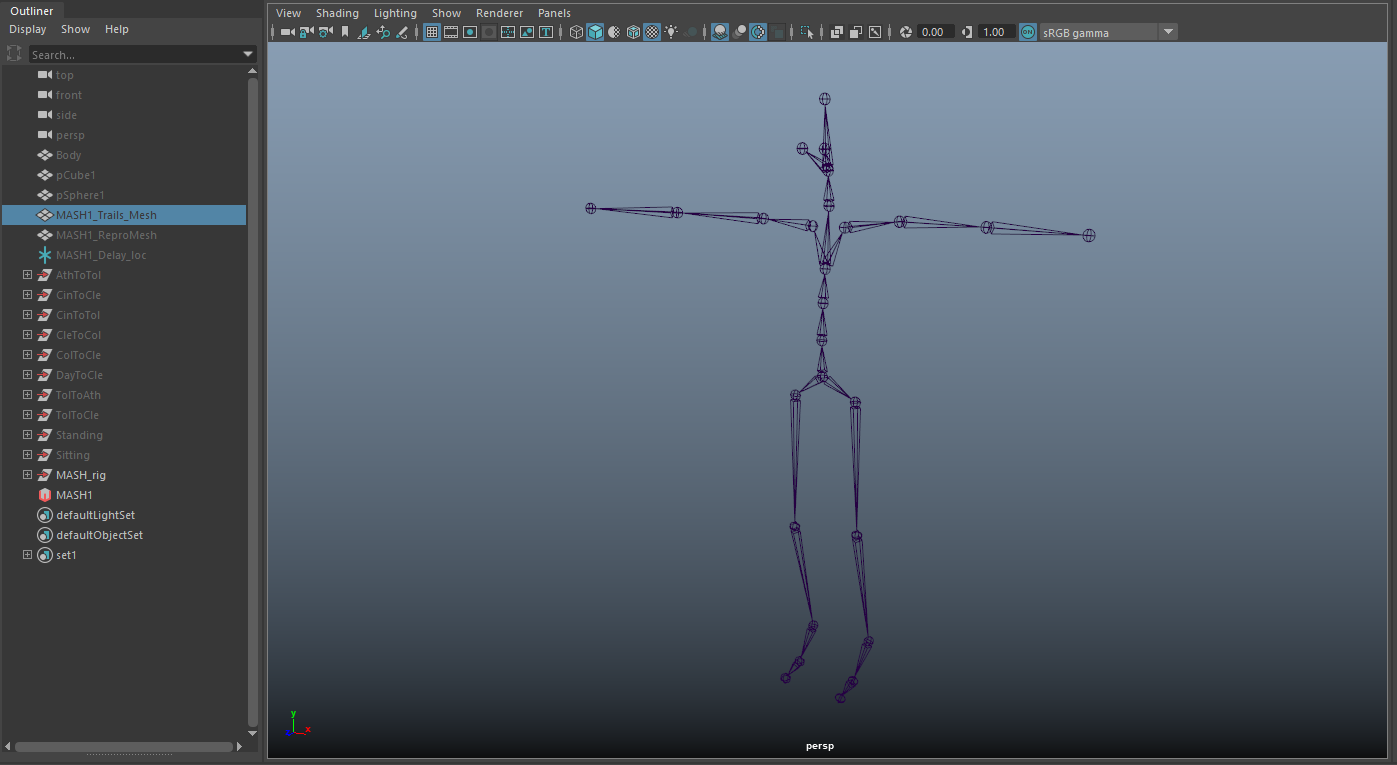
After using the mixamo characters and the separate mocap sessions as a base, I was able to easily interchange the procedural animations using the MASH setting within Maya. There is the ability to control how many points, how to interconnect the trails, and how to animate them over time. Adding in a 'noise' factor to the mix, the trails and positions of the points moved around to their own accord. Below is an example of different tests including the mocap data, mixamo rig, and different tests using the MASH pipeline.
While not all of the paths were used in the end animations, it was a good way to test the capabilities of the MASH pipeline and how quickly results could be created from such. Below is an example of how fast I was able to interchange the different uses of MASH plugins. I created a basic cube, applied the MASH node, added a signal, scattered the MASH node over a specified geometry, animated the base geo, and futzed with the settings. The use of this pipeline has many other possibilities, including color, physics, motion trails, animation delays, and distribution among a path (and much more).
After this, I took all the geometry data from the paths and the bodies, and the deforms, and cached them so that they would be a solid file that could be used for rendering later. This also allowed me to create individual textures and distribute the paths among desired locations rather than having to switch between them in different Maya files. I will say, though, that once you work on a certain machine, it can be hard for the ram to re-read the paths in the correct location. Make sure you know if you're going to be working on a dedicated machine, otherwise if you attempt to load the alembic files again they will be in a different position.
Pt. 10:
Using these cached files (mentioned in Pt. 8), I had to do multiple tests with how to deform the geometry to appear out of the ground and disappear back into the ground. This dealt with using different curve & flare deformers, and animated the both of them to make it look natural and not manipulated in a visually harsh manner. With these deforms, I also animated the number of points on the bodies, starting with 0-750-0, making an animated graph similar to a bell curve. 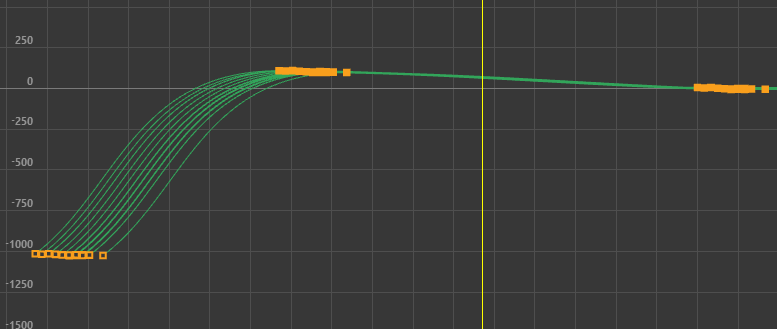
I moved onto animating the camera after having all of the paths laid out. This included creating a camera with an 'aim' to control it's focal point. I used a curve to attach the camera group along a motion path, and a locator along the other path. I then point-constrained the aim of the camera to the locator, allowing the ability to easily visualize and change both the camera and aim over a set amount of time. Below, you will find an example of this process, as well as the separate tests of the paths using this technique to follow the motion of the dancers and their trailing elements.
You might notice that one of the paths actually has a "bouncing" look to the motion. This is actually a post-wheelchair motion added to that of the dancer. I created a nurb circle, attached 4 more to the edge of the wheelchair, about the predicted size of the wheel while animating the motion alongside that of the dancer. I used the animated sweep option on the 4 circles along the edges, extracted the isoparms, extruded the polygons along the curves, duplicated the motion, and re-inserted the motion into the original deformation hierarchy.
Pt. 11:
Currently, I am waiting for the moment to create textures and hit "render" for these separate paths of motion. But for the moment, here is an excerpt of the beginning camera motion that reveals the map of the US.
Pt. 12:
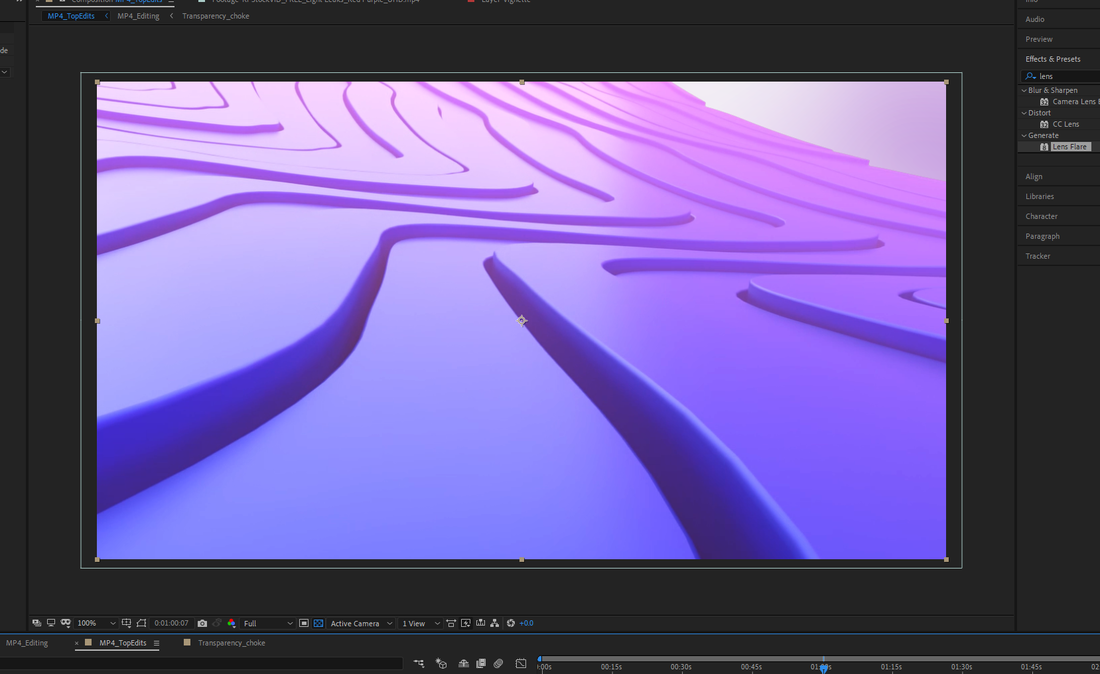
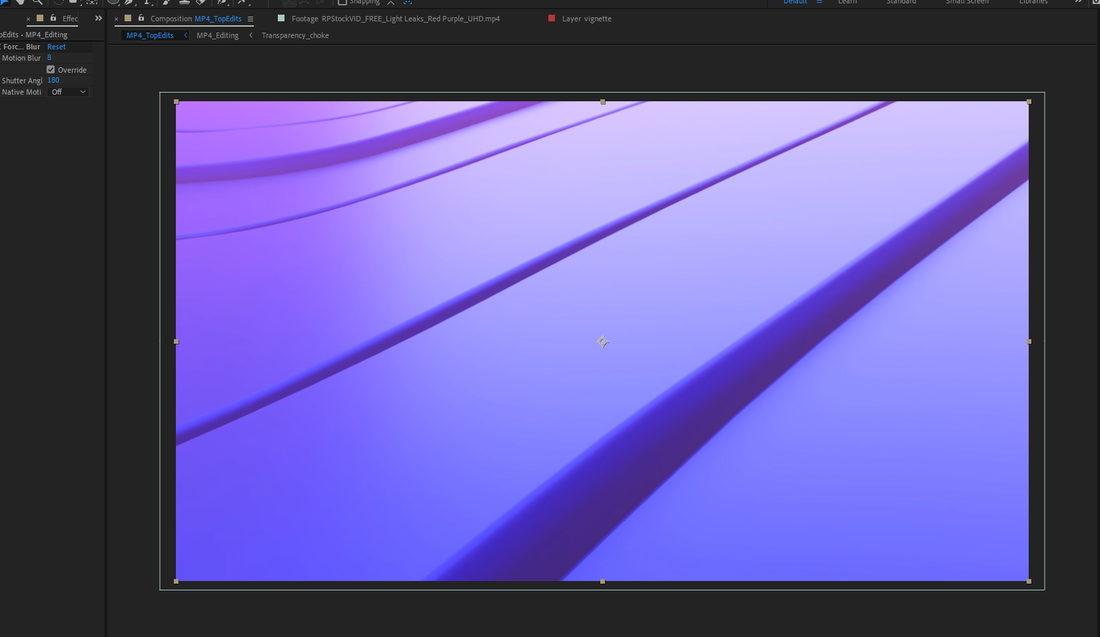
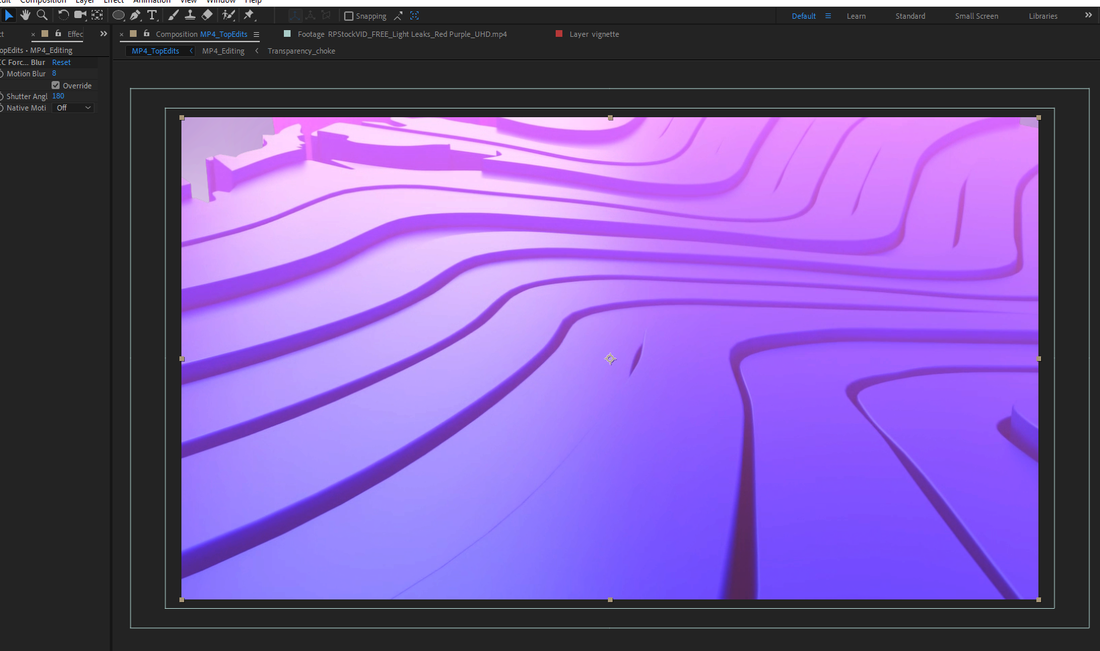
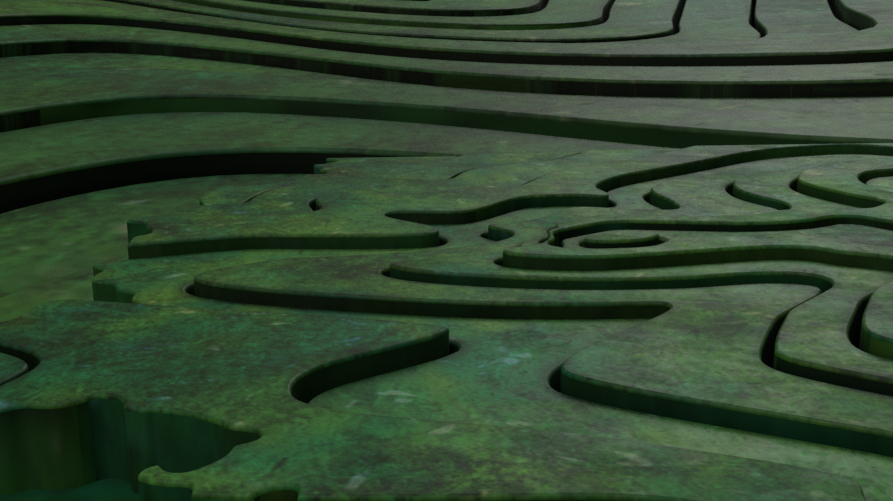
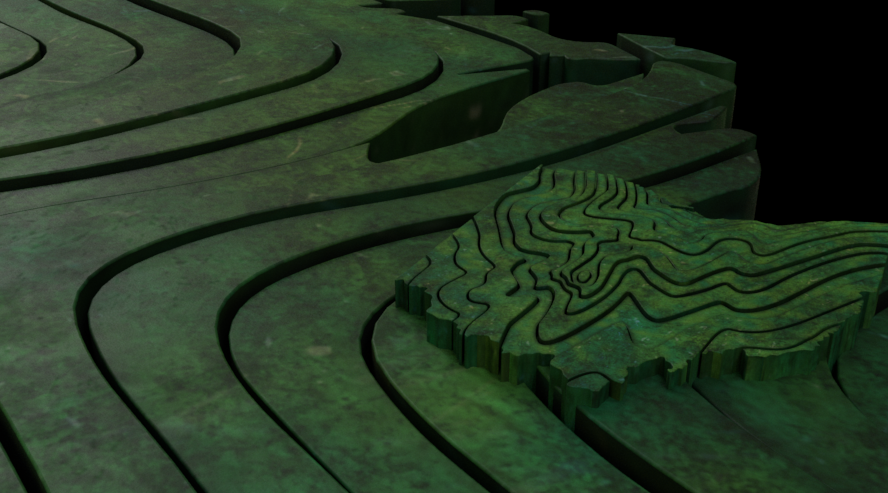
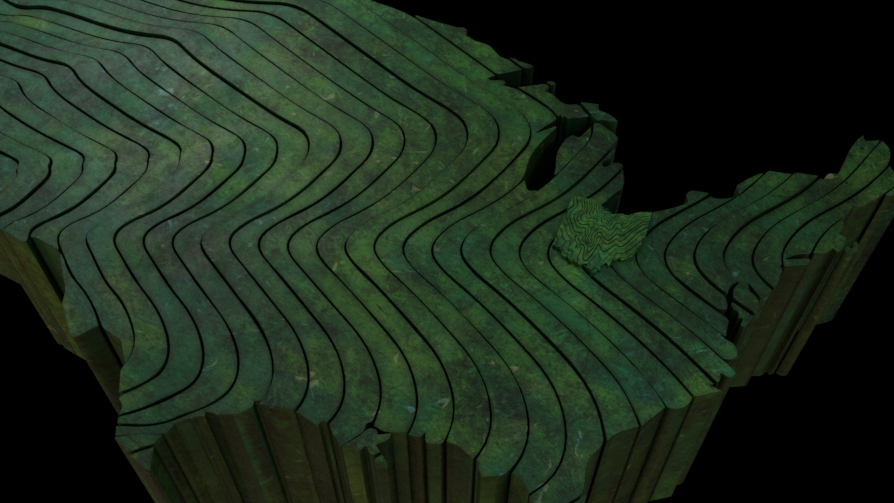
After some deliberation between the media designers, we have decided to move in a different direction than that of the animations already utilized. We're making changes to the animations themselves, focusing more on the motion and less on the "swooping" reveal of the lines that the dancers create. We're also considering moving towards a more "grassy/dirt" feel for the map portion of the animations. We're now working on numerous tests to have Ohio more prominent in the full scope of the project. Below are some screenshots of the newly redesigned landscapes and possible textures for the dancers/trails: Comments are closed.
|